














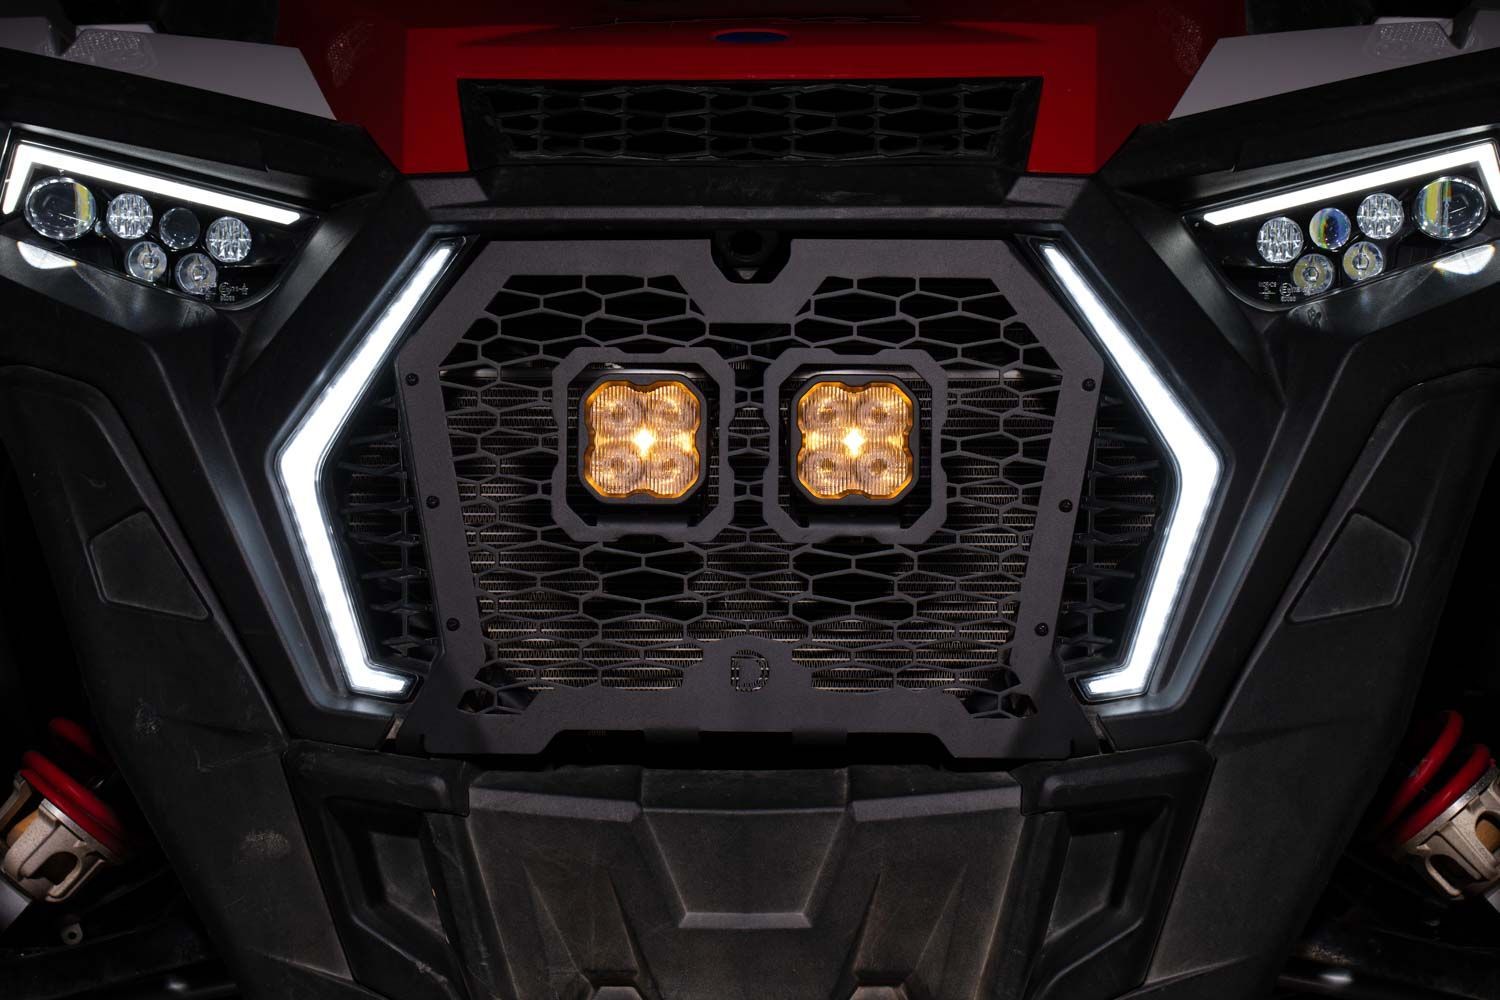
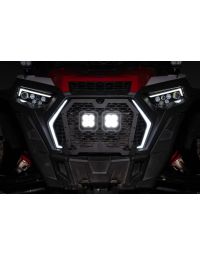
The Stage Series LED Grille Kit for the 2019–2023 Polaris RZR XP offers an unbeatable combination of functionality and style. Designed for off-road enthusiasts, this kit features SS3 LED pods mounted to a custom stainless steel grille for a sleek, aggressive appearance. With powerful lighting output and simple plug-and-play installation, this grille kit is built to tackle the toughest terrain with ease.
Built with durable materials and engineered for performance, the Stage Series LED Grille Kit includes everything you need for a quick and easy installation. Watch our installation video or continue reading below for step-by-step instructions!
Table of Contents
Installation Video
Tools Required
- 10mm Socket
- T25 Torx Bit
- Phillips Head Screwdriver
- 5/32 Allen Wrench
- 13mm Wrench
- Trim Removal Tools
- Zip Ties
Installation Instructions
Step 1 - Remove Hood and Factory Grille
Start by twisting both hood latches and sliding the hood forward to remove it. Next, remove the factory grille by pressing the two tabs at the top of the grille and pulling it away from the vehicle.
Step 2 - Remove Lower Bumper Cover
Using a T25 Torx bit, remove the two bolts holding the lower bumper cover in place. Set the cover aside for reinstallation later.
Step 3 - Install Wiring
If connecting to a factory bus bar, use a 10mm socket to loosen the positive and negative terminals. Add the positive and negative leads from your harness and secure the relay to the bus bar using the T25 screw. Route the DT lead behind the radiator, down the passenger side, and back to the front of the grille, avoiding any hot or moving parts. For direct-to-battery wiring, remove the driver’s seat by lifting and pulling it away. Use a 10mm wrench to loosen the battery terminals and connect the harness leads. Route the wiring along the driver’s door sill, up the dash, and toward the grille.
Install Rectangular Rocker Switch (Optional)
If desired, the included wiring harness can be controlled using the Diode Dynamics Rectangular Rocker Switch. To install the switch, disconnect the factory harness switch by unplugging it from the white connector on the switch lead. Connect the rectangular rocker switch directly to this connector.
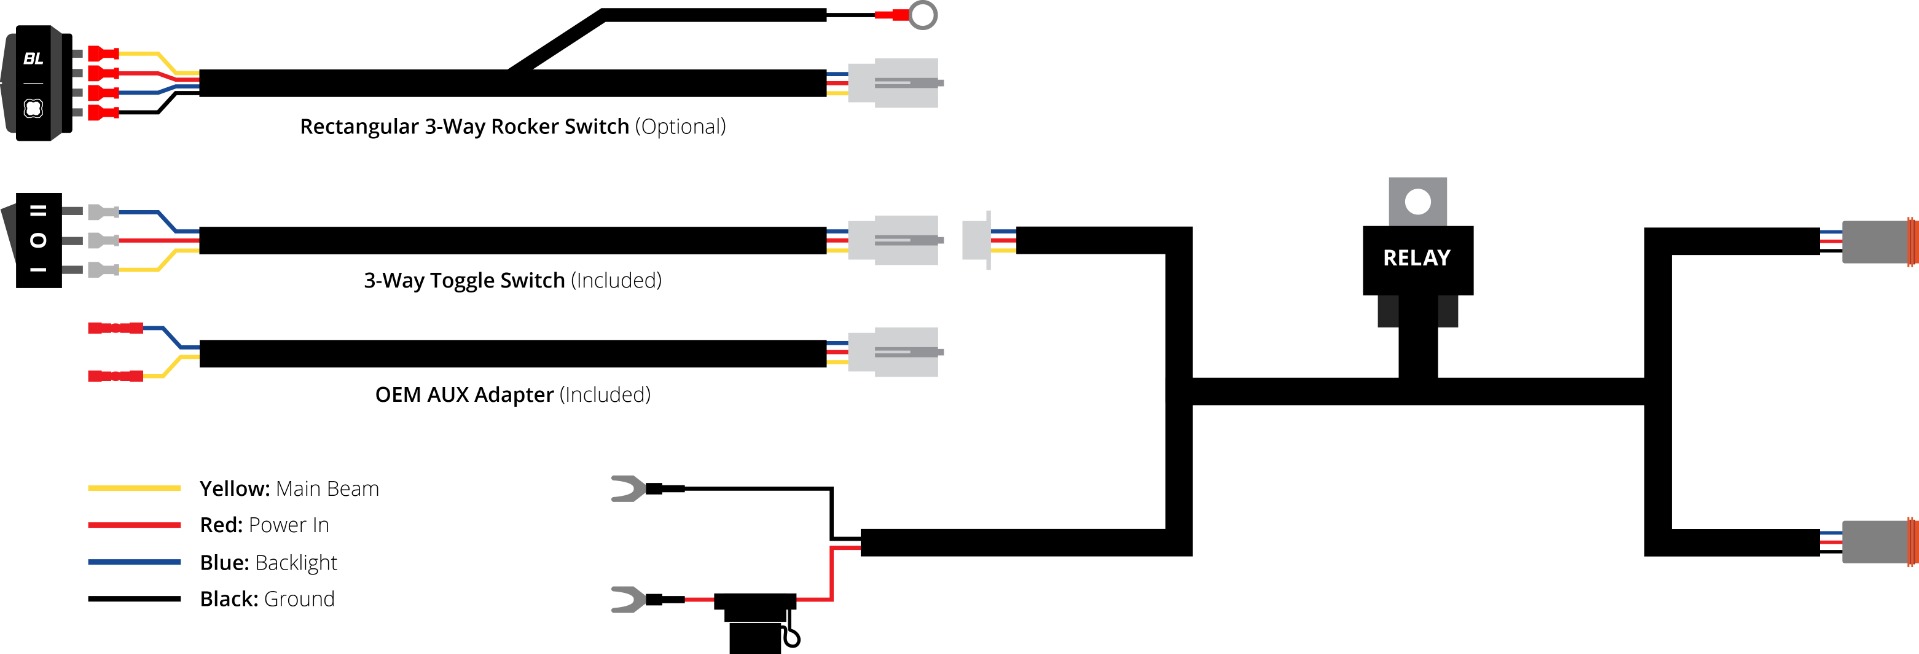
Route the switch wiring to your preferred mounting location and remove the factory switch blank from the dashboard or switch panel. Insert the rocker switch into the opening until it is fully seated.
The rocker switch features integrated backlighting and must be grounded for illumination. Attach the black wire with the ring terminal to a suitable chassis ground point on the vehicle.
Step 4 - Assemble SS3 Pods
Insert the supplied nuts into the slots on the side of each SS3 pod. With the nylon ring facing inward, slide the universal bracket over the back of the pod and secure it using the 5/32 Allen screws and washers. Leave the brackets slightly loose for adjustment later.
Step 5 - Mount SS3 Pods to Grille Bracket
Attach the SS3 pods to the grille bracket by inserting a carriage bolt through the pod bracket and grille bracket. Secure it with the included washer, lock washer, and nut, then tighten using a 13mm wrench. Repeat for the other pod.
Step 6 - Install Grille and Brackets
Place the grille back into position, ensuring the tabs are aligned. Loosely install the included 10mm bolts and nuts at the bottom of the bracket. Pull slightly to create tension and tighten with a 10mm socket. Use a Phillips head screwdriver to secure the grille with the six self-tapping screws, working side to side to keep the grille aligned.
Step 7 - Finalize Installation
Plug the DT splitter into the back of each pod and connect it to the DT lead on the harness. Test the system for functionality. Secure any loose wiring with zip ties and reverse the steps to reassemble the vehicle.
The installation is now complete. Enjoy your new Stage Series LED Grille Kit!
Questions About the Installation?
If you have any questions or issues installing the Stage Series LED Grille Kit for the 2019–2023 Polaris RZR XP, contact us for assistance.
Where Can I Buy the Stage Series LED Grille Kit for the 2019–2023 Polaris RZR XP?
If you're ready to upgrade your 2019–2023 Polaris RZR XP with the Stage Series LED Grille Kit, click here or use our Dealer Locator to find a dealer near you.
Looking for more lighting options for your Polaris RZR XP? Check out all of our RZR XP LED Lighting Upgrades.
Want to know more about Diode Dynamics products? Visit DiodeDynamics.com and subscribe to our newsletter for new product releases and more!
This Installation Guide is for the following SKUs: DD8071, DD8075, DD8072, DD8076, DD8073, DD8077, DD8074, DD8078, DD8070P
Share This Post