


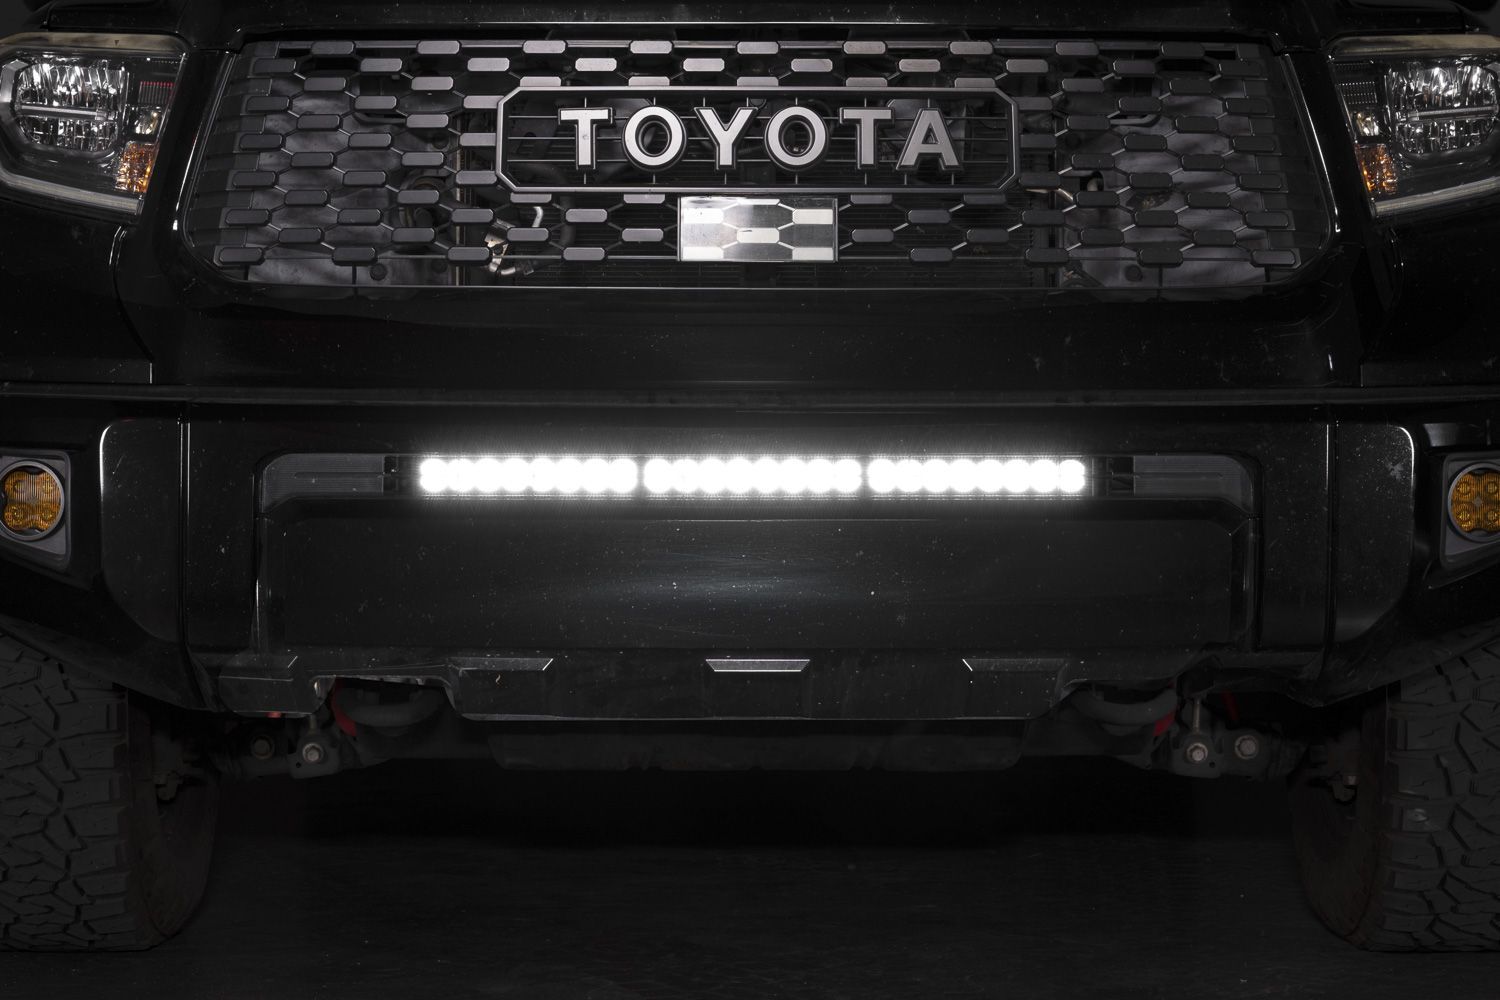
The 2014-2021 Toyota Tundra Stealth LED Light Bar Bracket Kit adds powerful forward-facing illumination while maintaining a clean, factory-style appearance. This installation guide will provide you with detailed instructions on how to install the 2014-2021 Toyota Tundra Stealth LED Light Bar Bracket Kit. Continue reading for step-by-step instructions below!
Table of Contents
- Installation Tools
- Installation Instructions
- Questions About the Installation?
- Where Can I Buy the 2014-2021 Toyota Tundra Stealth LED Light Bar Bracket Kit?
Installation Tools
- Trim removal tool
- Socket extension
- 10mm socket
- 10mm wrench
- 12mm socket
- 14mm socket
- 17mm socket
- Torque wrench
- Level
Installation Instructions
Step 1 — Remove Upper Grille Fasteners
Using a 10mm socket, remove the four bolts securing the top of the grille.

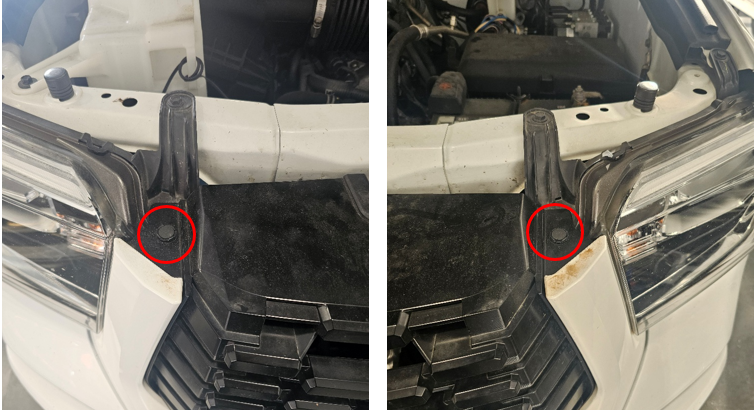
Step 2 — Release Grille Push Pins
Use a trim tool to remove one push pin from each side of the grille.
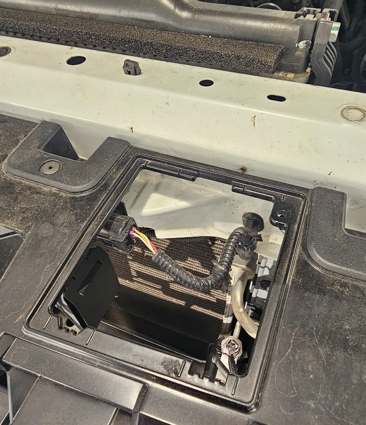
Step 3 — Disconnect Grille Wiring
Remove the grille cover and disconnect the multi-pin electrical connector located at the top of the grille.
Step 4 — Remove Grille Assembly
Carefully pull the grille straight away from the vehicle to release it from the mounting clips.
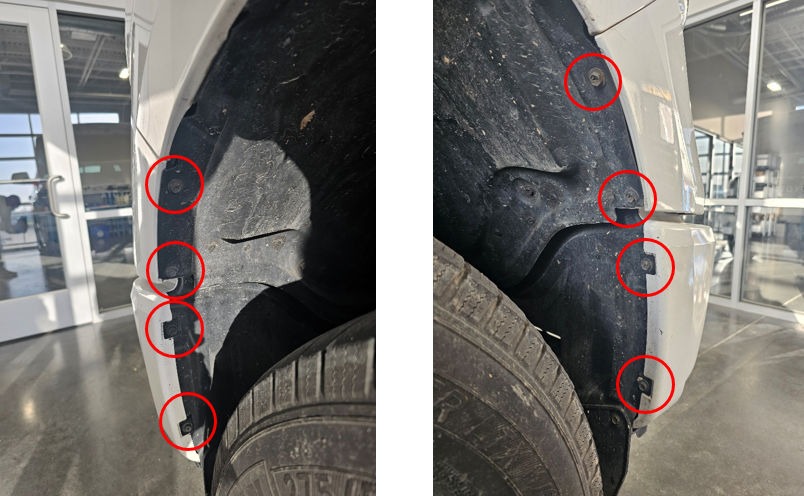
Step 5 — Remove Fender Well Fasteners
Using a 10mm socket, remove the four bolts located in each front fender well.
Step 6 — Remove Mid Bumper Push Pins
Use a trim tool to remove the two push pins securing each mid bumper panel.
Step 7 — Remove Mid Bumper Panels
Starting from the inside edge, carefully pull the mid bumper panels outward to release the retaining clips.
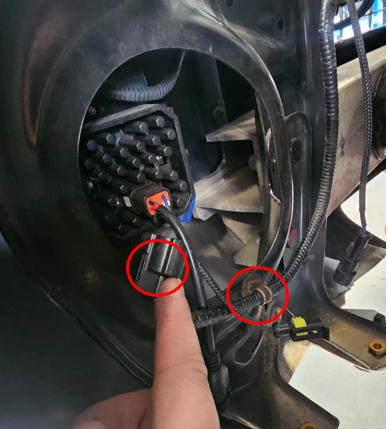
Step 8 — Disconnect Bumper Electrical Connectors
Disconnect the two multi-pin electrical connectors located behind each mid bumper panel.
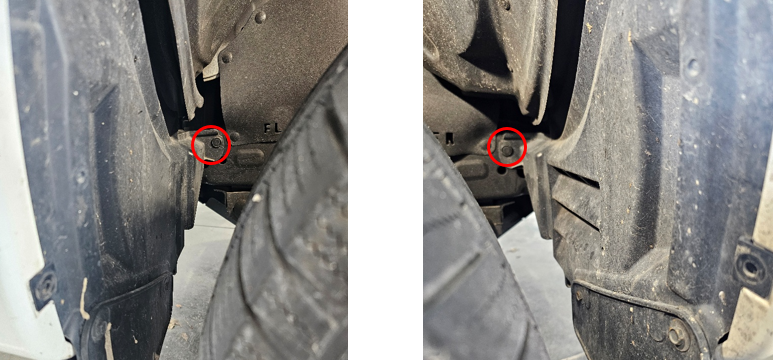
Step 9 — Release Fender Liners
Use a trim tool to remove one push pin on each side securing the front fender liners.
Step 10 — Remove Lower Bumper Fasteners
Remove the two 12mm bolts and two 10mm bolts on each side underneath the bumper.

Step 11 — Remove Fender Liners
Release the retaining clips and remove the fender liners from both sides of the vehicle.

Step 12 — Disconnect Fog Lights
Disconnect the fog light connectors and release the wire retaining clips on both sides.
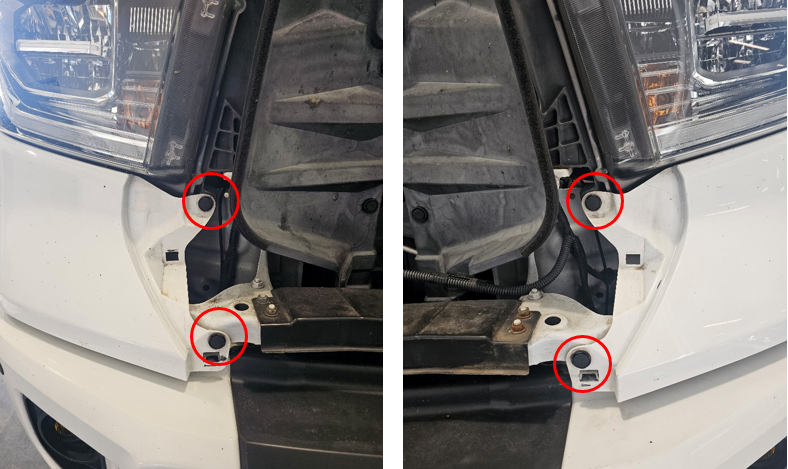
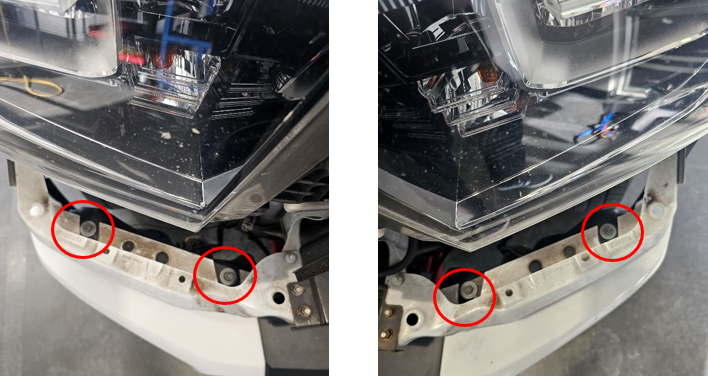
Step 13 — Remove Upper Bumper Bolts
Using a 12mm socket, remove the two bolts from the top of the bumper on each side.
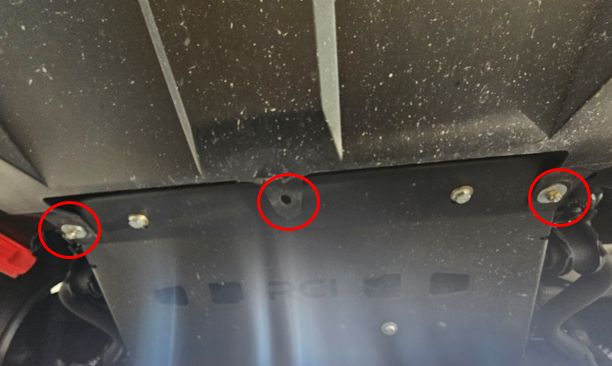
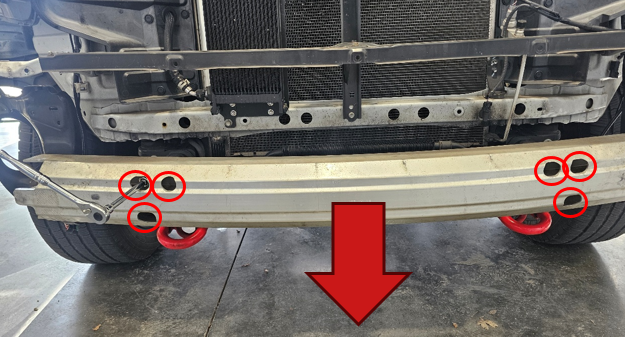
Step 14 — Remove Lower Bumper Bolts
Using a 10mm socket, remove the three bolts located underneath the bumper.
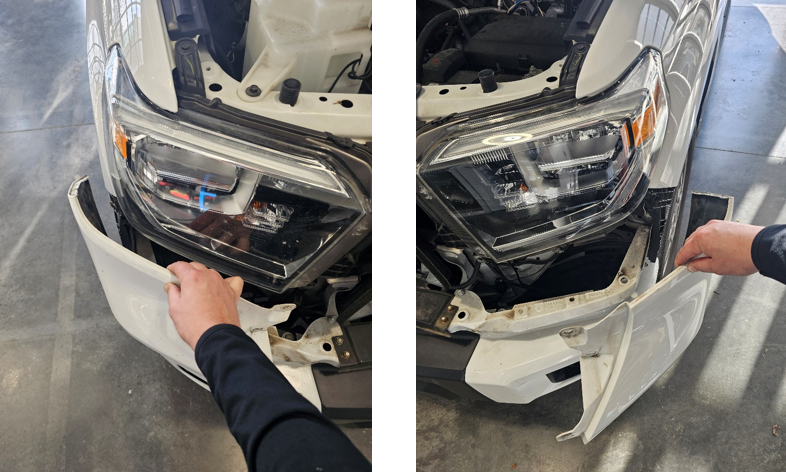
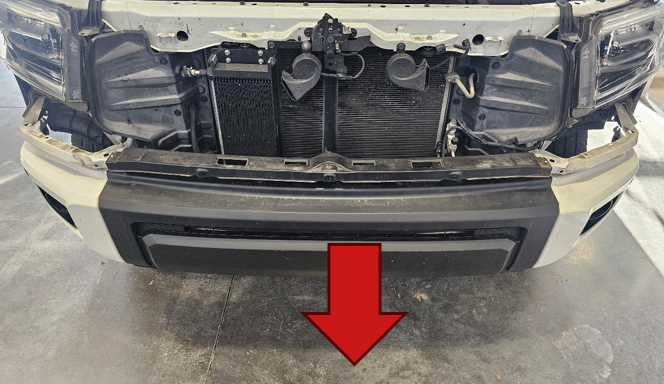
Step 15 — Remove Bumper Cover
Carefully pull the bumper cover away from the vehicle and place it on a padded surface.
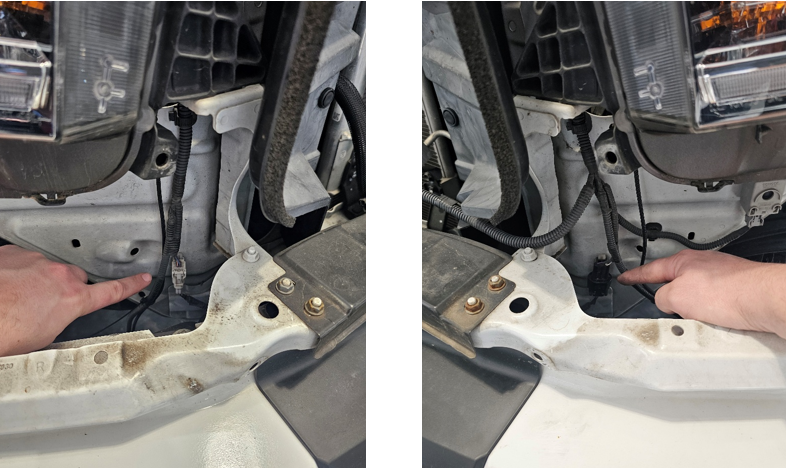
Step 16 — Remove Crash Bar
Using a 17mm socket, remove the six nuts securing the crash bar and pull it away from the vehicle.
Step 18 — Choose Your Lightbar Length (SS30 or SS40)
At this point, the bumper assembly and crash bar components are removed and you have access to the crash bar support bracket studs. The mounting steps now differ depending on whether you are installing an SS30 or SS40 lightbar.
Follow ONLY the section below that matches your lightbar length.
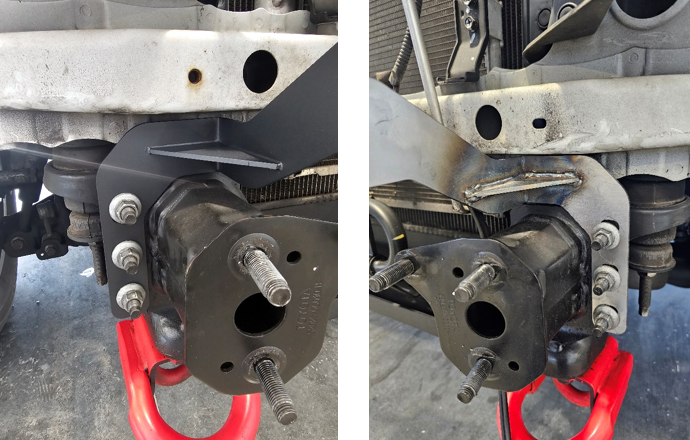
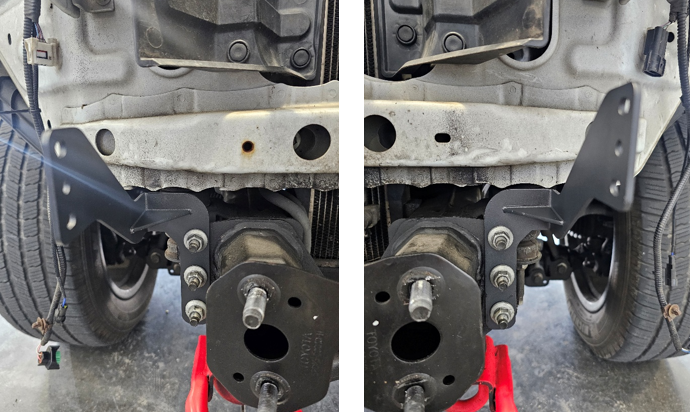
Step 18 (SS30) — Install the SS30 Mounting Brackets
Position the two mounting brackets onto the three studs on each crash bar support bracket. Make sure the bracket flanges are facing inward (toward the center of the vehicle). Reinstall the nuts removed previously and leave them slightly loose so the brackets can slide for alignment.
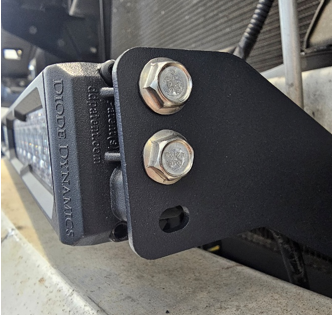
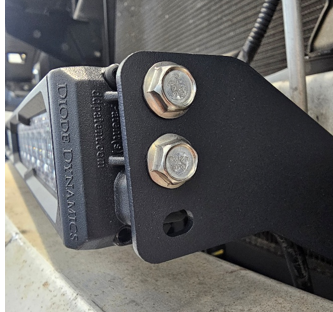
Step 19 (SS30) — Attach the SS30 Lightbar to the Brackets
Using the included hardware from the lightbar kit and a 10mm wrench, secure the SS30 lightbar to the brackets. Orient the lightbar so the harness exits on the driver side. Leave the mounting hardware slightly loose until the bar is level and centered.
Step 20 (SS30) — Level and Torque the Brackets
Use a level to confirm the lightbar is straight. Once aligned, tighten the bracket nuts on the support bracket studs to 43 ft-lbs. Re-check level after tightening to ensure the bar did not shift.
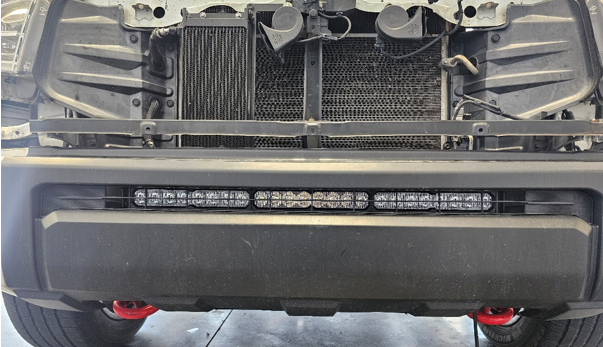
Step 21 (SS30) — Reinstall Crash Bar and Test-Fit the Opening
Reinstall the crash bar and torque the nuts to 52 ft-lbs. Carefully reinstall the bumper cover temporarily (or hold it in position) and verify the lightbar is vertically centered in the opening. If needed, loosen the bracket nuts slightly and slide the brackets up/down to fine-tune alignment, then re-torque to spec.
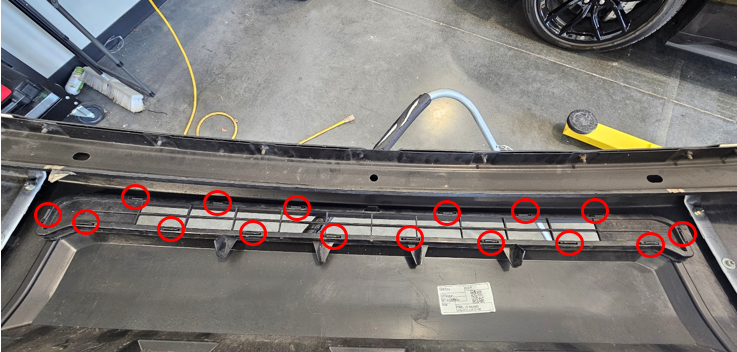
Step 22 (SS40) — Remove the Bumper Grille Insert
With the bumper cover placed face-down on a padded surface, release the plastic clips retaining the grille insert. Work around the perimeter, disengaging each clip until the insert separates from the bumper cover.
Note: The grille insert will not be re-used for the SS40 installation.
Step 23 (SS40) — Install the SS40 Mounting Brackets
Position the SS40 mounting brackets onto the three studs on each crash bar support bracket. Make sure the bracket flanges are facing outward (away from the center of the vehicle). Reinstall the nuts removed previously and leave them slightly loose so the brackets can slide for alignment.
Step 24 (SS40) — Attach the SS40 Lightbar to the Brackets
Using the included hardware from the lightbar kit and a 10mm wrench, secure the SS40 lightbar to the brackets. Orient the lightbar so the harness exits on the driver side. Leave the mounting hardware slightly loose until the bar is level and centered.
Step 25 (SS40) — Level and Torque the Brackets
Use a level to confirm the lightbar is straight. Once aligned, tighten the bracket nuts on the support bracket studs to 43 ft-lbs. Re-check level after tightening to ensure the bar did not shift.
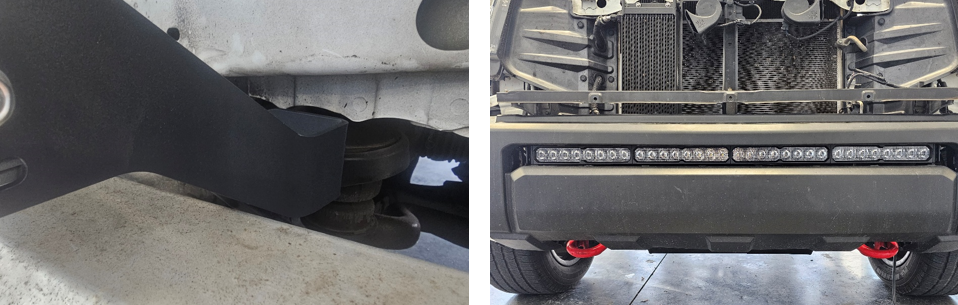
Step 26 (SS40) — Reinstall Crash Bar and Verify Clearance
Reinstall the crash bar and torque the nuts to 52 ft-lbs. Reinstall the bumper cover temporarily (or hold it in position) and verify the lightbar is vertically centered in the opening.
If needed, loosen the bracket nuts slightly and slide the brackets up/down to fine-tune alignment, then re-torque to spec.
Important: Ensure the SS40 brackets are not contacting the crash bar once everything is tightened.
Step 27 — Route the Lightbar Harness
Route the lightbar harness up the driver side of the vehicle, following existing OEM harness routing behind the driver-side headlamp. Secure the harness away from sharp edges, moving components, and high-heat areas using zip ties as needed.

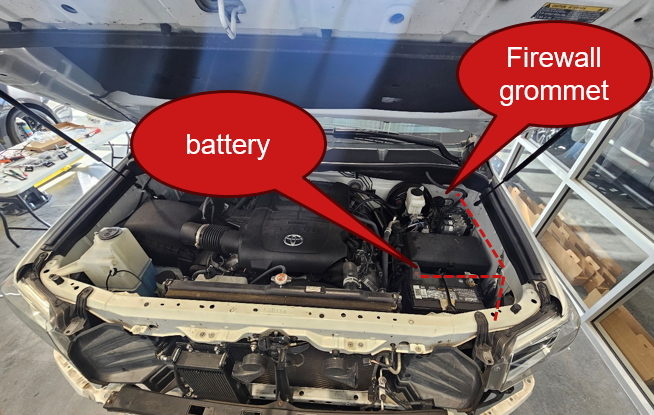
Step 28 — Connect the Harness and Install the Switch
Connect the lightbar to the wiring harness and route the switch lead through a factory firewall grommet into the cabin. Make sure the grommet seals around the wiring to prevent water intrusion. Connect the power leads to the battery and mount the switch in a convenient location inside the cabin.
Step 29 — Reinstall the Bumper Assembly
Reinstall the bumper assembly by reversing the removal process. Reconnect all electrical connectors, reinstall fasteners and clips, and confirm all panels are fully seated and aligned.
The installation is now complete. Enjoy your new 2014-2021 Toyota Tundra Stealth LED Light Bar Bracket Kit!
Questions About the Installation?
If you have any questions about installing the 2014-2021 Toyota Tundra Stealth LED Light Bar Bracket Kit, contact us via our support page.
Where Can I Buy the 2014-2021 Toyota Tundra Stealth LED Light Bar Bracket Kit?
If you're ready to upgrade your 2014-2021 Toyota Tundra with the 2014-2021 Toyota Tundra Stealth LED Light Bar Bracket Kit, visit DiodeDynamics.com or use our Dealer Locator to find a dealer near you.
Want to know more about Diode Dynamics products? Visit DiodeDynamics.com and subscribe to our newsletter for new product releases and more!
This Installation Guide is for the following SKU: DD6049, DD6048, DD8691, DD8692, DD6060, DD6054, DD6058, DD6063, DD6057, DD8711, DD8670, DD8715, DD8674, DD8712, DD8671, DD8716, DD8675, DD8709, DD8668, DD8713, DD8672, DD8710, DD8669, DD8714, DD8673

Share This Post