


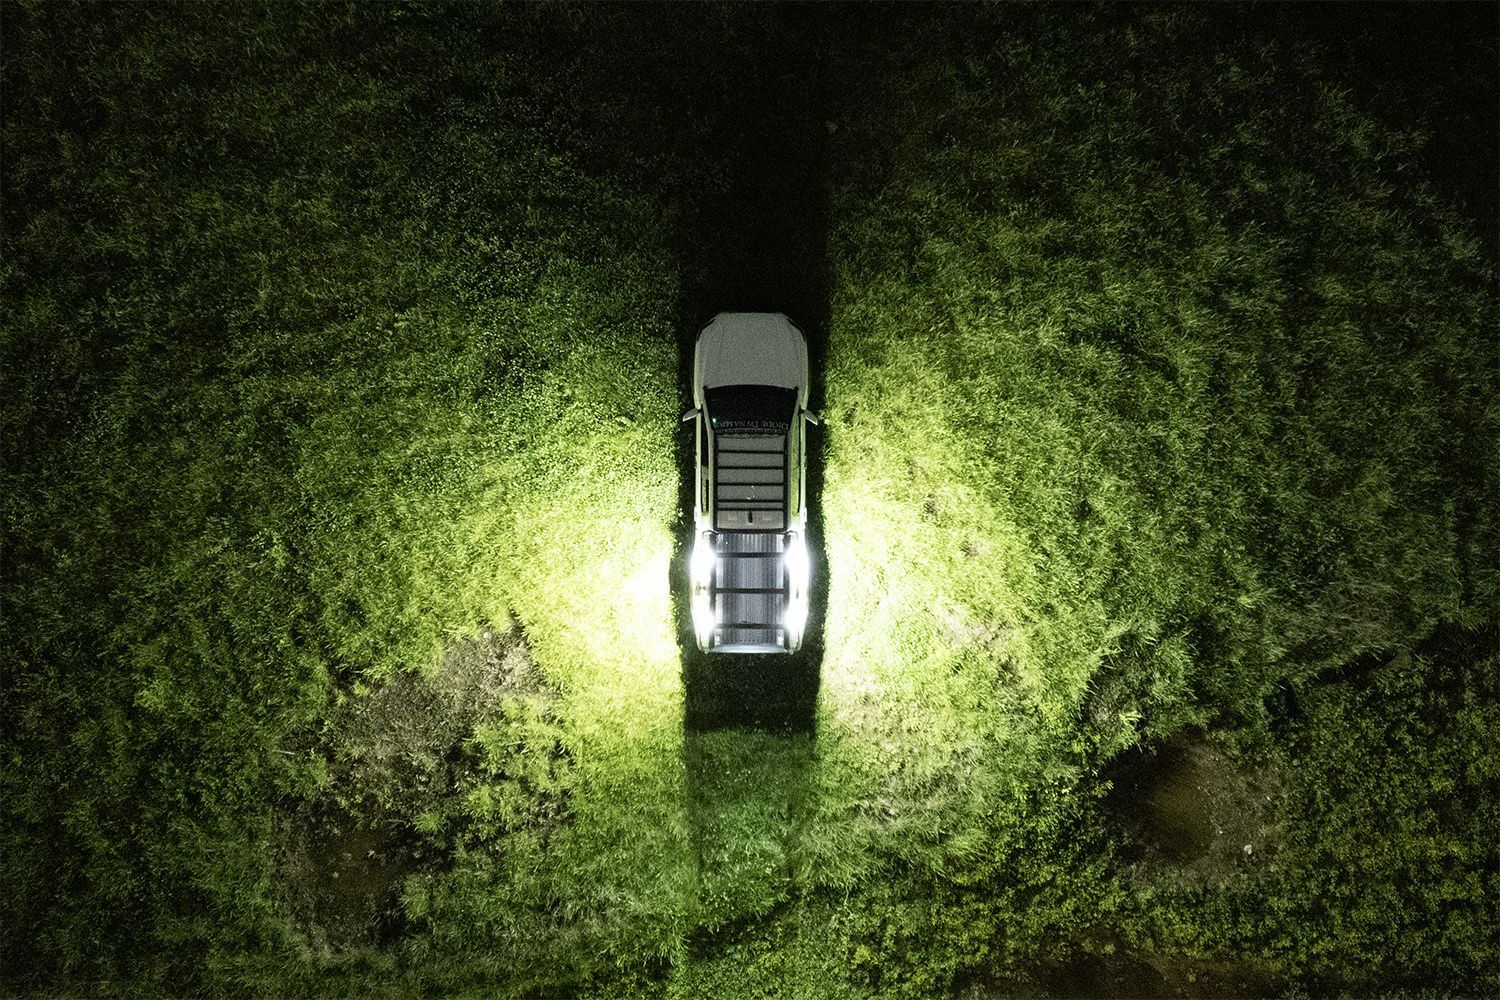
The Stage Series LED Scene Light Kit adds functional scene lighting around your rack, providing outward-facing ambient light for campsites, trail repairs, and late-night adventures. This installation guide will provide you with detailed instructions on how to install the Stage Series LED Scene Light Kit. Continue reading for step-by-step instructions below!
Table of Contents
- Installation Tools
- Installation Instructions
- Questions About the Installation?
- Where Can I Buy the Stage Series LED Scene Light Kit?
Installation Tools
- 4mm Allen key
- 10mm wrench
Installation Instructions
Step 1 — Plan light placement
Before installing, determine your preferred mounting locations. For optimal scene lighting, mount one light near each corner of your roof rack, angled outward to maximize usable light coverage around the vehicle. This configuration provides even illumination on all sides.
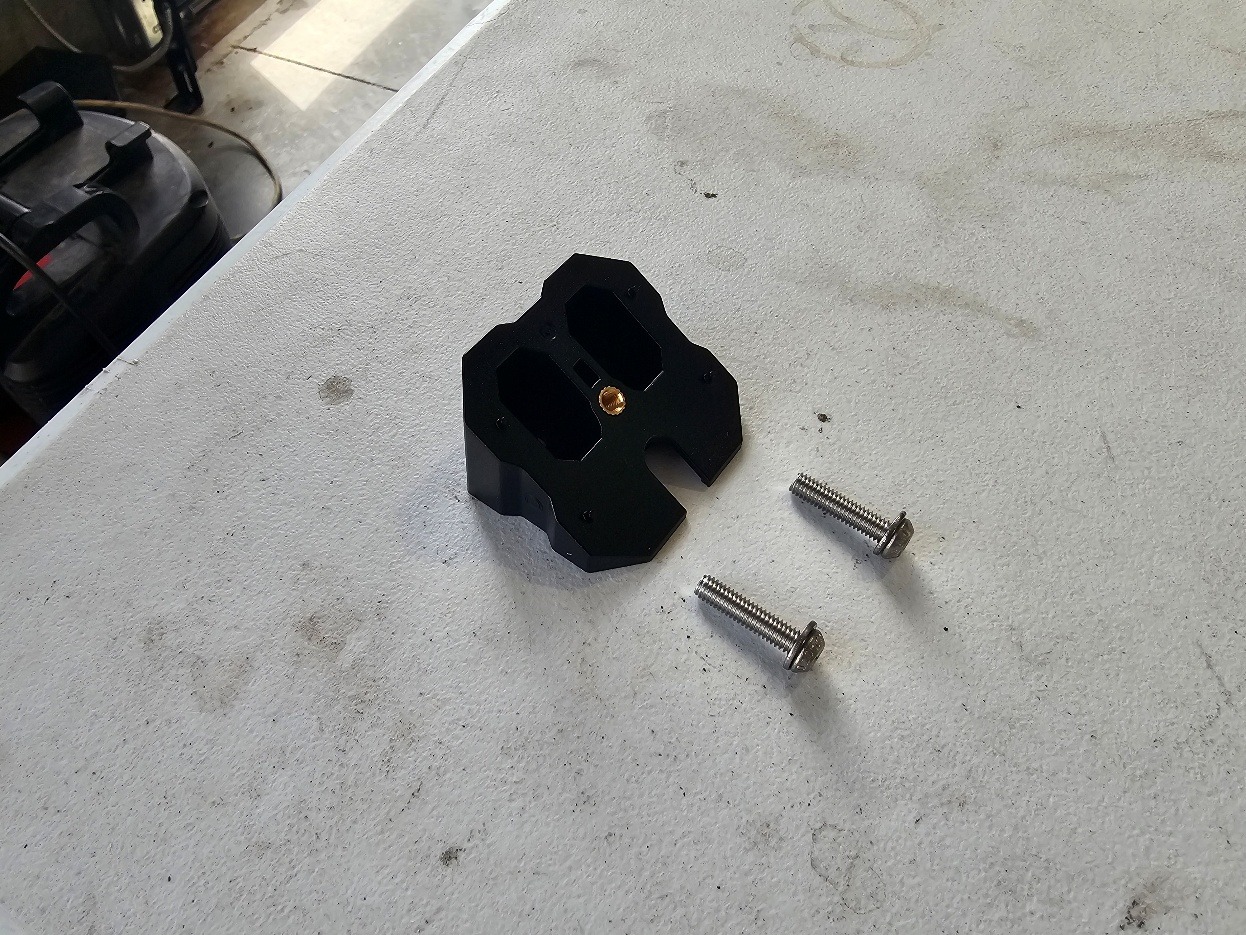
Step 2 — Assemble the mounting hardware
Place the washers onto the mounting screws before installing the bracket onto the rack. This ensures proper load distribution when tightening the hardware.
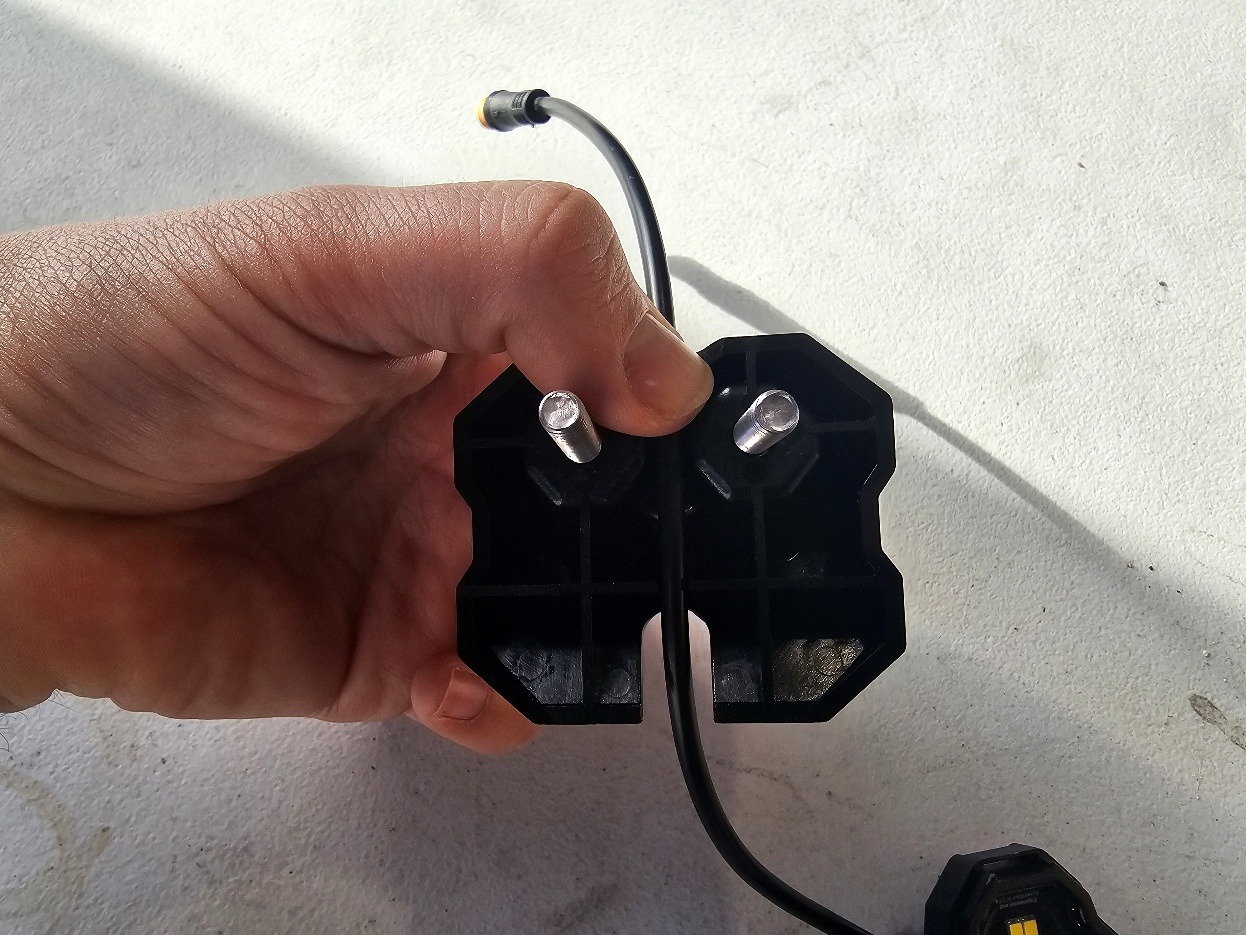
Step 3 — Route the rock light pigtail into the mount
Place the rock light pigtail into the channel on the rear side of the mount, ensuring the M8 connector exits at the top for clean routing along the rack.
Step 4 — Secure the mount to the roof rack
Position the mount onto the roof rack and insert the mounting screws. Using a 10mm wrench and 4mm Allen key, tighten the nuts until the mount is firmly secured.
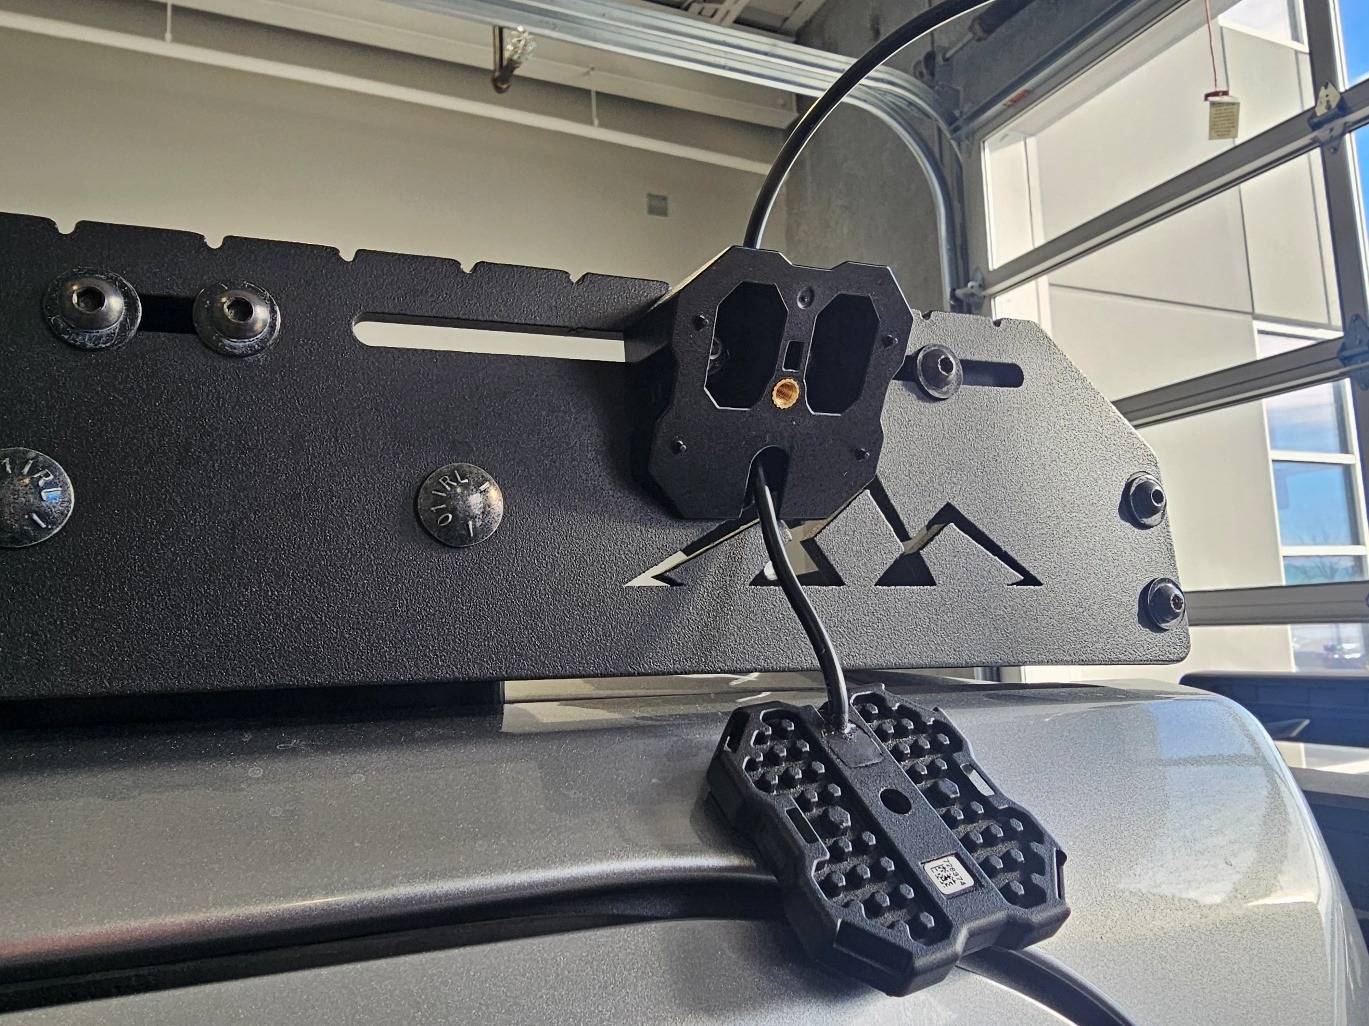
Step 5 — Install the rock light
Pull any slack out of the rock light pigtail. Then secure the light to the mount using the included screw and washer with a 4mm Allen key.
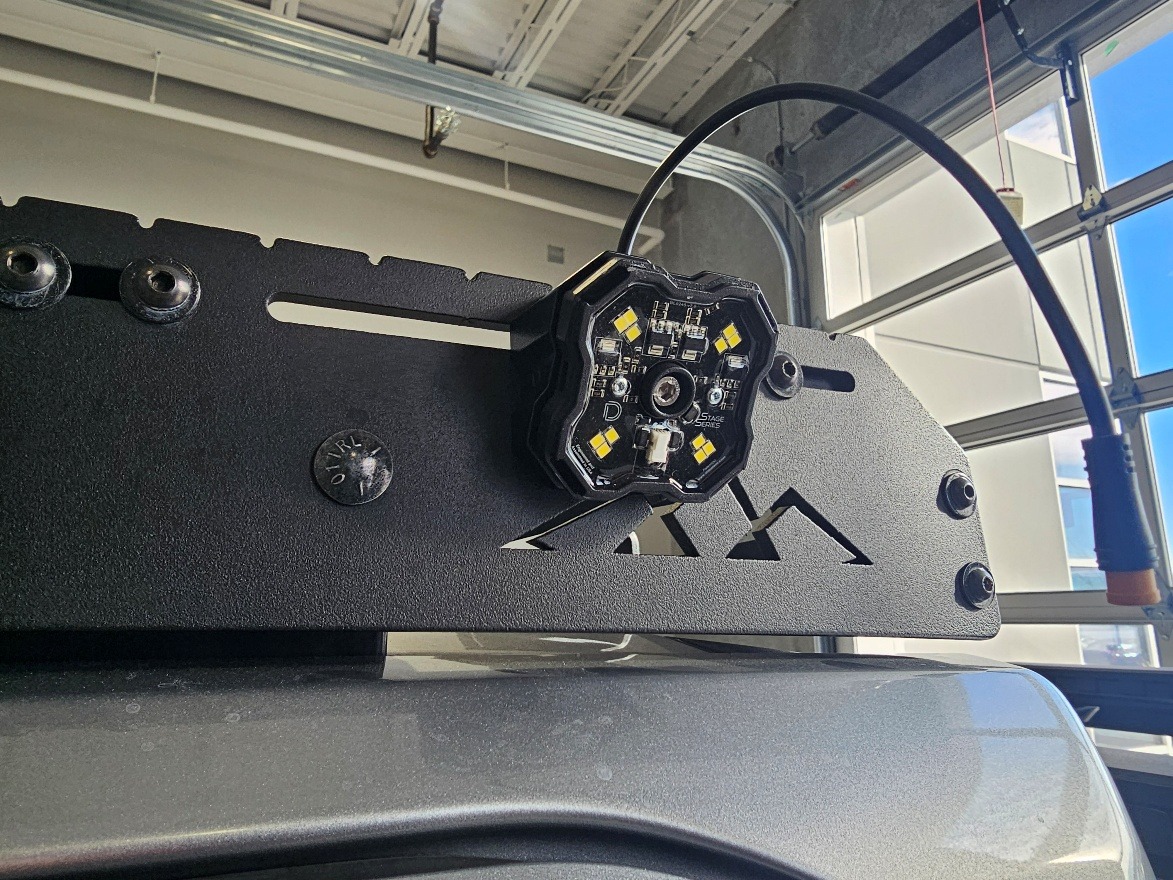
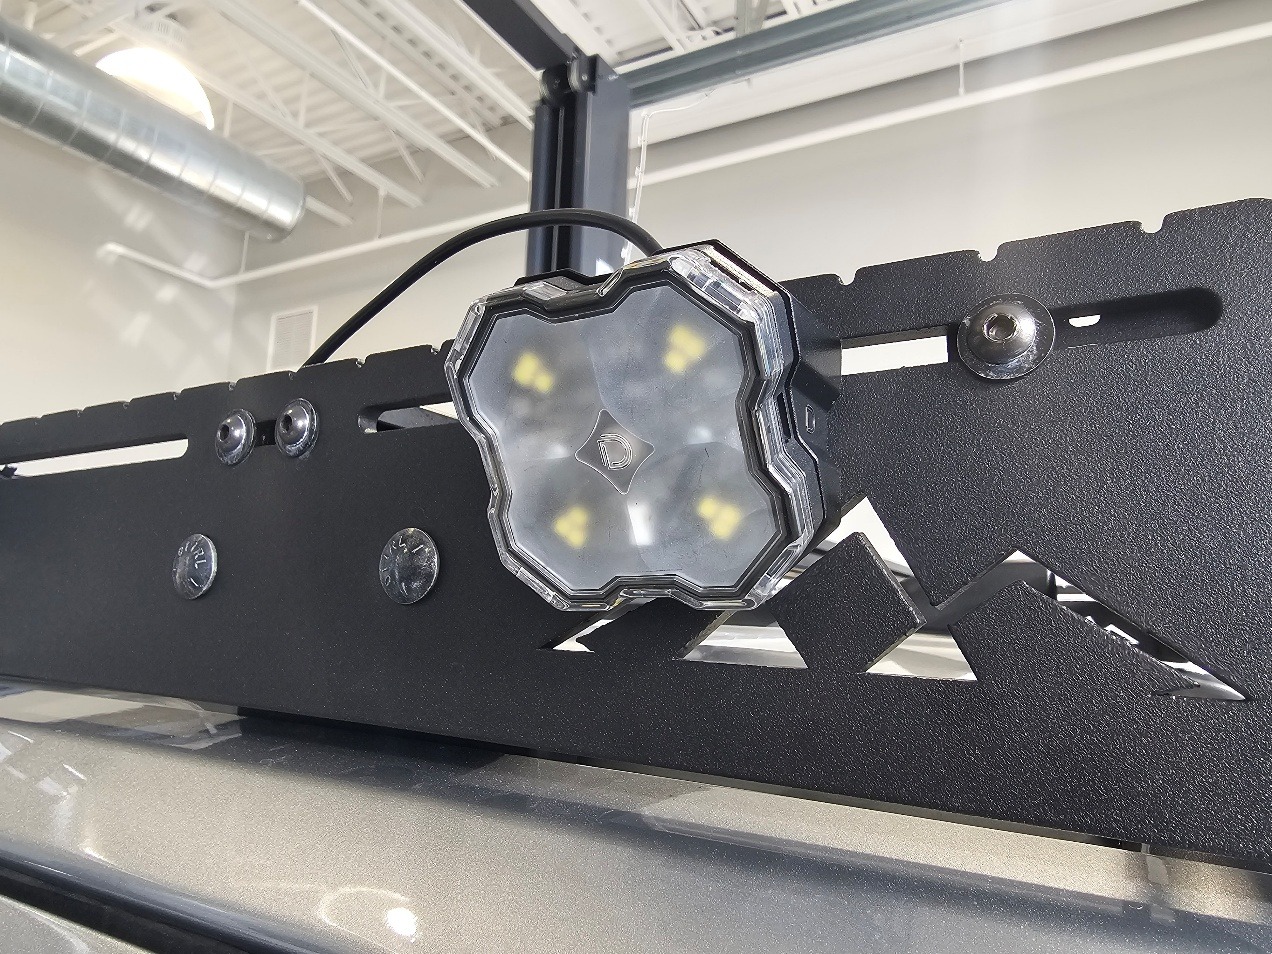
Step 6 — Install the optic and repeat for remaining lights
Snap the diffused optic onto the rock light. Repeat Steps 2–5 for the remaining lights, placing one at each corner of the rack or in your desired configuration.
Step 7 — Connect extensions and route wiring along the rack
Attach the included extensions to each light and route the wiring along the roof rack toward the front of the vehicle. Secure the wiring with zip ties, keeping it tucked along rack channels for a clean install.
Step 8 — Use splitter at the A-pillar
At the front corner of the rack, use the included splitter to combine the light outputs. This allows all lights to feed into a single harness run down the A-pillar. Route the wiring down the windshield edge, ensuring it is secured and does not interfere with doors or visibility.
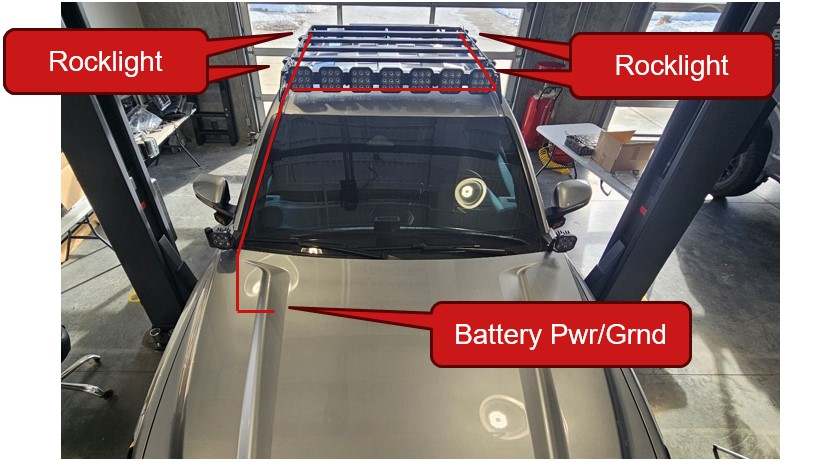
Step 9 — Route wiring into the engine bay
Continue routing the harness into the engine bay, avoiding sharp edges and moving components. Use existing gaps or channels near the hood or firewall for a clean entry point.
Step 10 — Connect the relay harness to the battery
Connect the relay harness ring terminals directly to the vehicle battery—red to positive and black to ground. Ensure all connections are secure and that the inline fuse is properly seated.
Step 11 — Route the switch into the cabin
Route the switch lead from the relay harness through the firewall and into the cabin. Mount the switch in a convenient location for easy control of the scene lights.
Step 12 — Test and finalize installation
Turn on the switch to verify all lights are functioning properly. Adjust the light location if needed and secure any remaining loose wiring.
The installation is now complete. Enjoy your new Stage Series LED Scene Light Kit!
Questions About the Installation?
If you have any questions about installing the Stage Series LED Scene Light Kit, contact us via our support page.
Where Can I Buy the Stage Series LED Scene Light Kit?
If you're ready to upgrade your vehicle with the Stage Series LED Scene Light Kit, visit DiodeDynamics.com or use our Dealer Locator to find a dealer near you.
Want to know more about Diode Dynamics products? Visit DiodeDynamics.com and subscribe to our newsletter for new product releases and more!
This Installation Guide is for the following SKU: DD8910, DD8911

Share This Post