


The TRD Pro Grille Lightbar Kit for 2024–2026 Toyota Tacoma adds powerful forward-facing illumination while maintaining a clean, factory-style appearance. This installation guide will provide you with detailed instructions on how to install the TRD Pro Grille Lightbar Kit for 2024–2026 Toyota Tacoma. Continue reading for step-by-step instructions below!
Table of Contents
- Installation Tools
- Installation Instructions
- Questions About the Installation?
- Where Can I Buy the TRD Pro Grille Lightbar Kit?
Installation Tools
- Trim tool
- T6 Torx driver
- T20 Torx driver
- 10mm socket
- 12mm socket
- 10" socket extension
- Phillips screwdriver
- Flathead screwdriver
Installation Instructions
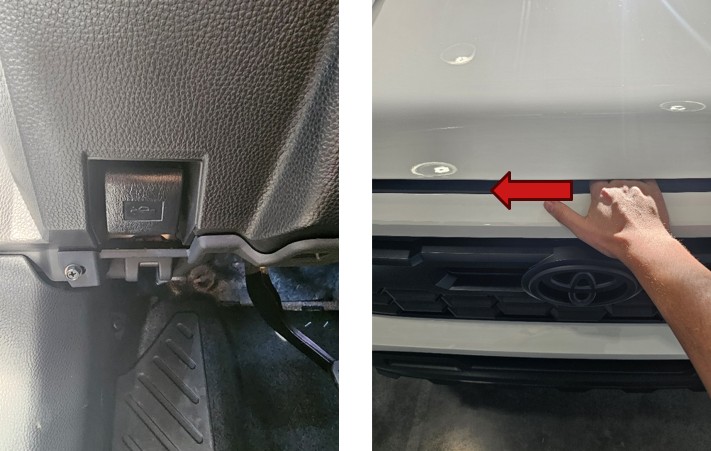
Step 1 — Open the Hood
Locate the hood latch inside the vehicle and pull to release the hood. Slide your hand from right to left to release the safety lock and open the hood.
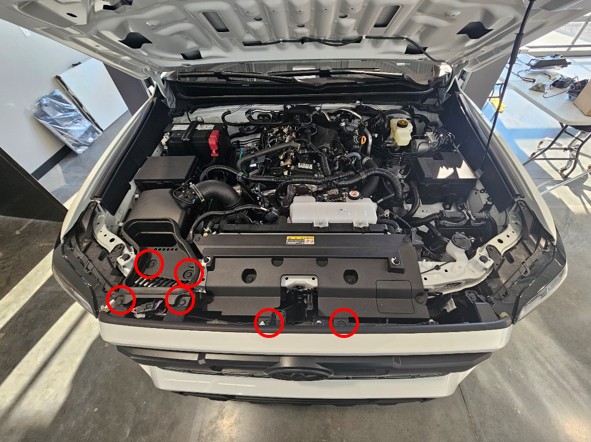
Step 2 — Remove Upper Bumper Clips
Use a trim tool to remove the six button-style clips securing the upper bumper area by pushing down the center pin and prying the clip out.
Step 3 — Remove Air Intake Duct
Lift the engine air intake duct upward and remove it from the vehicle.

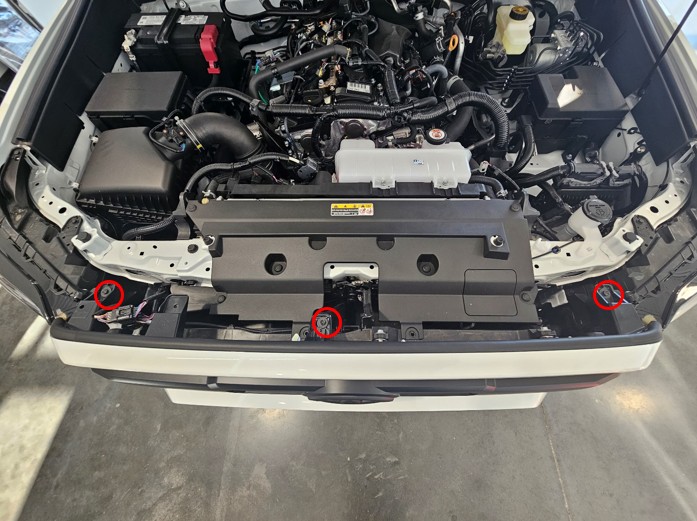
Step 4 — Remove Upper Bumper Bolts
Using a 10mm socket, remove the three bolts securing the upper portion of the bumper.
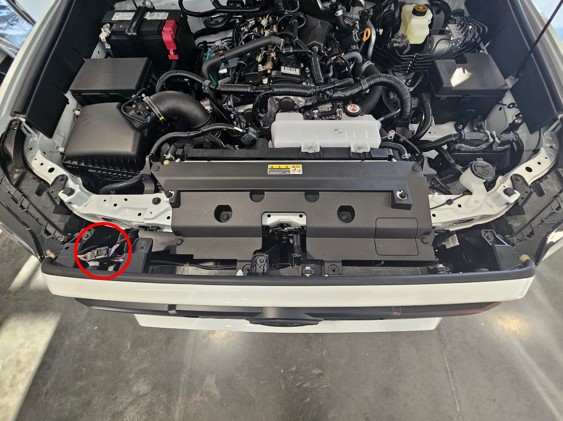
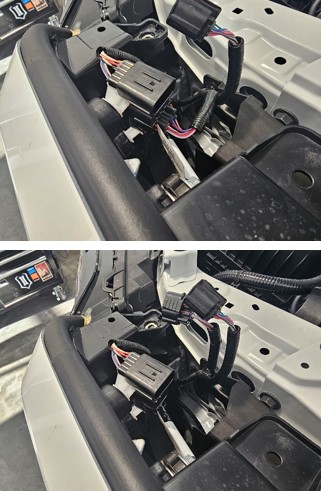
Step 5 — Disconnect Headlamp Connectors
Disconnect the two multi-pin electrical connectors located near the passenger-side headlamp.
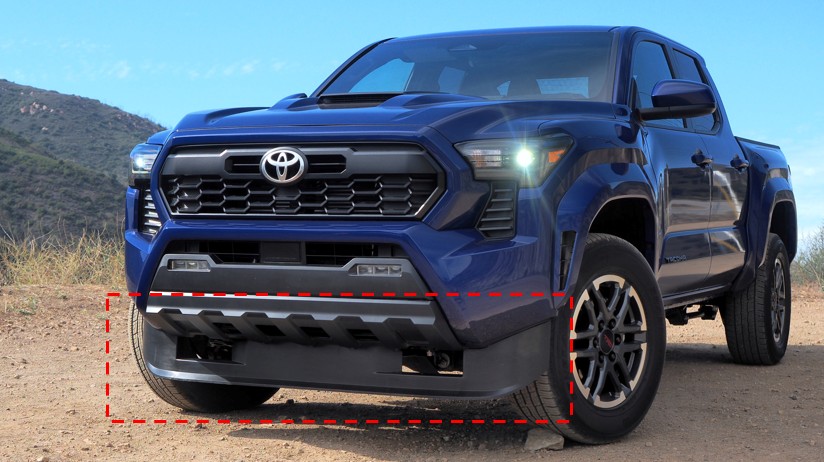
Step 6 — Remove Front Air Dam (If Equipped)
If your vehicle is equipped with a factory front air dam, remove it at this time.
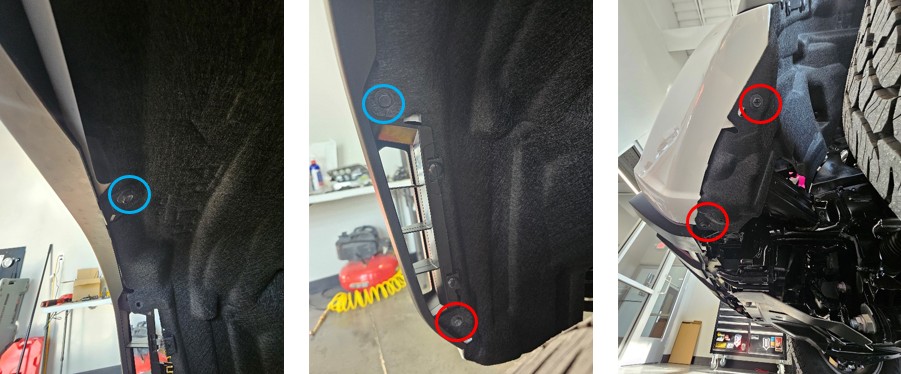
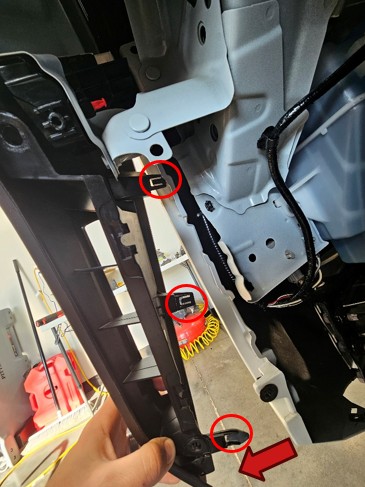
Step 7 — Remove Wheel Liner Fasteners
Using a 10mm socket, remove the five fasteners securing each front wheel liner. Repeat on both sides.
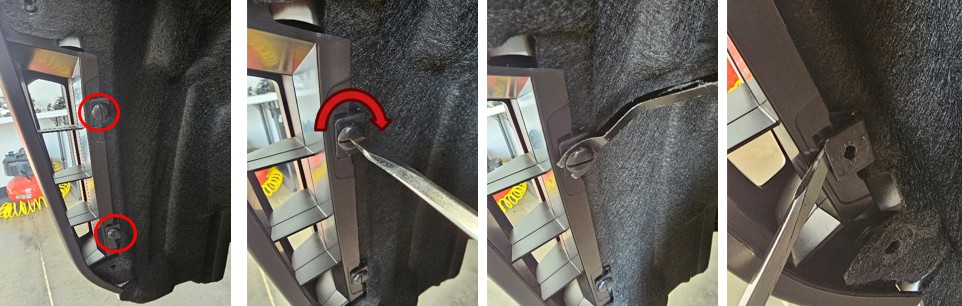
Step 8 — Remove Twist Clips
Rotate the twist clips 90 degrees using a flathead screwdriver, remove the center pin, and pry the clip assembly out. Repeat on both sides.
Step 9 — Release Fender Flares
Carefully push the fender liner aside and squeeze the retaining clips from behind while pulling the fender flare outward. Repeat on both sides.
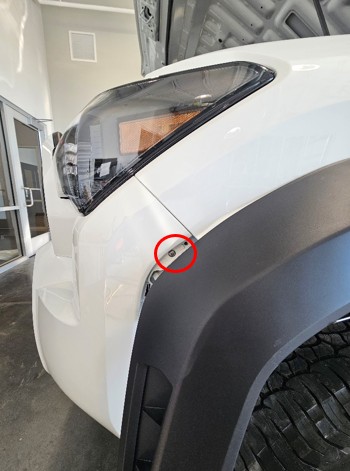
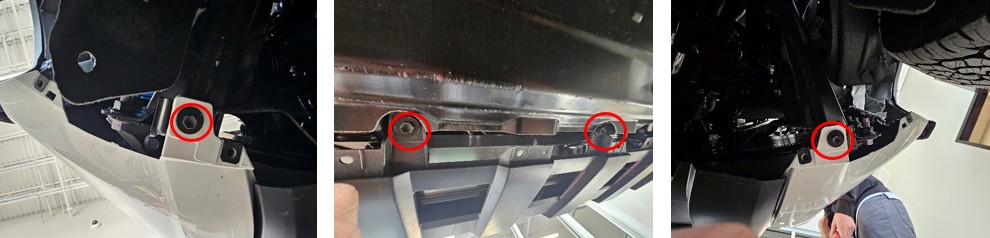
Step 10 — Remove Fender Screws
Use a Phillips screwdriver to remove the single screw on each side securing the bumper to the fender.
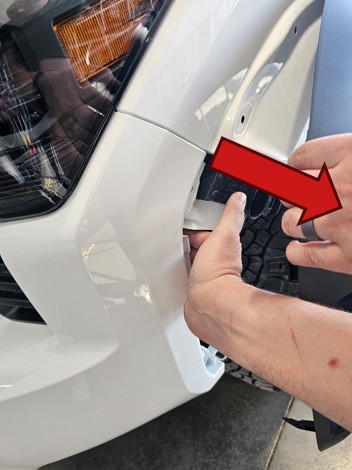
Step 11 — Release Bumper Sides
Gently flex the fender flare outward and pull the bumper panel away from the support structure. Repeat on both sides.
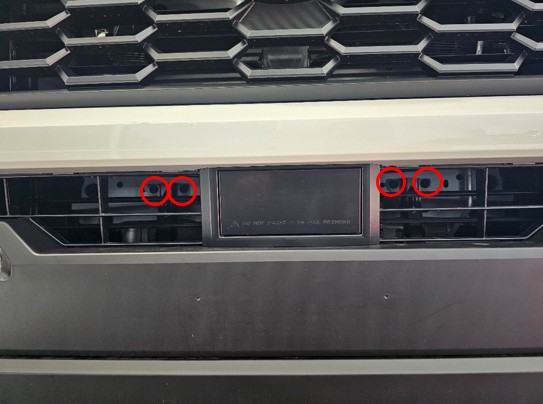
Step 12 — Remove Lower Grille Bolts
Using a 10mm socket with a 10" extension, remove the four bolts located behind the lower grille.
Step 13 — Remove Lower Bumper Bolts
Remove the four bolts underneath the front bumper using a 10mm socket.
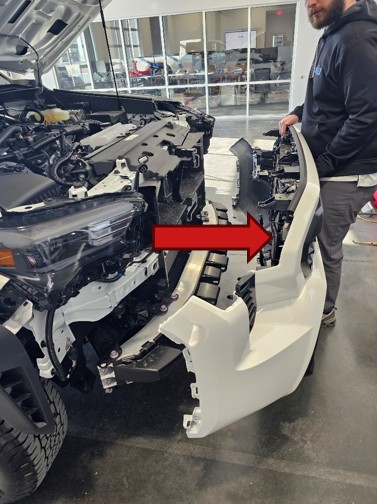
Step 14 — Remove Front Bumper Assembly
Carefully pull the bumper assembly forward and away from the vehicle. Place it on a padded surface to prevent damage.
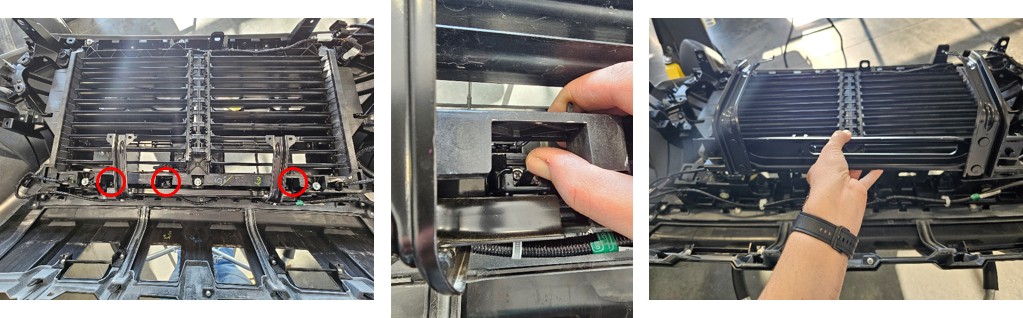
Step 15 — Remove Mid Support
With the bumper face down, release the three clips and remove the mid support from the bumper assembly.
Step 16 — Reinstall Mid Support
Reinstall the mid support onto the vehicle using the previously removed fasteners.
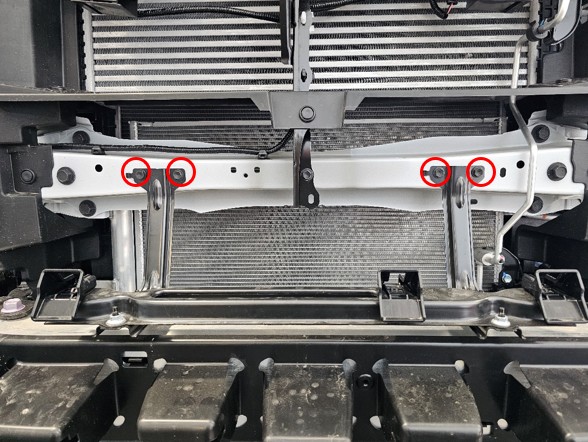
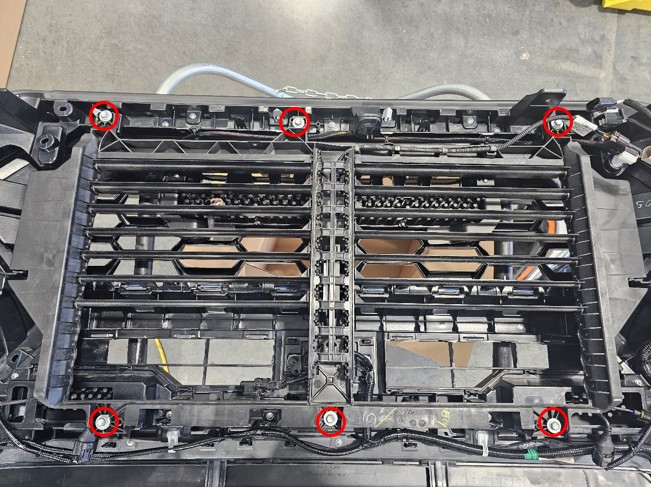
Step 17 — Remove Air Shutter
Using a 10mm socket, remove the six bolts securing the air shutter. Do not use power tools.
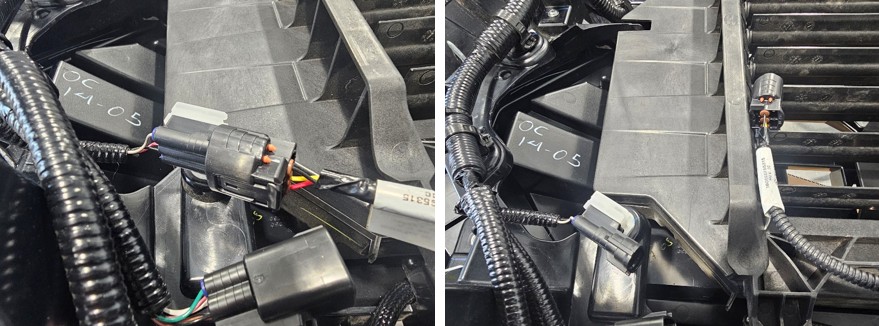
Step 18 — Disconnect Air Shutter Connector
Disconnect the air shutter electrical connector.
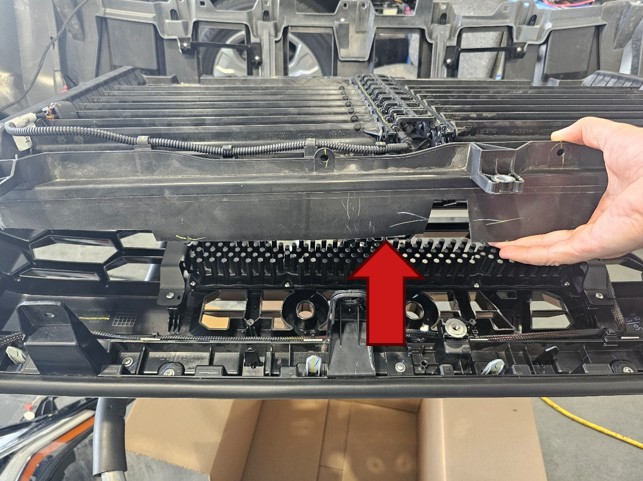
Step 19 — Remove Air Shutter Assembly
Lift the air shutter assembly out and set it aside for reinstallation later.
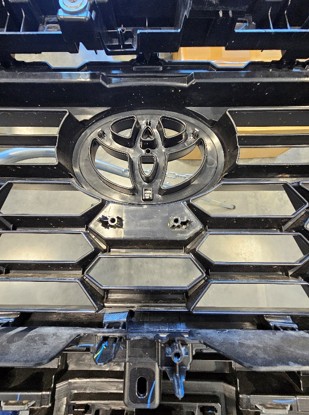
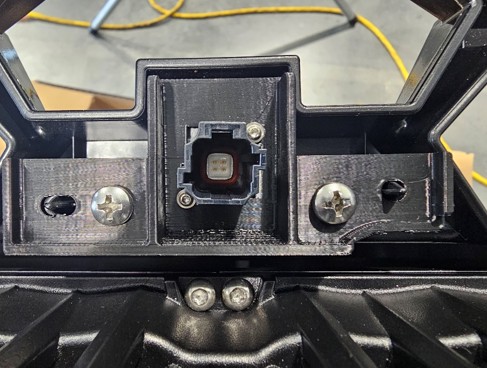
Step 20 — Transfer Front Camera (If Equipped)
If equipped with a front-facing camera, disconnect it and remove it from the factory grille. Install the camera onto the provided camera bracket and attach it to the TRD Pro grille.
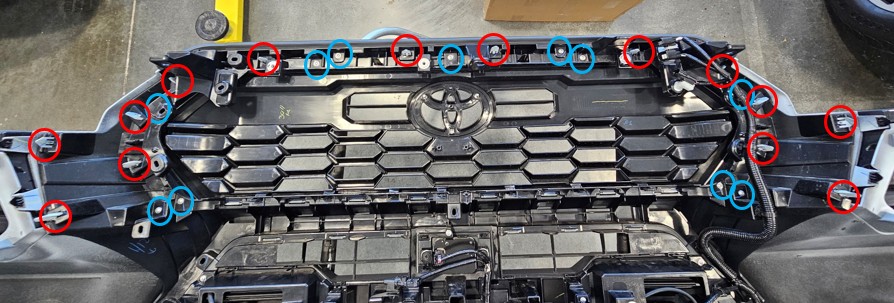
Step 21 — Remove Grille Garnish Pieces
Release the plastic tabs on each side to remove the left and right grille garnish pieces.

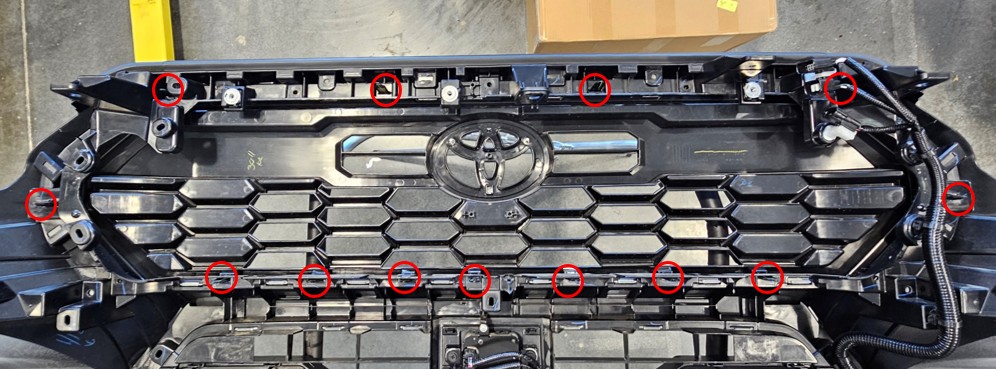
Step 22 — Remove Grille Surround Trim
Remove the grille surround trim by removing the screws and releasing the plastic retaining tabs.
Step 23 — Remove Factory Grille
Release the retaining tabs and remove the factory grille from the bumper.
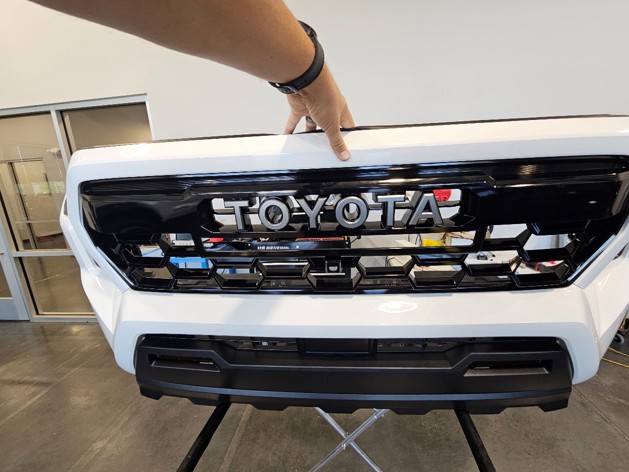
Step 24 — Install TRD Pro Grille
Install the new TRD Pro grille by reversing the previous steps. Reconnect the front camera if equipped.
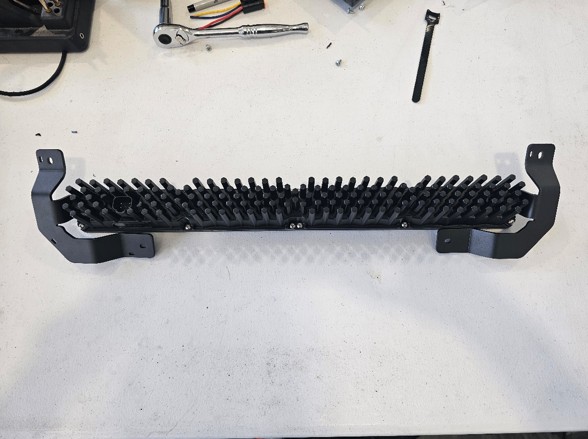
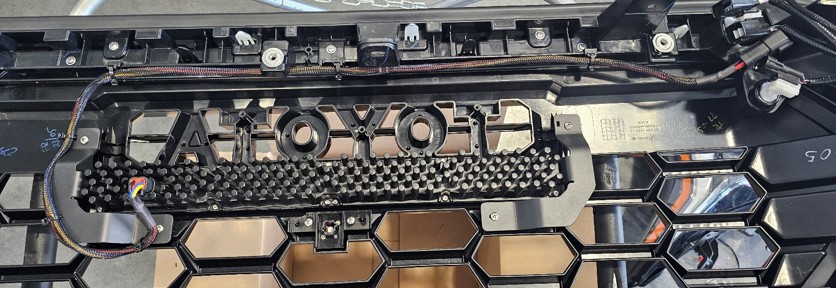
Step 25 — Mount Lightbar to Brackets
Loosely attach the lightbar to the mounting brackets using the included hardware, ensuring the connector is oriented toward the driver's side.
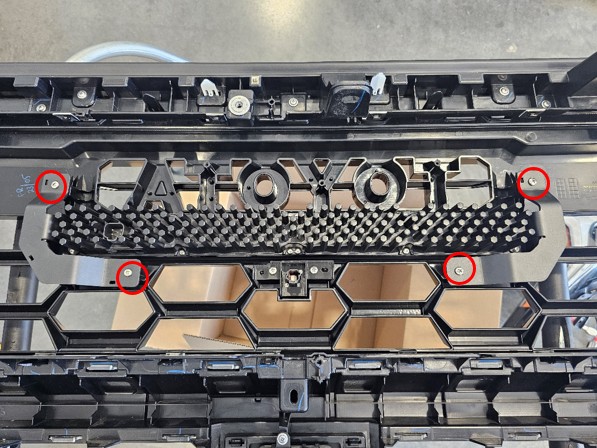
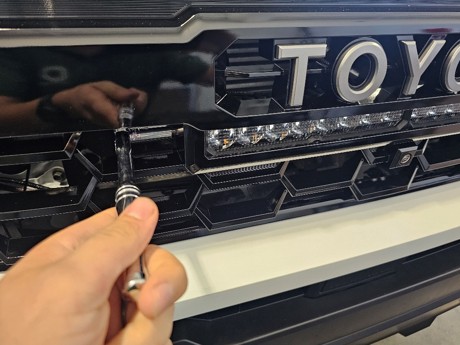
Step 26 — Secure Lightbar Assembly
Attach the lightbar assembly to the grille using a T20 Torx driver. Do not overtighten.
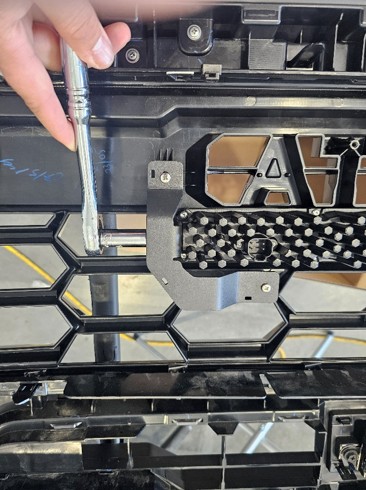
Step 27 — Tighten Lightbar Hardware
Use a 10mm deep socket to fully tighten the lightbar mounting hardware.
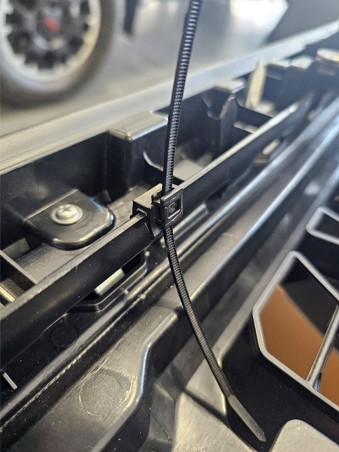
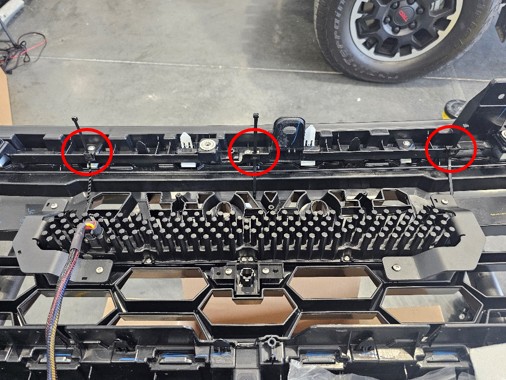
Step 28 — Secure Wiring
Attach the included edge-biter zip ties along the top grille support to secure the wiring.
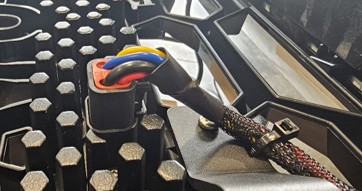
Step 29 — Route Extension Harness
Route the extension harness along the grille support and brackets, ensuring the wiring is kept flat to avoid air shutter interference.
Step 30 — Reinstall Air Shutter
Reinstall the air shutter and confirm that no wiring interferes with its operation.

Step 31 — Reinstall Front Bumper
Reinstall the front bumper assembly by reversing the removal steps.
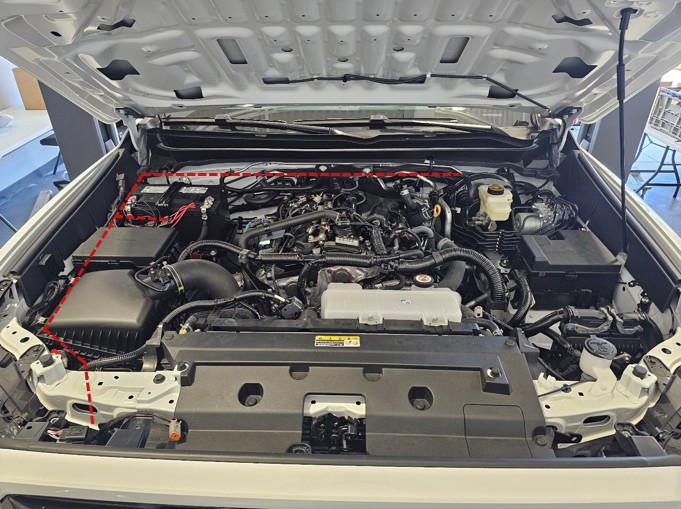
Step 32 — Route Main Wiring Harness
Route the main wiring harness through the engine bay toward the battery and firewall.
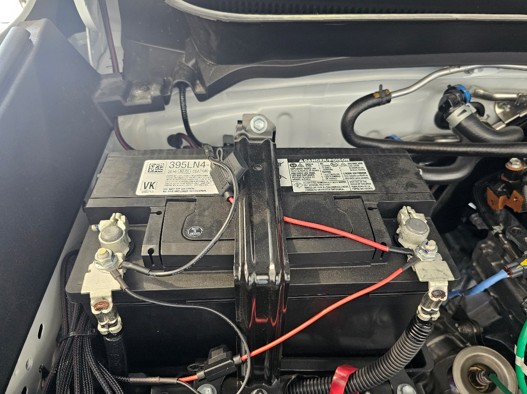
Step 33 — Connect Power and Ground
Using a 12mm socket, connect the power and ground leads directly to the battery terminals.
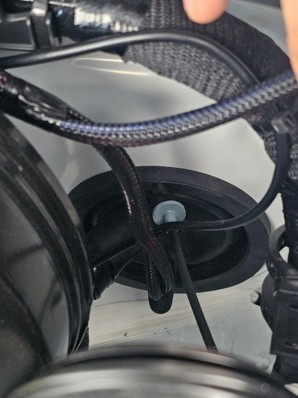
Step 34 — Route Switch Through Firewall
Locate the factory grommet on the driver side and route the switch wiring through the firewall.
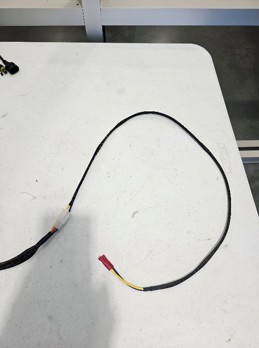
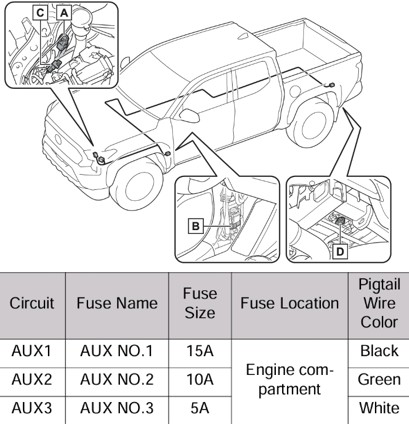
Step 35 (Optional) — Install Wiring Harness
If equipped with factory auxiliary outputs, you can replace the 3-position rocker switch on the DD4104 harness with the included AUX Switch Extension. Behind the driver's side headlight is a factory pigtail. We recommend attaching the blue wire on the AUX extension to AUX3 (White) and the yellow wire on the AUX extension to AUX1 (Black) or AUX2 (Green).
Step 36 — Reinstall Air Intake Duct
Reinstall the engine air intake duct removed earlier.

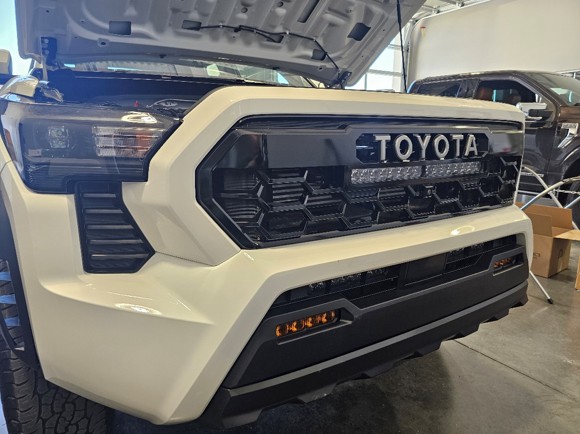
Step 37 — Test and Aim Lightbar
Test the lightbar for proper operation. Adjust the aiming as needed using a 10mm socket through the grille.
The installation is now complete. Enjoy your new TRD Pro Grille Lightbar Kit for 2024–2026 Toyota Tacoma!
Questions About the Installation?
If you have any questions about installing the TRD Pro Grille Lightbar Kit for 2024–2026 Toyota Tacoma, contact us via our support page.
Where Can I Buy the TRD Pro Grille Lightbar Kit?
If you're ready to upgrade your 2024–2026 Toyota Tacoma with the TRD Pro Grille Lightbar Kit, visit DiodeDynamics.com or use our Dealer Locator to find a dealer near you.
Want to know more about Diode Dynamics products? Visit DiodeDynamics.com and subscribe to our newsletter for new product releases and more!
This Installation Guide is for the following SKU: DD8060, DD8064, DD8061, DD8065, DD8058, DD8062, DD8059, DD8063, DD8057


Share This Post