



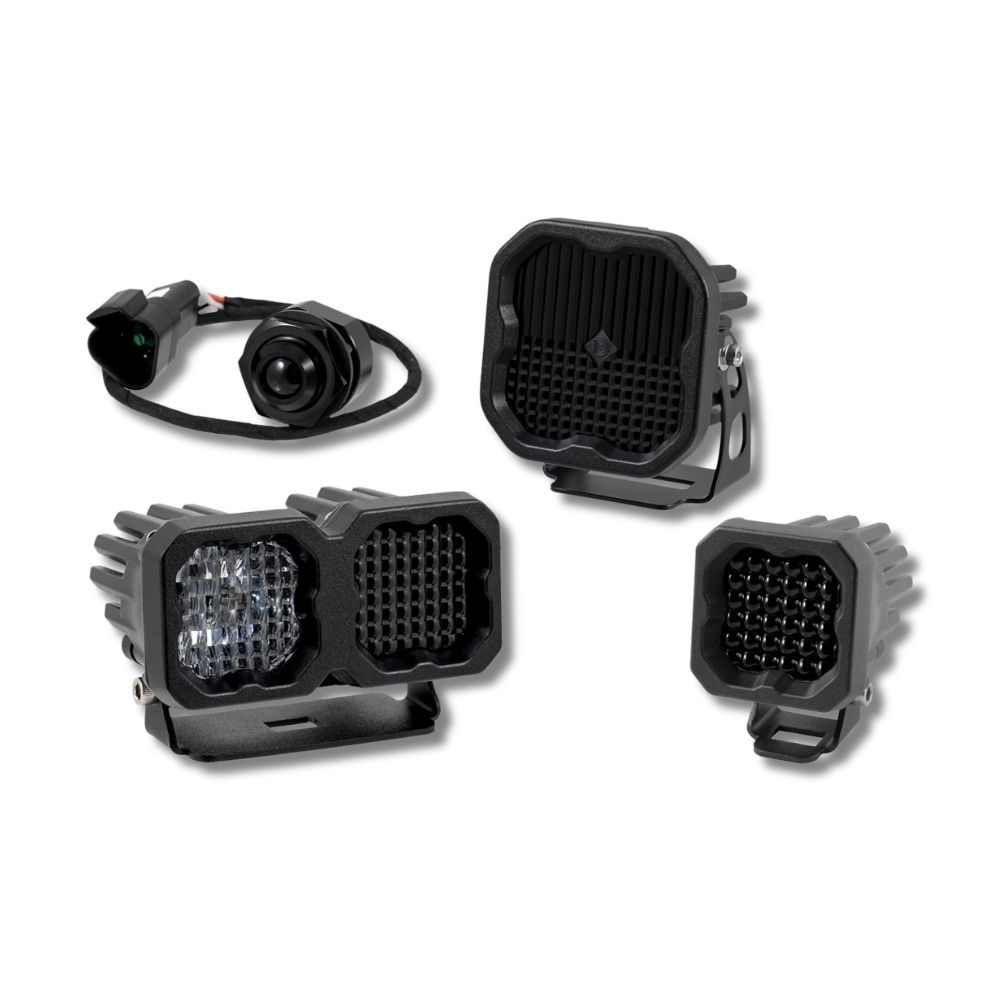











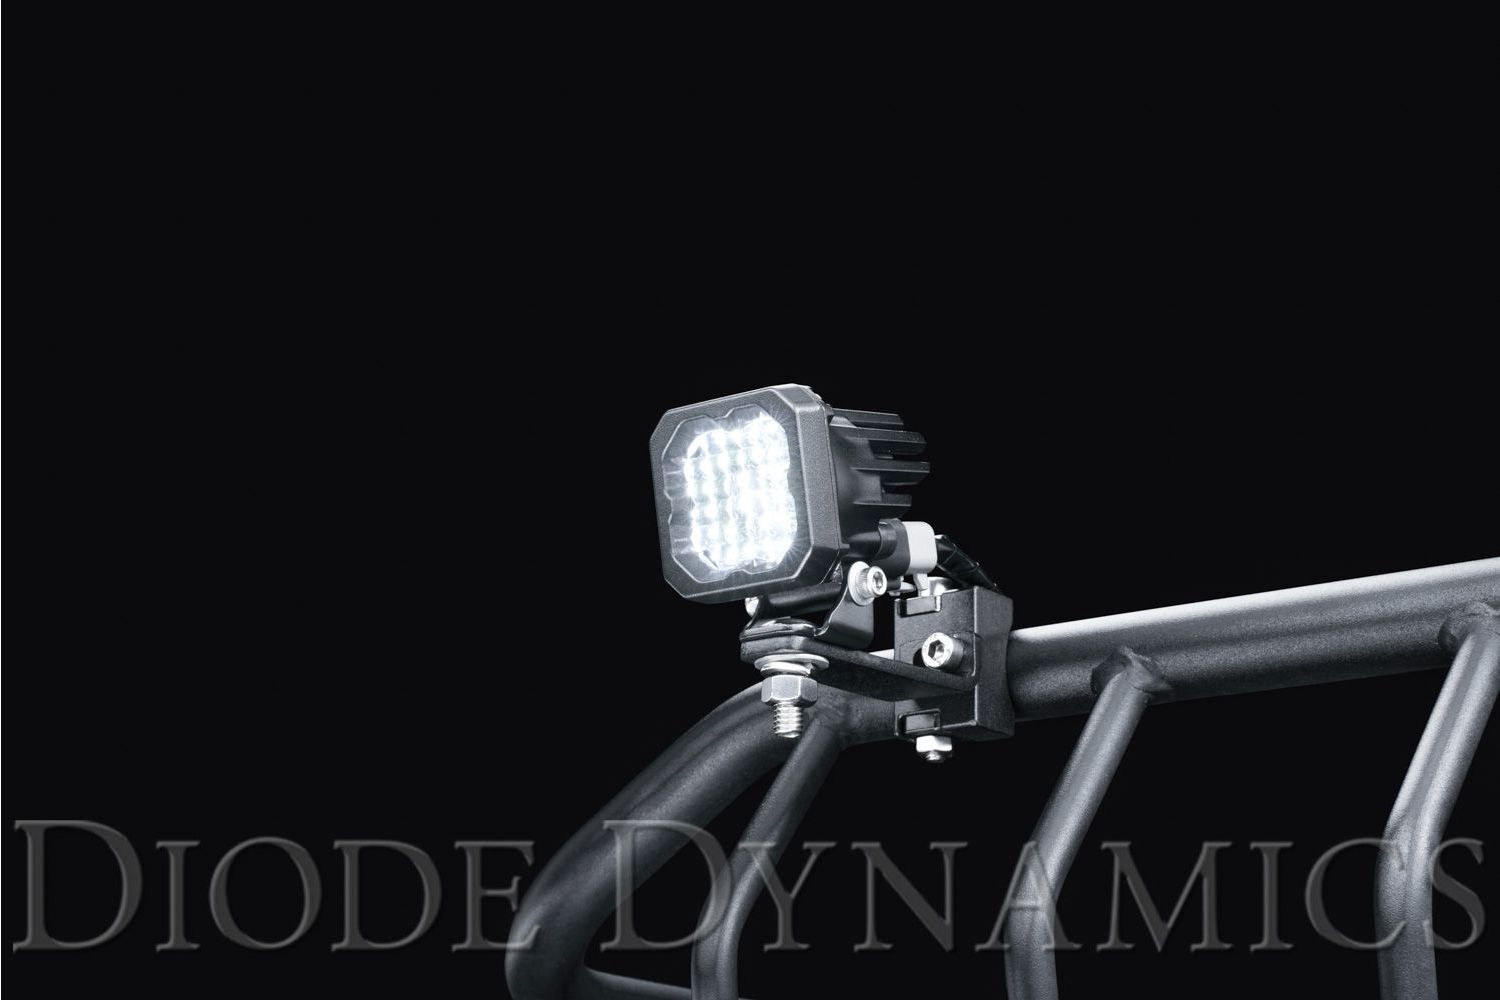
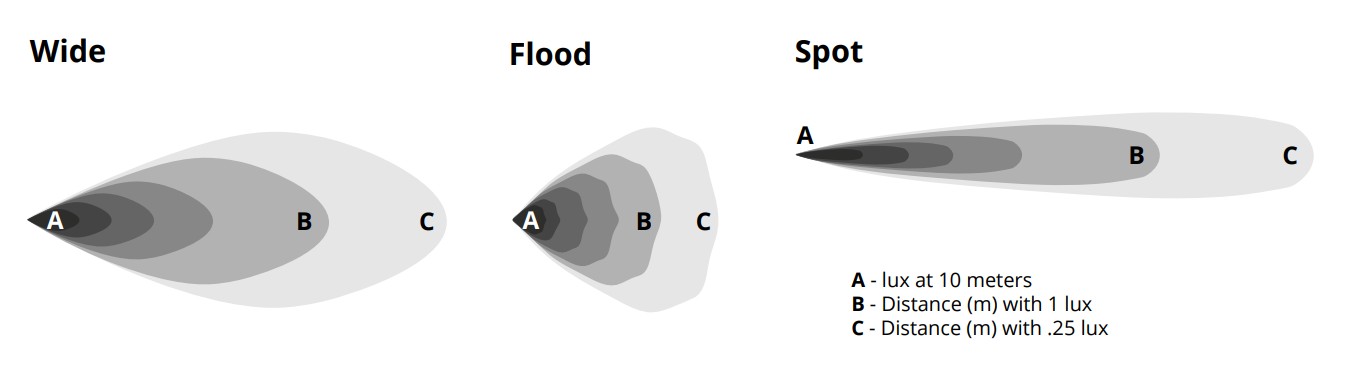
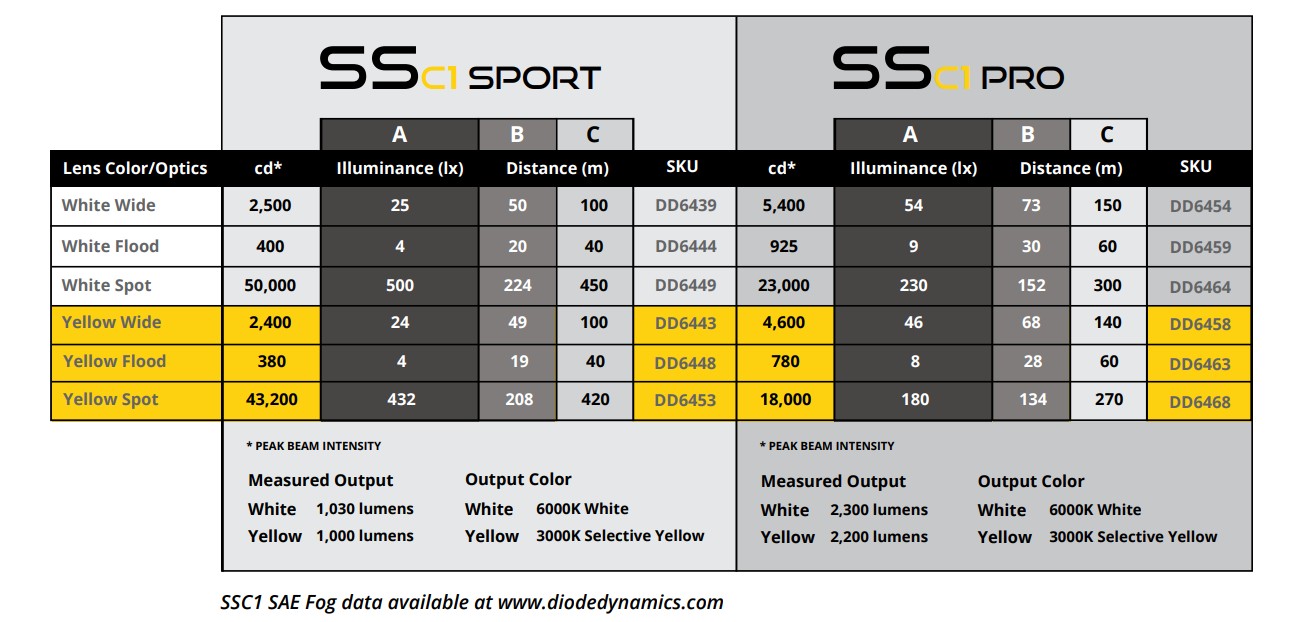
Diode Dynamics SSC1 LED Pods feature a compact, single-LED design with high-output performance in a small footprint. Available in Sport, Pro, and SAE Fog beam patterns, these pods are ideal for auxiliary lighting, accent applications, and compact mounting locations where space is limited.
This guide outlines the universal mounting and wiring process for Diode Dynamics SSC1 LED Pods with the Standard Bezel. While output levels and beam patterns may vary by configuration, the installation process is consistent across the SSC1 lineup.
Table of Contents
- Installation Tools
- Installation Instructions
- Wiring Instructions
- Questions About the Installation?
- Where Can I Buy SSC1 LED Pods?
Installation Tools
- 1/2” wrench
- 3/8” wrench
- 5/32” Allen key
- Drill and mounting hardware (if required by application)
Time Required: Approximately 30–60 minutes per pod.
Installation Instructions
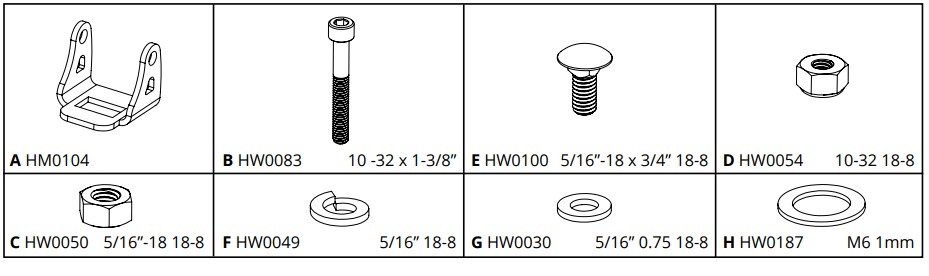
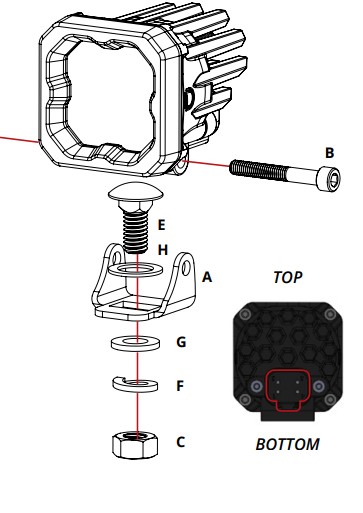
Step 1 – Assemble the mounting bracket
Assemble the SSC1 LED pod with the included mounting bracket and hardware as shown in the diagram. Leave all hardware slightly loose to allow for final aiming adjustments.
Step 2 – Choose a mounting location
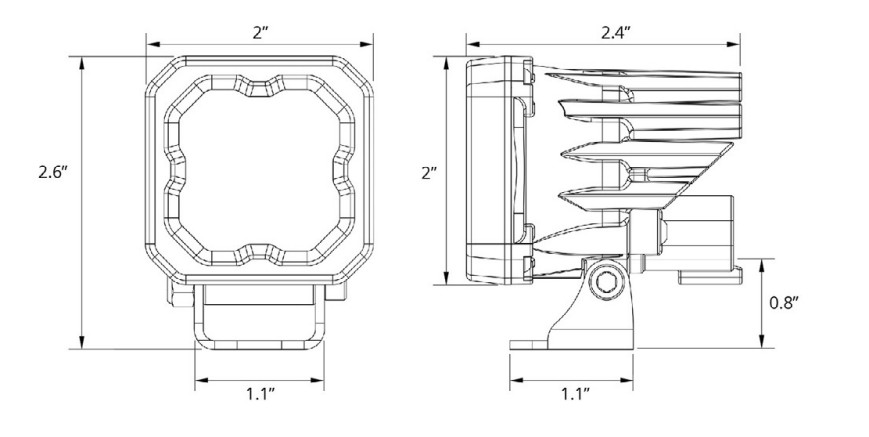
Select a suitable mounting location that provides adequate clearance and airflow. SSC1 pods are compatible with most standard auxiliary light mounting brackets and surfaces.
Step 3 – Secure the pod
Using the included hardware or application-specific fasteners, secure the SSC1 pod to the mounting surface. Ensure the pod is firmly mounted before proceeding.
Step 4 – Aim the pod
Adjust the pod to the desired angle. Once properly aimed, fully tighten all mounting hardware.
Wiring Instructions
Main beam wiring
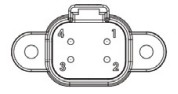
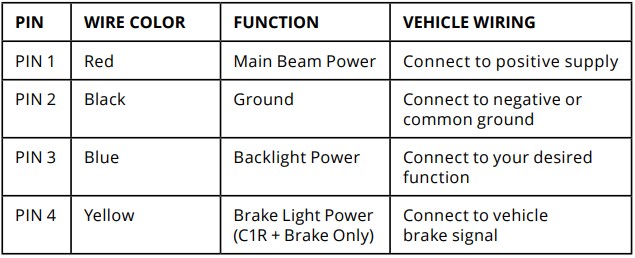
The SSC1 LED pod uses an integrated Deutsch-style connector with the following wiring:
- Red wire: Main beam power (connect to fused 12V positive)
- Black wire: Ground (connect to chassis or battery ground)
Backlight wiring (if equipped)
If your SSC1 pod includes a backlight feature, connect the blue wire to your desired low-current power source such as parking lights, DRLs, or a switch circuit.
- Blue wire: Backlight power
Important: SSC1 LED pods draw high current and require adequately sized wiring. If you are not using a Diode Dynamics wiring harness, use 18 AWG wire or larger and always install an inline fuse.
Questions About the Installation?
If you have any questions about installing Diode Dynamics SSC1 LED Pods, contact us via our support page.
Where Can I Buy Diode Dynamics SSC1 LED Pods?
To browse all available SSC1 LED Pod configurations—including Sport, Pro, and SAE Fog beam patterns—visit our SSC1 Standard Bezel LED Pods category page on DiodeDynamics.com.
You can also use our Dealer Locator to find a Diode Dynamics dealer near you.
Want to know more about Diode Dynamics products? Visit DiodeDynamics.com and subscribe to our newsletter for new product releases and more!
This Installation Guide applies broadly to the following SKUs:
DD6439S, DD6440P, DD6440S, DD6441P, DD6441S, DD6442P, DD6442S, DD6443P, DD6443S, DD6444P, DD6444S, DD6445P, DD6445S, DD6446P, DD6446S, DD6447P, DD6447S, DD6448P, DD6448S, DD6449P, DD6449S, DD6450P, DD6450S, DD6451P, DD6451S, DD6452P, DD6452S, DD6453P, DD6453S, DD6454P, DD6454S, DD6455P, DD6455S, DD6456P, DD6456S, DD6457P, DD6457S, DD6458P, DD6458S, DD6459P, DD6459S, DD6460P, DD6460S, DD6461P, DD6461S, DD6462P, DD6462S, DD6463P, DD6463S, DD6464P, DD6464S, DD6465P, DD6465S, DD6466P, DD6466S, DD6467P, DD6467S, DD6468P, DD6468S, DD6846P, DD6846S, DD6847P, DD6847S, DD6848P, DD6848S
Share This Post