


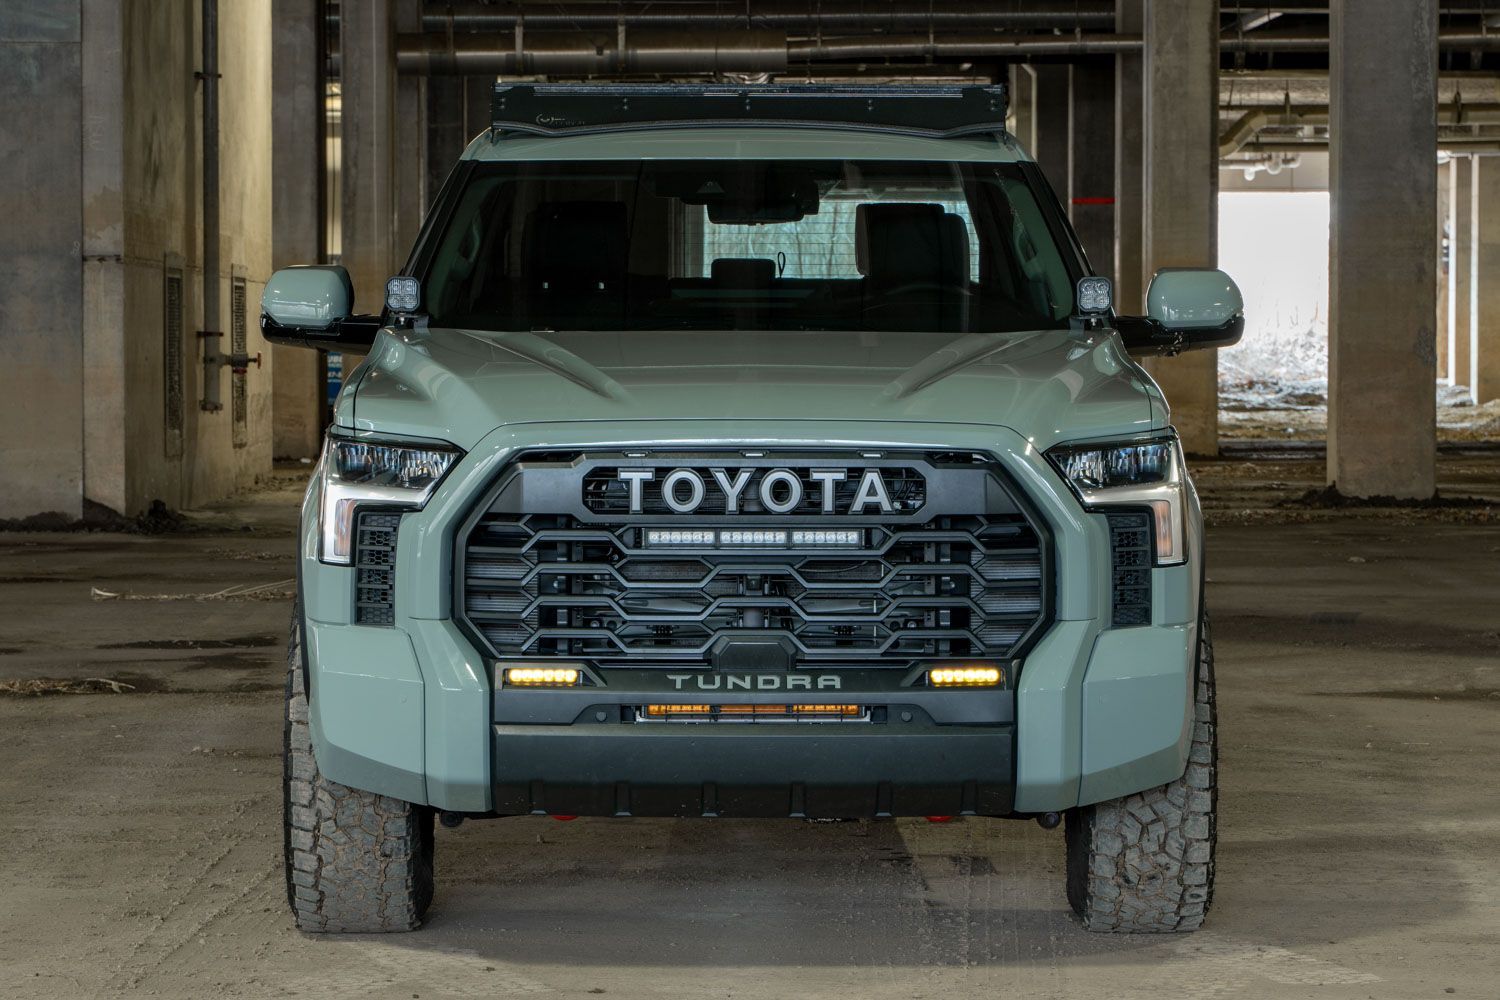
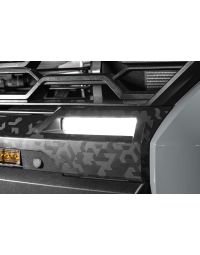
The SS6 LED Fog Light Kit for the 2022-2026 Toyota Tundra and 2023-2026 Sequoia allows you to mount a pair of Stage Series 6" LED Light Bars as Tundra and Sequoia LED fog lights. The following installation guide will provide you with detailed instructions on how to remove the factory Tundra and Sequoia fog lights and install the SS6 LED Fog Light Bar Kit on the 2022-2026 Toyota Tundra and 2023-2026 Sequoia. Check out our installation video, or continue reading for step-by-step instructions below!
Table of Contents
Installation Tools
- Phillips Screwdriver
- Phillips Screwdriver Bit
- Ratchet/Extensions
- Plastic Trim Removal Tool
Installation Video
Mounting Instructions
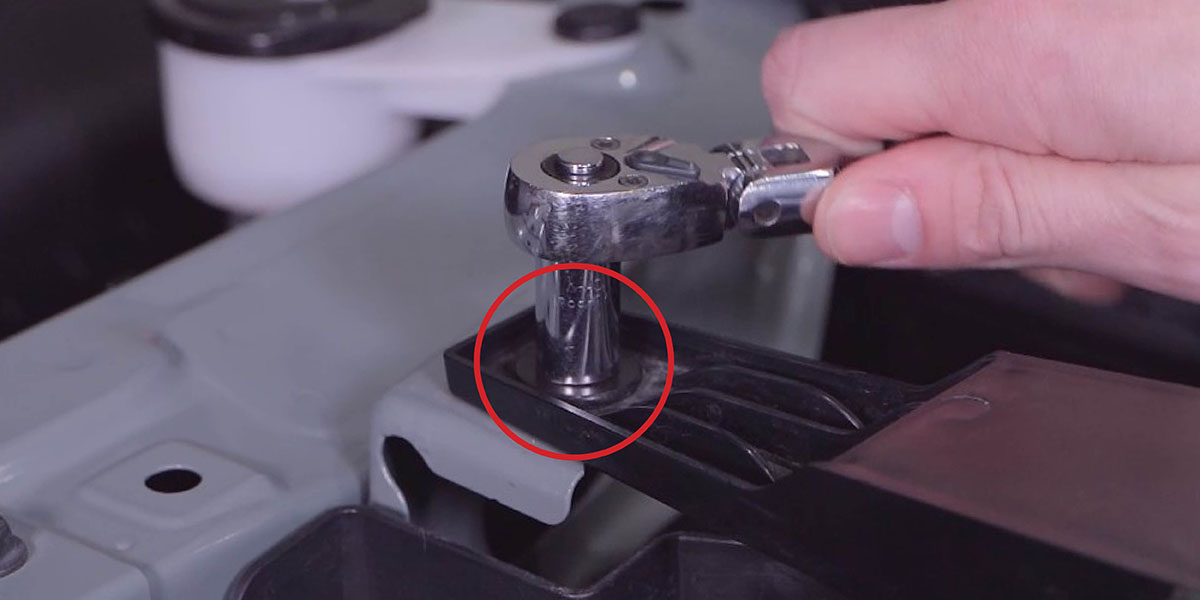
Step 1 - Loosen the Grille
Using a 10mm socket, remove the four bolts from the top of the grille.
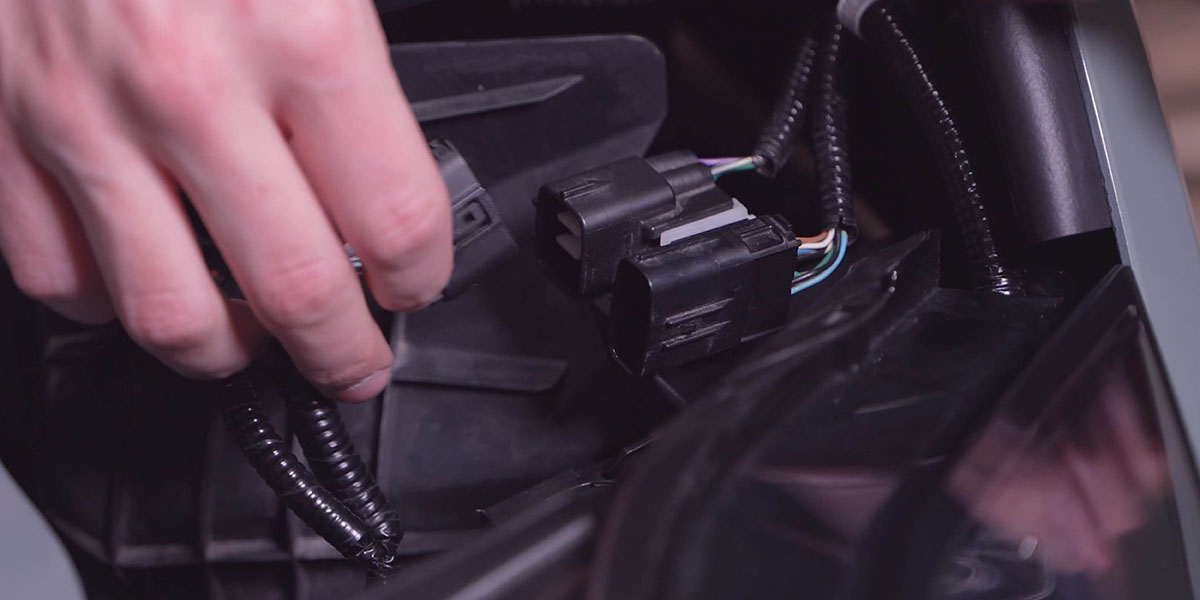
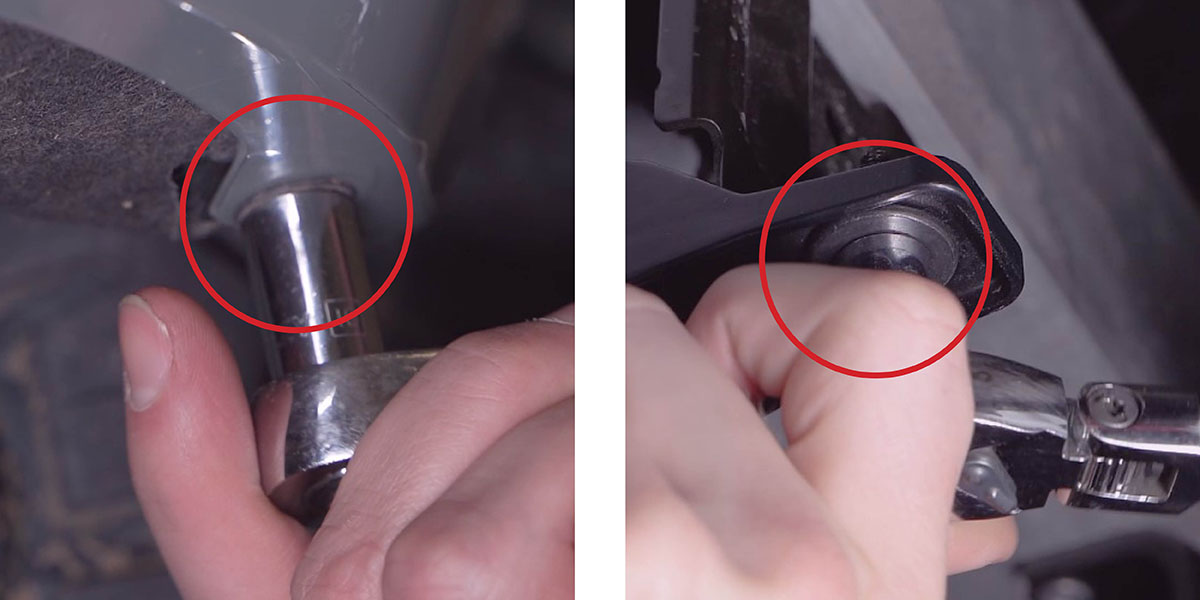
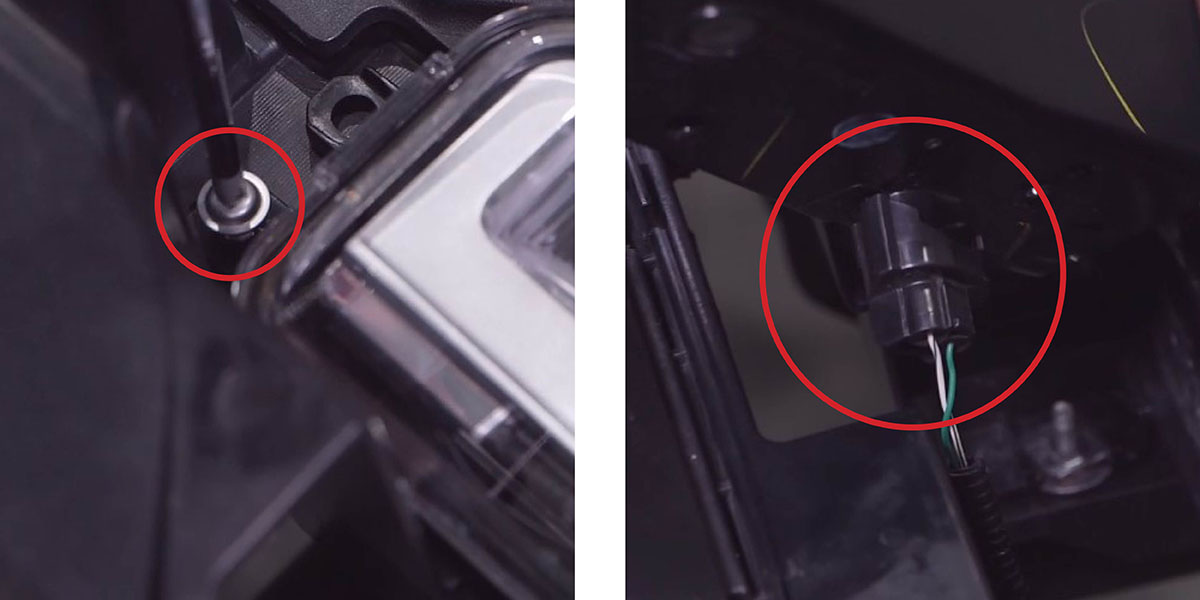
Step 2 - Disconnect Connectors
If equipped, disconnect the connectors from both corners of the grille as shown in the image below.
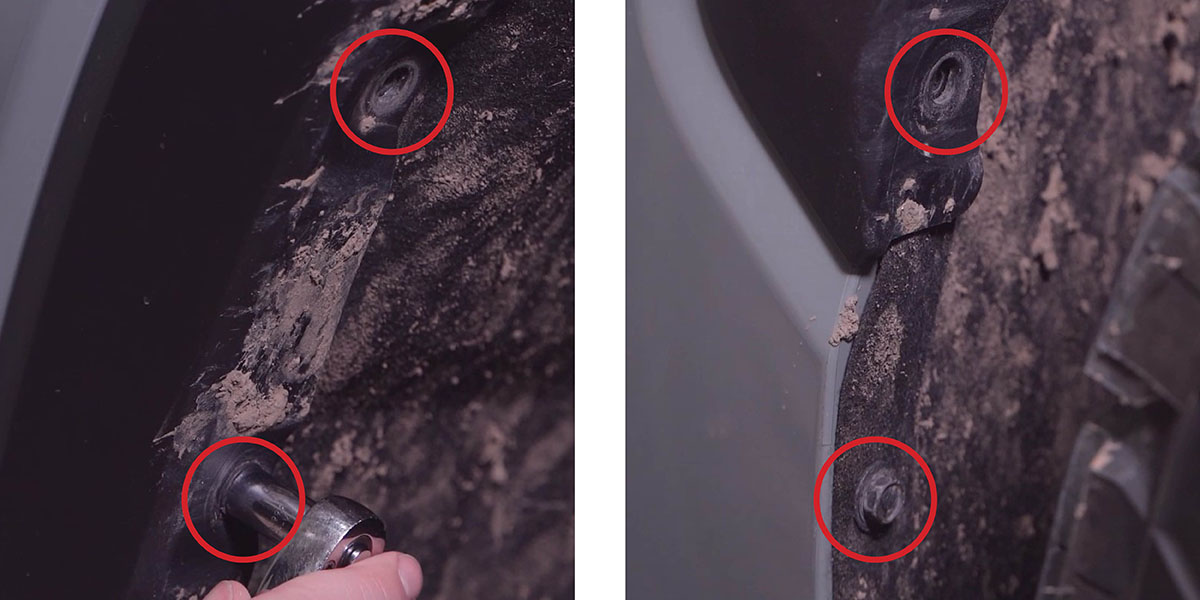
Step 3 - Remove Wheel Well Screws
Using a 10mm socket, remove the four screws from inside the wheel well. If equipped with over-fender molding, remove the additional screw from the bottom inside of the wheel well opening. Repeat this step on the other side of the vehicle.
Step 4 - Remove Bumper Bolts
Remove the four 10mm bolts from underneath the bumper. If not equipped with a front spoiler, there will be four screws underneath the bumper that will need to be removed as well.
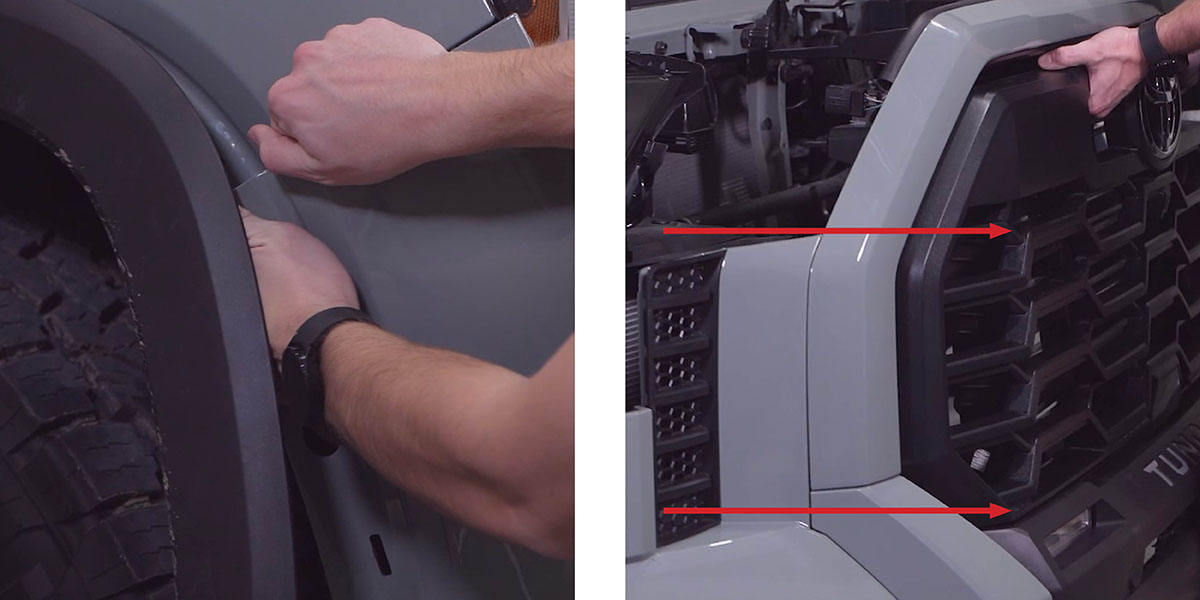
Step 5 - Remove Grille/Bumper Assembly
Pull out on both sides to release the clips holding the grille in place. Then remove the front grille/bumper assembly by pulling forward.
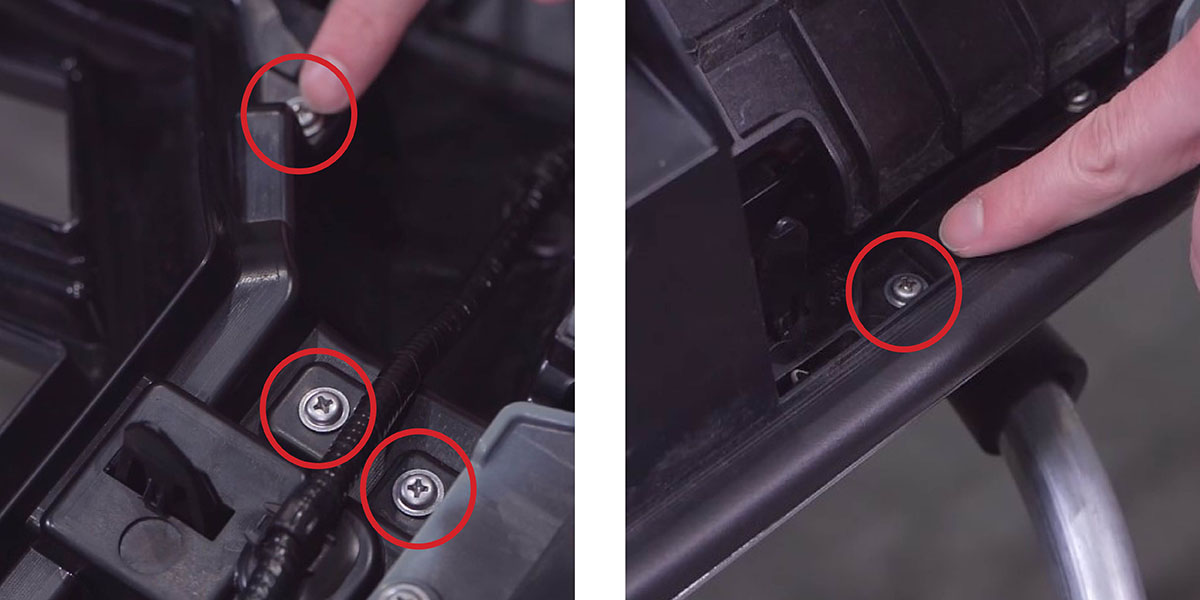
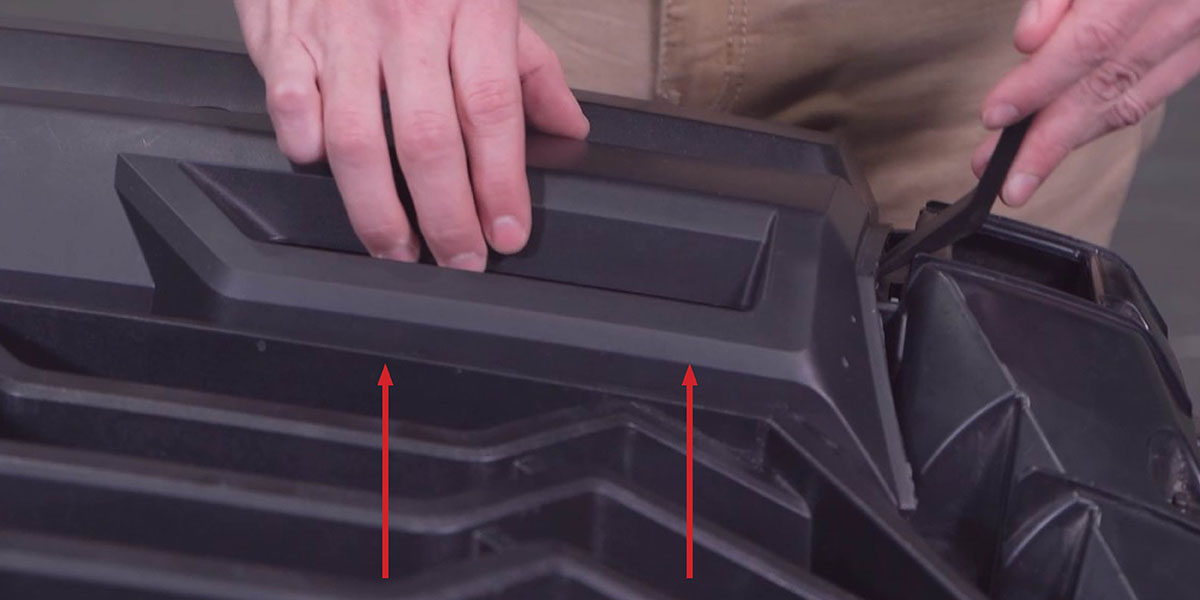
Step 6 - Remove Bumper Panel Screws
Using a Phillips screwdriver, remove the six screws securing each corner bumper panel. Then remove the two screws on top of the grille.
Step 7 - Loosen Upper Grille Surround
Using a plastic trim removal tool, push through the ten tabs securing the upper grille surround.
Step 8 - Remove Corner Bumper Panels
Remove the corner bumper panels by pushing through the seven tabs securing them in place.
Step 9 - Remove Bumper Molding
Using a plastic trim removal tool, remove the front bumper molding by releasing the clips and pulling outward.
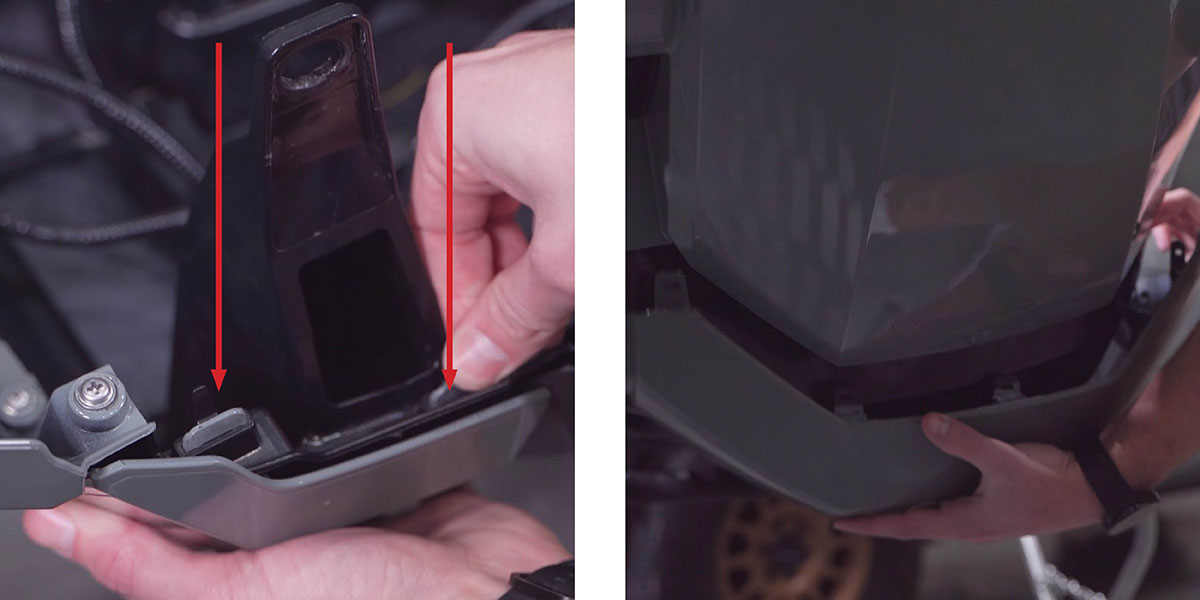
Step 10 - Remove Fog Lights
Using a Phillips screwdriver, remove the two screws securing the factory fog light to the front bumper. Then remove the factory fog light from the vehicle, and unplug the factory fog light connector. Repeat this step on the other side of the vehicle.
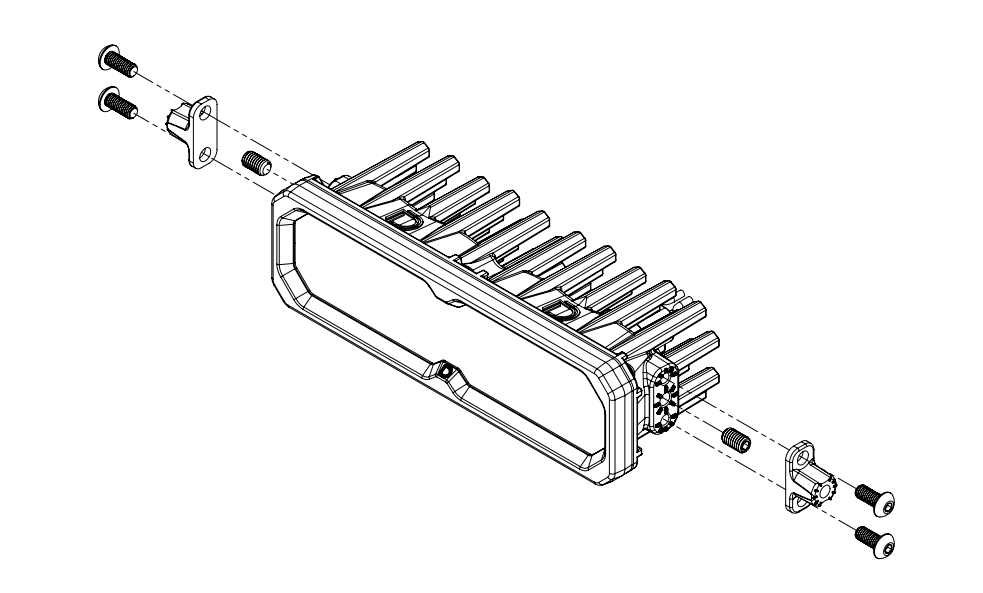
Step 11 - Install Fog Light Brackets
Install the four included fog light brackets onto the sides of your new Stage Series 6” light bars using the included hardware as shown.
New Stage Series Lightbars include a mounting adapter bracket that allows them to work with existing mounting brackets used across current kits. This adapter ensures proper fitment without requiring a redesigned bracket.
If your kit includes this adapter, it must be installed onto the lightbar before attaching the lightbar to the main mounting brackets.
Install the included set screws in the center mounting position on both sides of the lightbar. Then, attach the adapter to the lightbar using the included Torx screws in the top and bottom mounting holes. Once the adapter is secured, use the supplied hex bolt to mount the lightbar to the main mounting bracket as normal.
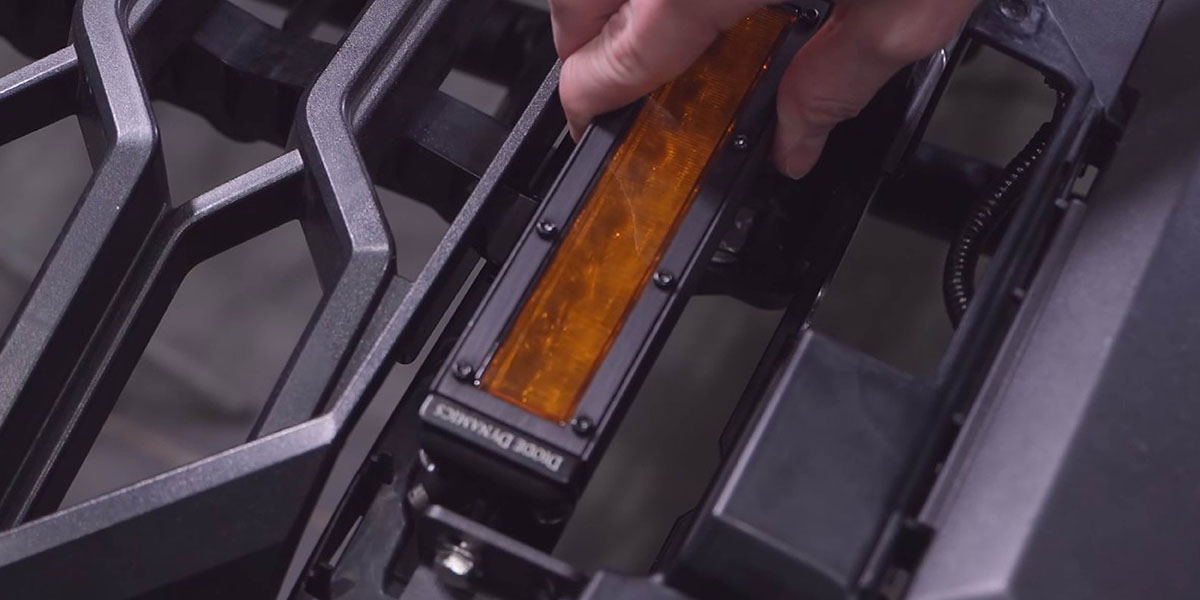
Step 12 - Install LED Light Bars
Install your new light bar and bracket into the factory location using the factory screws. Repeat this step on the other side of the vehicle.
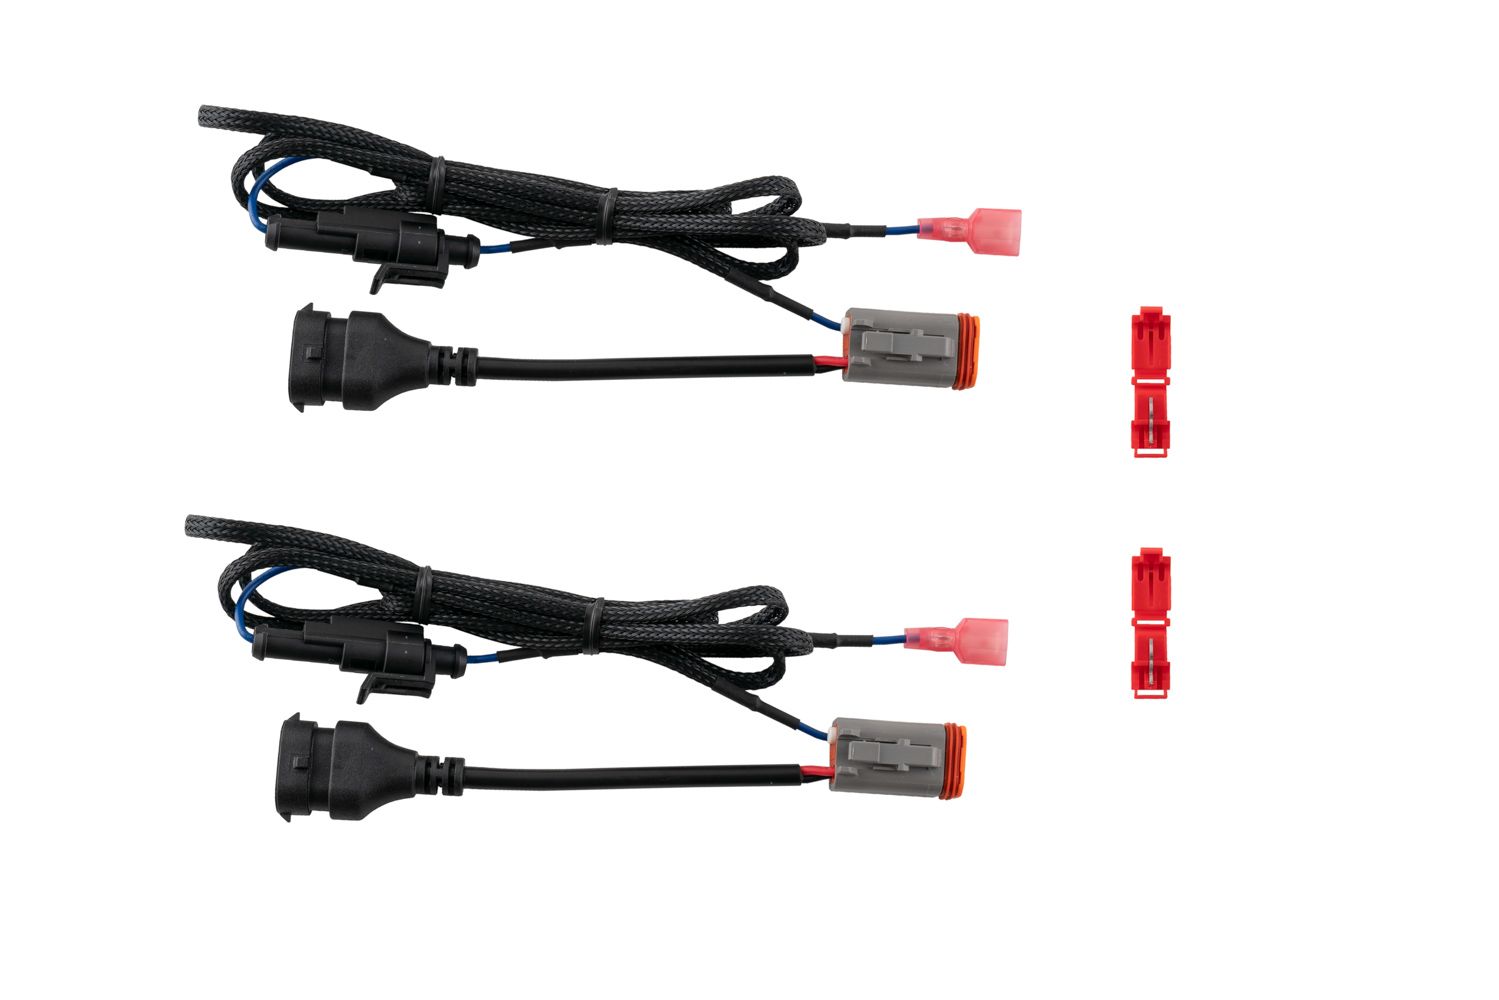
Step 13 - Connect Vehicle Harness
Use an included adapter wire to connect the light bar to the vehicle harness on each side.
Connect Backlight Wire (Optional)
New Stage Series Light Bars feature an integrated amber backlight that fully illuminates the TIR optic, creating a distinctive accent appearance while improving visibility when parked, staged, or stopped on the trail.
If your light bar is equipped with the backlight function, connect the blue wire with the red male spade connector to a fused 12V source. The parking light or sidemarker circuit is commonly used so the backlight activates with your vehicle’s exterior lighting.
Use the included T-taps to make this connection:
-
Position the T-tap over the selected wire.
-
Use needle-nose pliers to fully seat and crimp the tap.
-
Insert the red male spade connector into the T-tap until secure.
NOTE: The power source must be fused. Do not connect the backlight wire directly to the vehicle battery.
Step 14 - Reinstall Grille/bumper Assembly
Bring the bumper assembly to the vehicle to test and aim. Snap each end into the fender clips, and reinstall four 10mm bolts along the top of the grille. Plug in the two connectors at each corner of the grille if equipped.
Step 15 - Test Function
Test the function of the lights. If either light does not turn on, try flipping the connector 180° where it plugs into the vehicle harness. Aim the lights as shown on the back of this guide. Then, tighten down the bolts to secure the lightbars in place.
Step 16 - Resecure Assembly Panels
Reverse step 14 to remove the grille/bumper assembly from the vehicle again, then reinstall the bumper assembly by reversing steps 1 through 9. Then reverse steps 6 through 9 to resecure the grille/bumper assembly panels.
Aiming Instructions
Step 17 - Position Vehicle for Aiming
Park your vehicle 25 feet away from a wall or garage door on a level surface.
Step 18 - Loosen LED Light Bar Bolts
Loosen the M6 bolts on each side of your SS6 lightbar, just enough to allow you to adjust the lightbar.
Step 19 - Measure Mounting Height
On your vehicle, measure the distance between the ground and the center of your SS6 lightbar. This is your mounting height.
Step 20 - Mark Mounting Height On Wall
Mark the mounting height on the wall or garage door using tape.
Step 21 - Mark Fog Cut-Off Line
Add another piece of tape four inches below the mounting height. This is your fog light cut-off line.
Step 22 - Aim SS6 LED Light Bars
Aim your SS6 lightbar on each side, so that the top of the beam pattern is on the cutoff line mark.
Step 23 - Complete Installation
Tighten the M6 bolts back down to complete the installation. Do not overtighten or use power tools to torque them down.
Questions About the Installation?
If you have any questions or issues installing the SS6 LED Fog Light Kit for the 2022-2026 Toyota Tundra or 2023-2026 Sequoia, please contact us for further assistance.
Where Can I Buy an SS6 LED Fog Light Kit for the 2022-2026 Toyota Tundra and 2023-2026 Sequoia?
If you're ready to upgrade your 2022-2026 Toyota Tundra or 2023-2026 Sequoia with an SS6 LED Fog Light Kit, you can purchase one by clicking here, or using our dealer locator to find a dealer near you.
If you are looking to add additional Off-Road LED Lights to your Tundra or Sequoia, we have a variety of LED Light bars and Pod Light kits here!
Want to know more about Diode Dynamics products? Visit DiodeDynamics.com and subscribe to our newsletter for new product releases and more!
This Installation Guide is for the following SKUs: DD7418, DD7419, DD8702, DD8581, DD8583, DD8703, DD8582, DD8584
Share This Post