



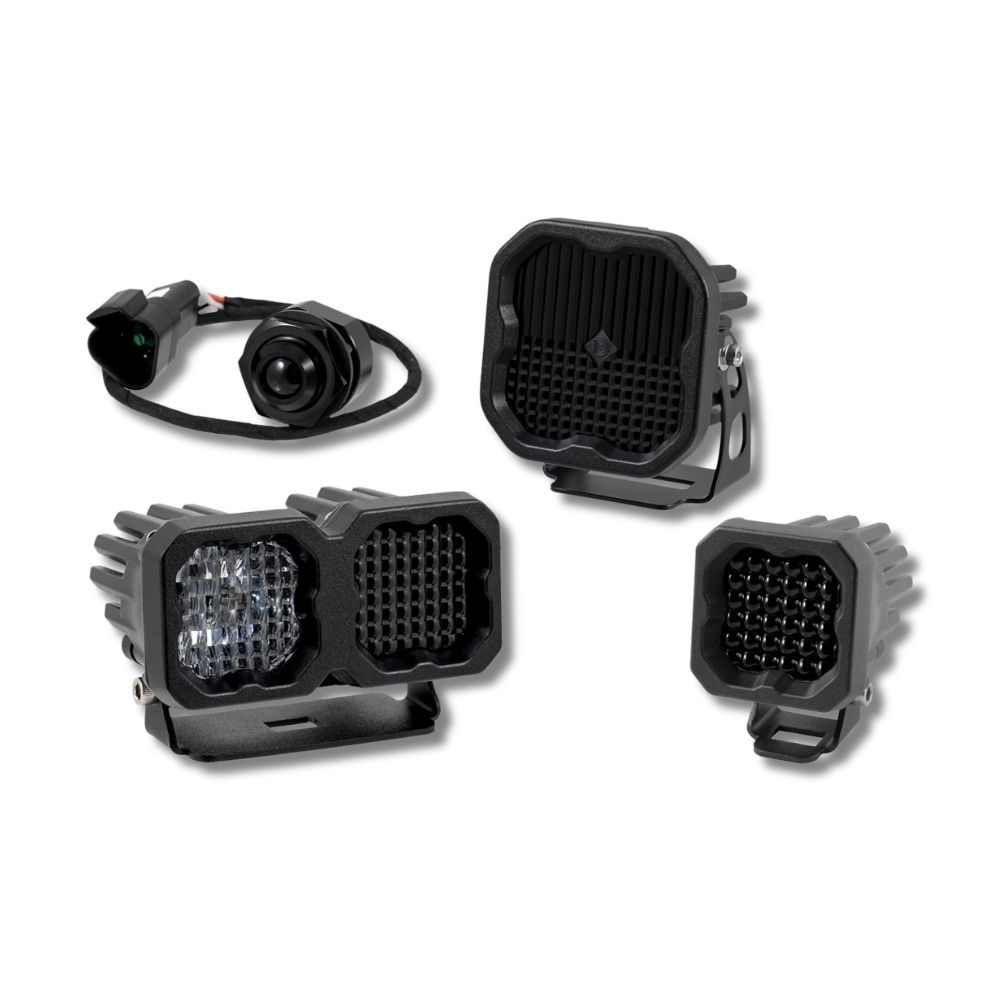











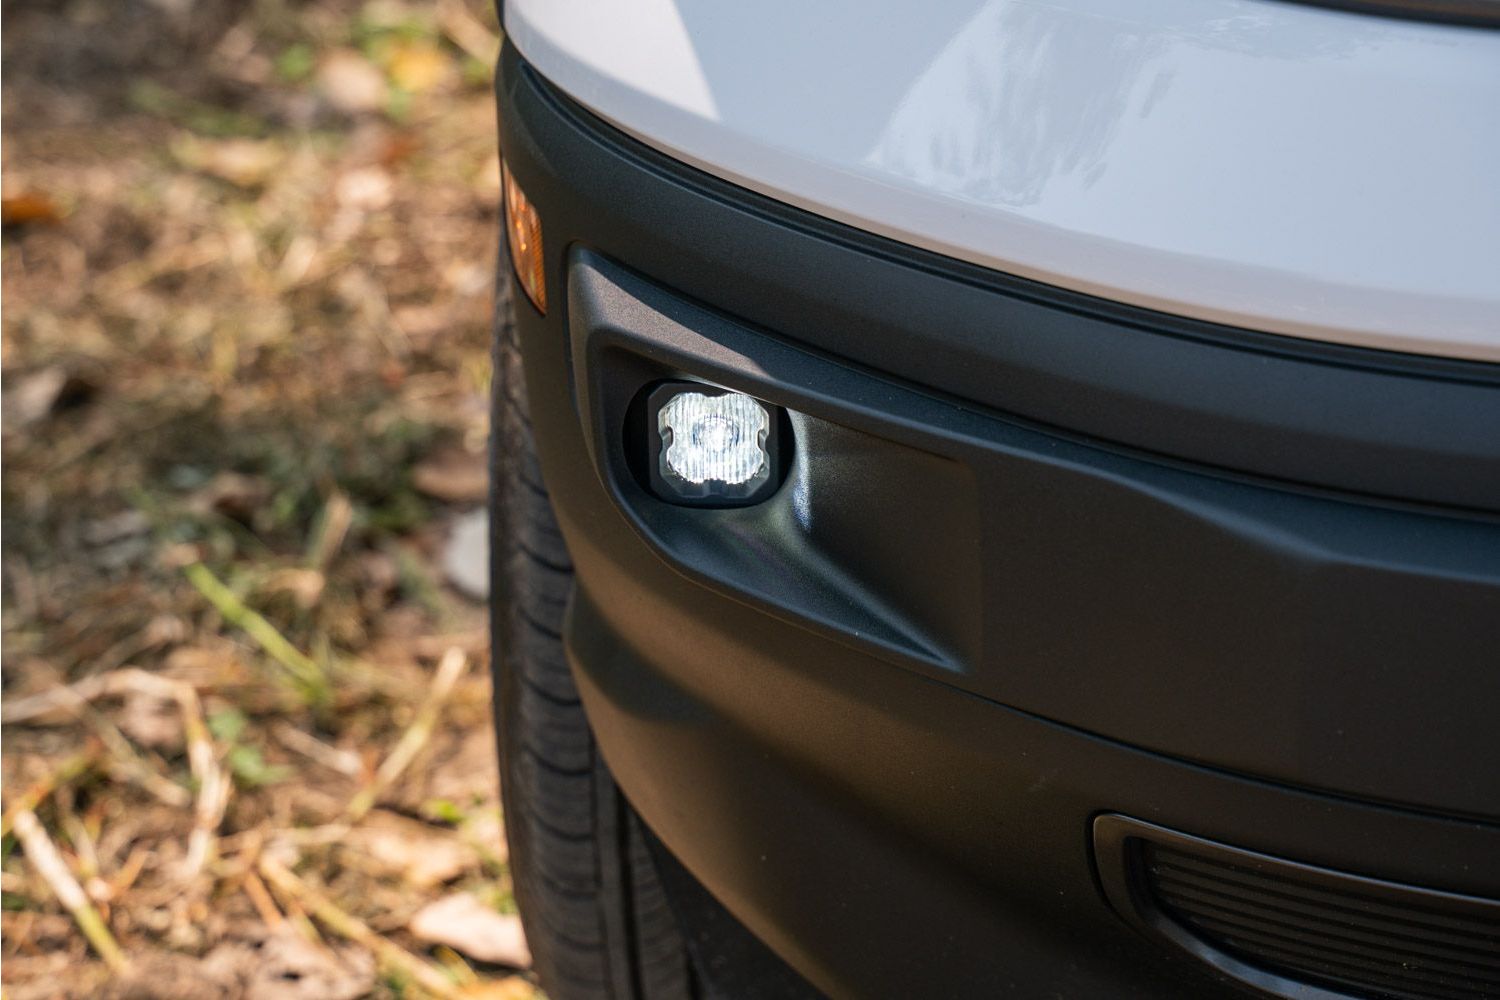
Upgrade the factory fog lights on your 2021+ Ford Bronco Sport with the Diode Dynamics SSC1 SAE Type FBS Fog Light Kit. CAD-designed to use existing mounting points, this kit provides a clean, direct-fit installation while adding powerful SSC1 LED pod performance.
This guide covers installation for Bronco Sport models both with and without factory tow hooks, along with wiring and final aiming instructions.
Table of Contents
- Installation Video
- Installation Tools
- Installation Instructions
- Questions About the Installation?
- Where Can I Buy the SSC1 SAE Type FBS Fog Light Kit?
Installation Video
Installation Tools
- 7mm socket
- 10mm socket
- T30 Torx driver
- 5/32-inch Allen key
- Trim removal tool
- Pliers
- Flat-head screwdriver
- Tape measure
- Tape for marking the aiming height and cutoff line
Time Required: Not specified in the installation guide.
Installation Instructions
Step 1 – Attach the SSC1 Bracket
Attach the bracket to the SSC1 pod using the supplied screw and nut. Make sure the bracket is in the correct orientation. Tighten the screw enough that the pod retains its position while still allowing it to pivot with force for aiming.
Vehicles Without Tow Hooks – Step 2: Remove the Passenger-Side Mud Flap Screws
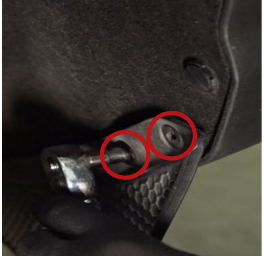
Starting on the passenger side of the vehicle, use a 7mm socket to remove the three screws securing the mud flap to the fender liner.
Vehicles Without Tow Hooks – Step 3: Peel Back the Fender Liner
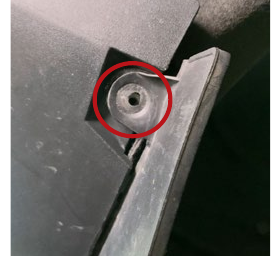
Using a trim removal tool, remove the four plastic push clips from the fender liner and peel the liner back to access the bumper assembly.
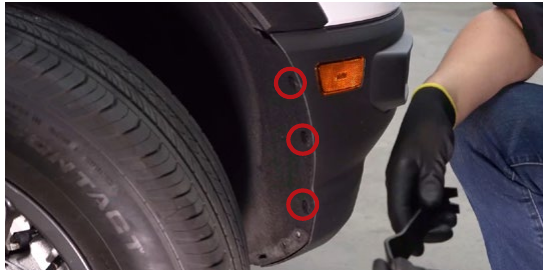
Vehicles Without Tow Hooks – Step 4: Remove the Fender-to-Bumper Bolts
Using a 10mm socket, remove the three bolts holding the fender to the bumper. Repeat Steps 2 through 4 on the other side of the vehicle.
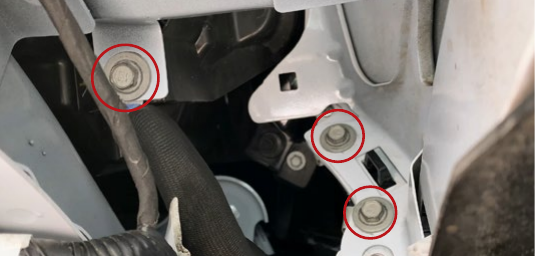
Vehicles Without Tow Hooks – Step 5: Remove the Skid Plate Screws
Using a T30 Torx driver, remove the eight screws holding the skid plate to the bottom of the bumper.
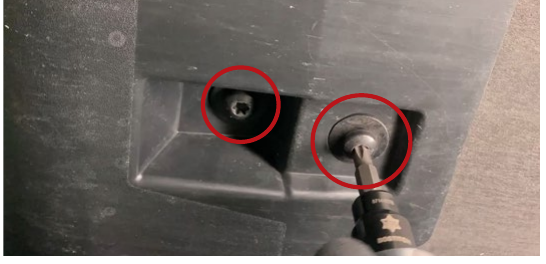
Vehicles Without Tow Hooks – Step 6: Remove the Upper Bumper Screws
Using a 7mm socket, remove the six screws holding the top of the bumper to the radiator trim panel.
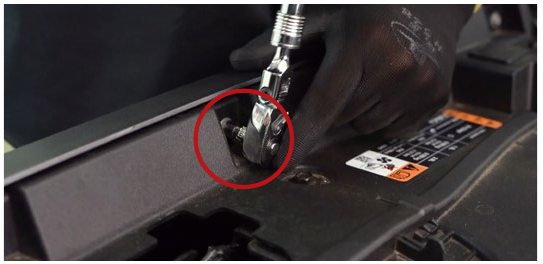
Vehicles Without Tow Hooks – Step 7: Remove the Radiator Trim Panel Bolts
Remove the eight 10mm bolts holding the plastic trim panel to the radiator core support.
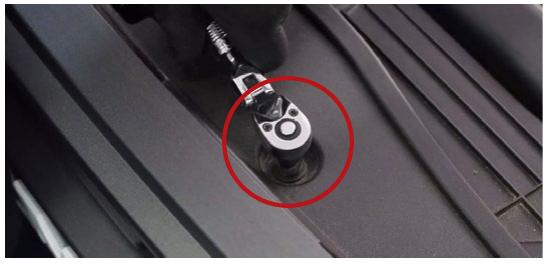
Vehicles Without Tow Hooks – Step 8: Disconnect the Headlight Connectors
Disconnect the factory headlight connector and release the wire from the headlamp clip. Repeat this process on both sides of the vehicle.
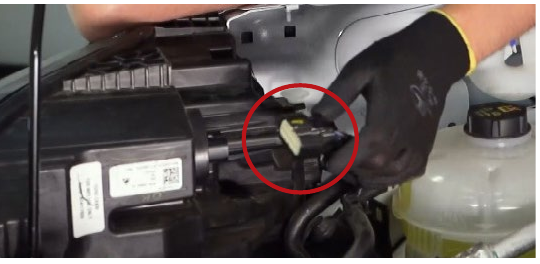
Vehicles Without Tow Hooks – Step 9: Disconnect the Factory Body Connector
In the passenger-side wheel well, disconnect the factory body connector from the bumper cover.
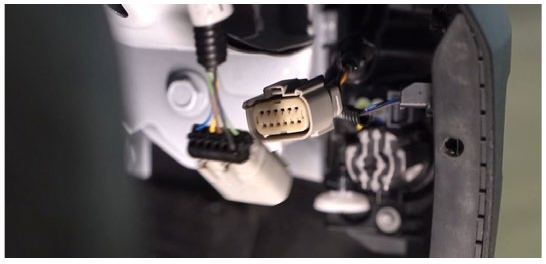
Vehicles Without Tow Hooks – Step 10: Release the Fender Flare
Pinch the white clip securing the fender flare to the fender using a pair of pliers. Then push the black clip out to detach that end of the fender flare from the bumper. Repeat this step on the other side of the vehicle.
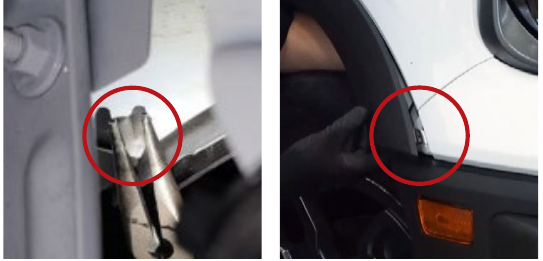
Vehicles Without Tow Hooks – Step 11: Detach the Bumper from the Fender
Slowly pull the fender flare outward just enough to access the black clip securing the bumper to the fender. Push the black clip down to detach the bumper from the fender.
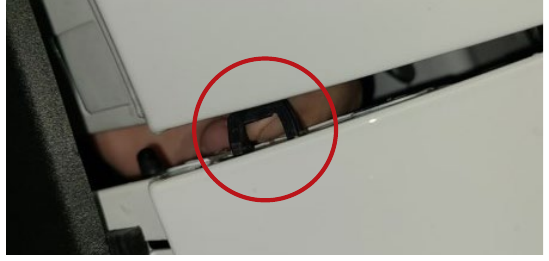
Vehicles Without Tow Hooks – Step 12: Remove the Bumper Assembly
Compress the clips holding the headlamp to the fender by pushing on the top and bottom with a flat-head screwdriver. Remove the bumper assembly from the vehicle and place it face down on a soft surface. Take care not to drag or scratch the assembly.
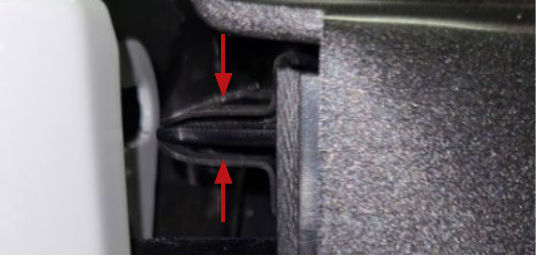
Vehicles Without Tow Hooks – Step 13: Remove the Factory Fog Light
Access the factory fog lights and disconnect the factory fog light connector. Using a 7mm socket, remove the three screws securing the factory fog light to the bumper, then remove the factory fog light.
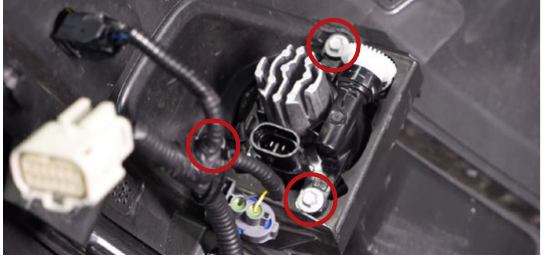
Vehicles Without Tow Hooks – Step 14: Install and Connect the SSC1 Pod
Install the SSC1 pod and bracket onto the vehicle using the three original screws. Plug the SSC1 into the factory fog light harness using the included DT wire adapter and test the light for proper function. If the light does not turn on, flip the connector 180 degrees and test again.
If desired, connect the backlight power wire to a fused 12V source, such as a parking light or sidemarker circuit, to activate the backlight feature. T-Taps are included for this purpose.
Vehicles Without Tow Hooks – Step 15: Loosely Reinstall the Bumper
Repeat Steps 9 through 12 in reverse order to loosely reinstall the bumper. Then follow the aiming instructions below.
Vehicles Without Tow Hooks – Step 16: Complete Reassembly
Once the desired fog light aiming has been reached, repeat Steps 2 through 12 in reverse order to complete the installation.
Vehicles With Tow Hooks – Step 2: Remove the Driver-Side Mud Flap Screws
Starting on the driver side of the vehicle, use a 7mm socket to remove the three screws securing the mud flap to the fender liner.
Vehicles With Tow Hooks – Step 3: Peel Back the Fender Liner
Using a trim removal tool, remove the three plastic push clips from the fender liner and peel the liner back to access the bumper assembly.
Vehicles With Tow Hooks – Step 4: Move the ECU
To access the factory fog lights on the driver side, move the ECU out of the way. Using a 10mm socket, remove the two bolts on the back side and the one nut on the front side holding the ECU in place.
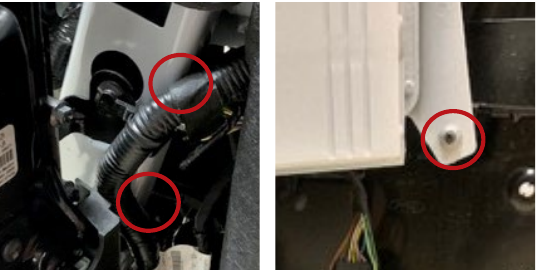
Vehicles With Tow Hooks – Step 5: Disconnect the Factory Fog Light
Move the ECU out of the way and unplug the factory fog light connector. There is no ECU unit on the passenger side of the vehicle.
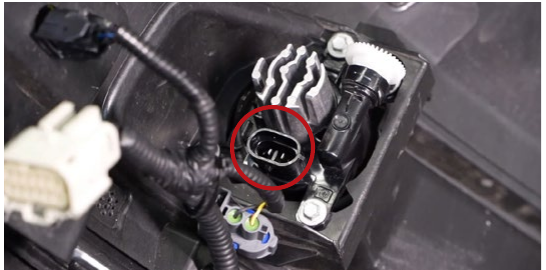
Vehicles With Tow Hooks – Step 6: Remove the Factory Fog Light Screws
Using a 7mm socket, remove the three screws securing the fog light to the bumper.
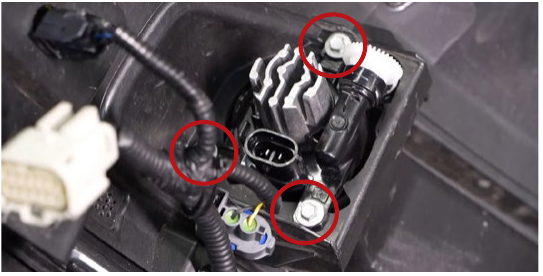
Vehicles With Tow Hooks – Step 7: Remove the Factory Fog Light
Remove the factory fog light from the bumper.
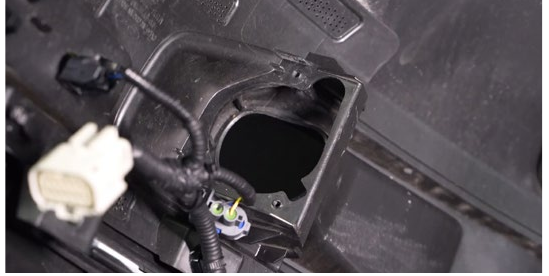
Vehicles With Tow Hooks – Step 8: Install the SSC1 Pod
Install the SSC1 pod and bracket onto the vehicle using the three original screws.
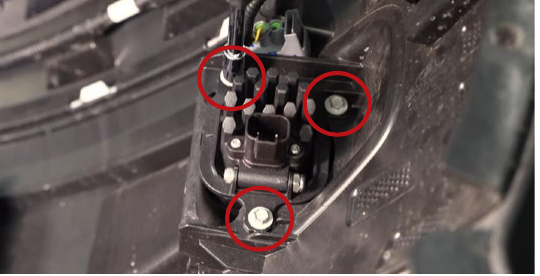
Vehicles With Tow Hooks – Step 9: Connect the SSC1 Pod
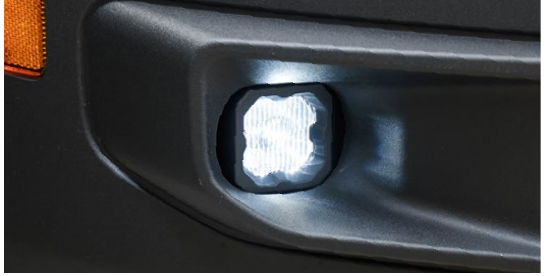
Plug the SSC1 into the factory fog light harness using the included DT wire adapter and test the light for proper function. If the light does not turn on, flip the connector 180 degrees and test again.
Vehicles With Tow Hooks – Step 10: Connect the Backlight
If desired, connect the backlight power wire to a fused 12V source, such as a parking light or sidemarker circuit, to activate the backlight feature. T-Taps are included for this purpose.
Vehicles With Tow Hooks – Step 11: Aim and Reassemble
Follow the aiming instructions below. Once aiming is complete, repeat Steps 2 through 5 in reverse order.
Vehicles With Tow Hooks – Step 12: Repeat on the Opposite Side
Repeat the installation steps on the other side of the vehicle.
Aiming Step 1 – Position the Vehicle
Park the vehicle on a level surface 25 feet away from a wall or garage door.
Aiming Step 2 – Loosen the SSC1 Pod
Loosen the 5/32-inch Allen bolt on the side of the SSC1 pod just enough to allow the pod to be adjusted.
Aiming Step 3 – Measure the Mounting Height
Measure the distance from the ground to the center of the SSC1 pod. This measurement is the mounting height.
Aiming Step 4 – Mark the Mounting Height
Use tape to mark the measured mounting height on the wall or garage door.
Aiming Step 5 – Mark the Fog Light Cutoff Line
Add another piece of tape four inches below the mounting-height mark. This lower mark is the fog light cutoff line.
Aiming Step 6 – Aim the SSC1 Pods
Aim the SSC1 pods on each side of the vehicle so the top of the beam pattern aligns with the cutoff line.
[IMAGE – Aiming diagram showing mounting height, four-inch drop, beam cutoff line, and 25-foot distance]
Aiming Step 7 – Tighten the SSC1 Pods
Tighten the 5/32-inch Allen bolts. Do not overtighten the bolts or use power tools to torque them down.
Questions About the Installation?
If you have any questions about installing the SSC1 SAE Type FBS Fog Light Kit for the 2021+ Ford Bronco Sport, contact us via our support page.
Where Can I Buy the SSC1 SAE Type FBS Fog Light Kit for the 2021+ Ford Bronco Sport?
If you're ready to upgrade your 2021+ Ford Bronco Sport with the SSC1 SAE Type FBS Fog Light Kit, visit DiodeDynamics.com or use our Dealer Locator to find a dealer near you.
Want to know more about Diode Dynamics products? Visit DiodeDynamics.com and subscribe to our newsletter for new product releases and more!
This Installation Guide is for the following SKUs: DD7174, DD7175
Share This Post