


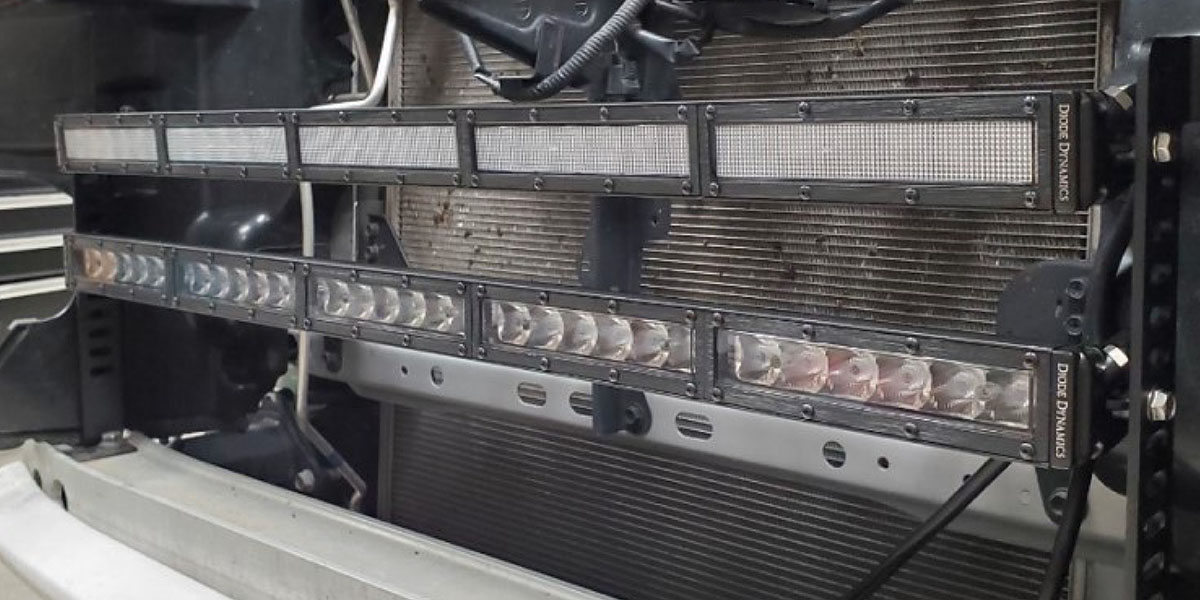
The Stealth LED Lightbar Kit for the 2014-2019 Toyota 4Runner provides a substantial increase in light output for your vehicle! This kit allows you to mount either one or two 30" Stage Series LED Light Bars into the lower grille opening of your 5th-gen Toyota 4Runner!
This Stealth LED Lightbar Kit features CAD-designed brackets that utilize factory mounting points to install on the 5th-gen Toyota 4Runner, retaining the clean OEM-like appearance of your factory grille. The brackets were designed with multiple mounting points, allowing you to customize the position of the single or dual Stage Series LED Light Bars behind the grille.
The following installation guide will provide you with detailed instructions on how to install the Stealth LED Light Bar Kit for the 2014-2019 Toyota 4Runner. Check out our installation video, or continue reading for step-by-step instructions below!
Table of Contents
Installation Video
Installation Tools
- 10mm Socket
- 14mm Wrench
- Flathead Screwdriver or Plastic Trim Removal Tool
Mounting Instructions
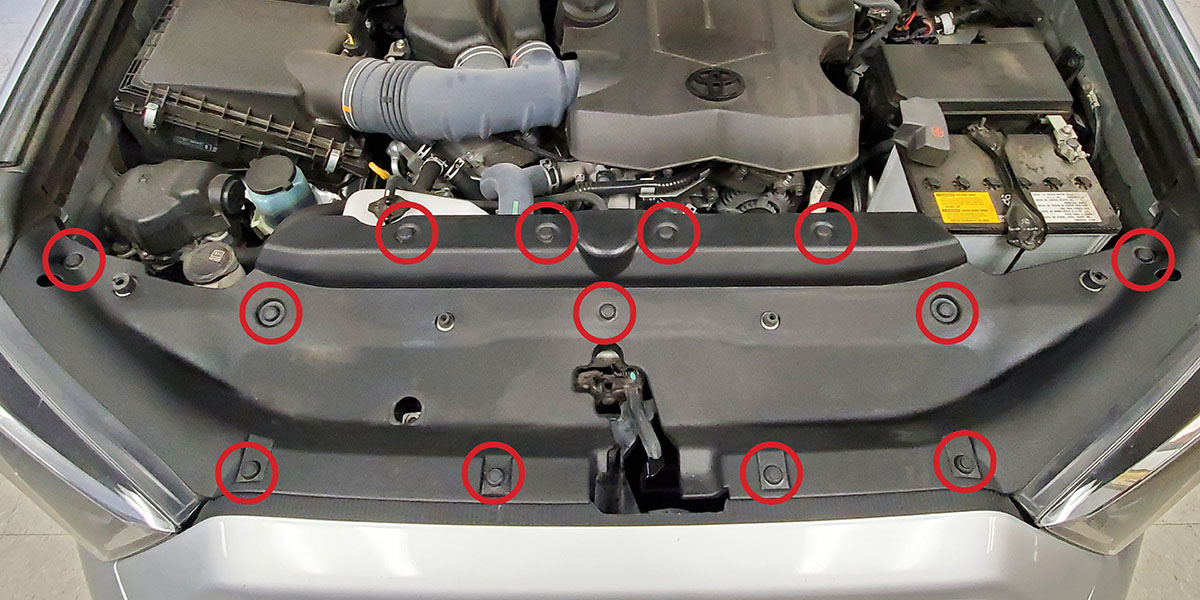
Step 1 - Remove Rivets.
Remove the thirteen push rivets holding the core support trim panel in place. Push down in the center of each push-rivet and then use a plastic trim removal tool or flathead screwdriver to extract the push-rivet.
Reset the push rivets upon removal by pushing the center section back through the top.
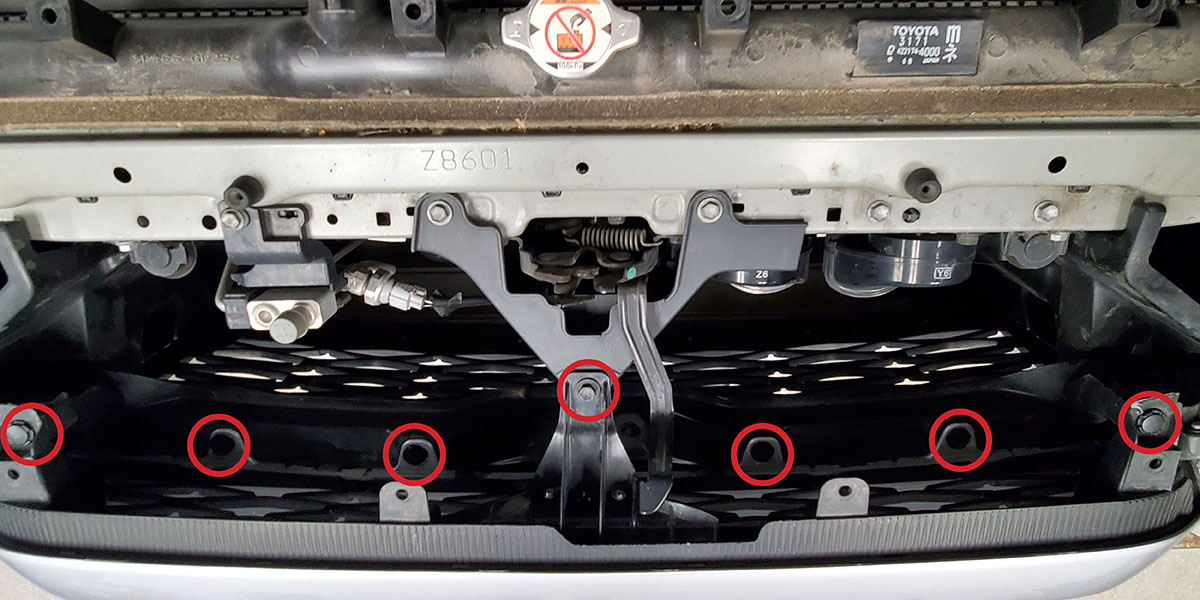
Step 2 - Remove Center Screw.
Using a trim removal tool or flathead screwdriver, remove the six plastic push rivets shown in the image below. Then using a 10mm socket, remove the screw in the center.
Step 3 - Disconnect Factory Fog Lights.
Using a 10mm socket, remove the six screws along the bottom of the bumper (passenger’s side shown in the picture below).
Then reach up from underneath the vehicle and disconnect the factory fog lights.
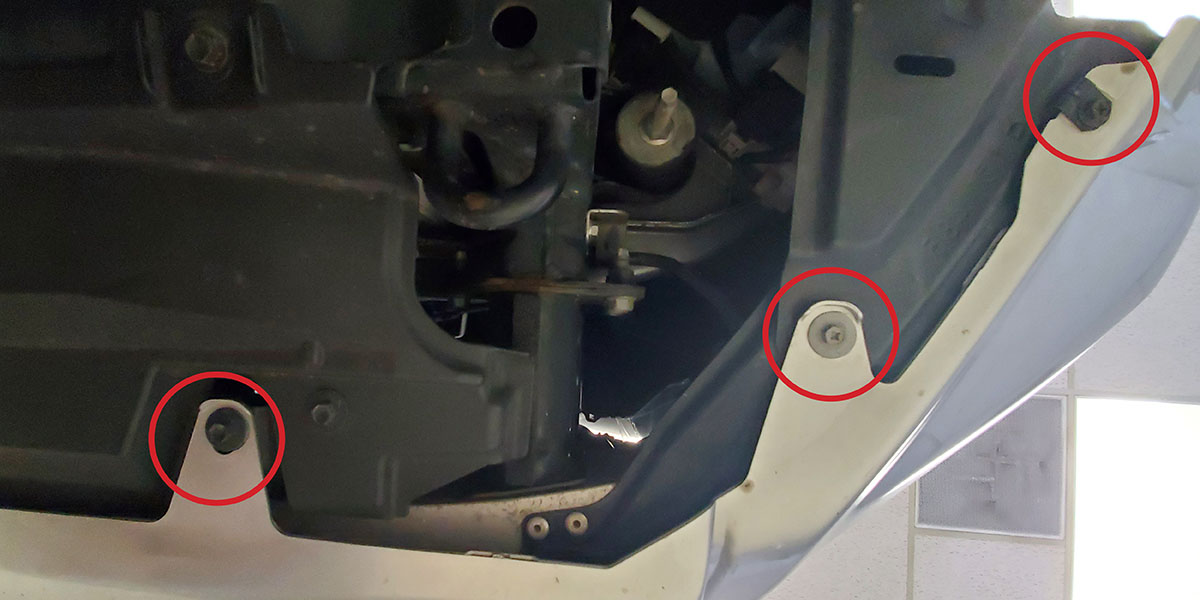
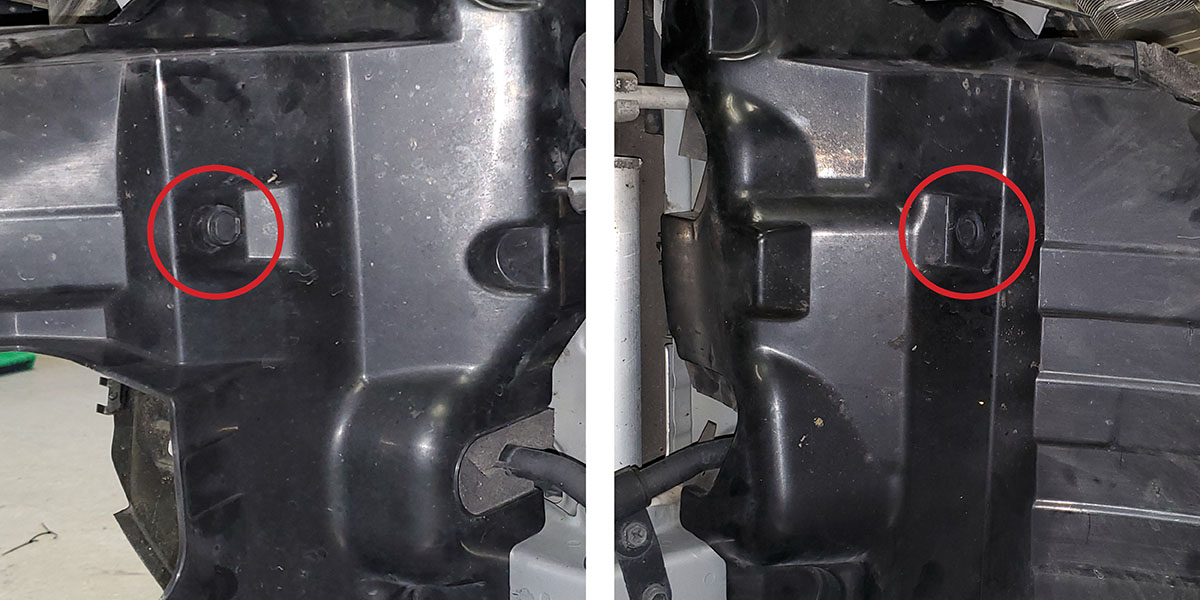
Step 4 - Remove Wheel Well Screws.
Using a 10mm socket, remove the three screws from the edge of the front bumper in the wheel well.
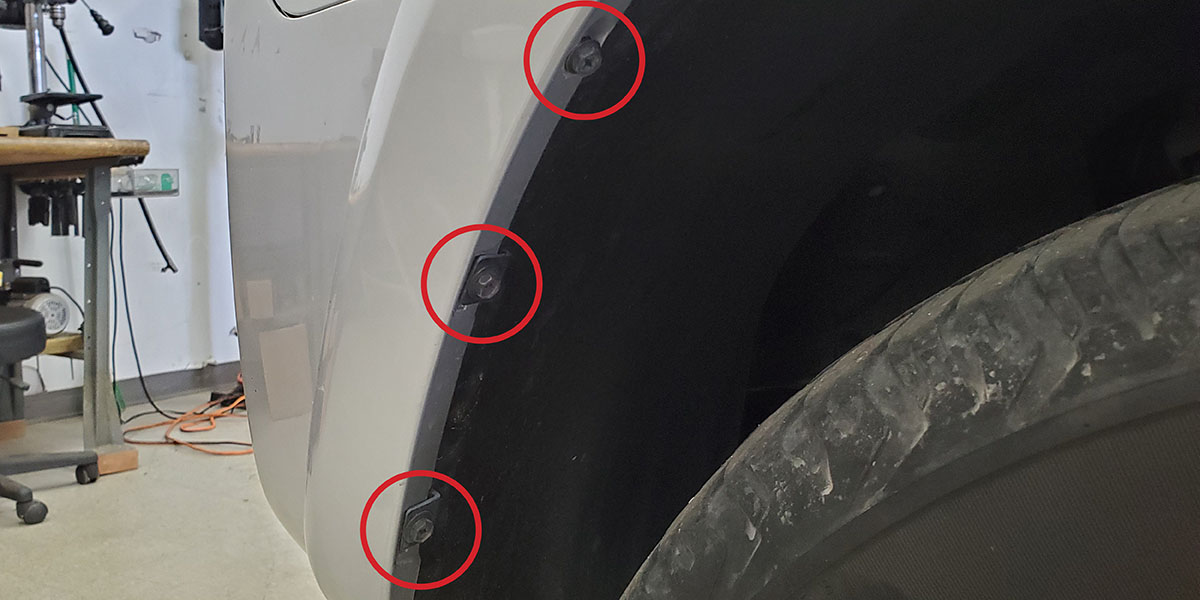
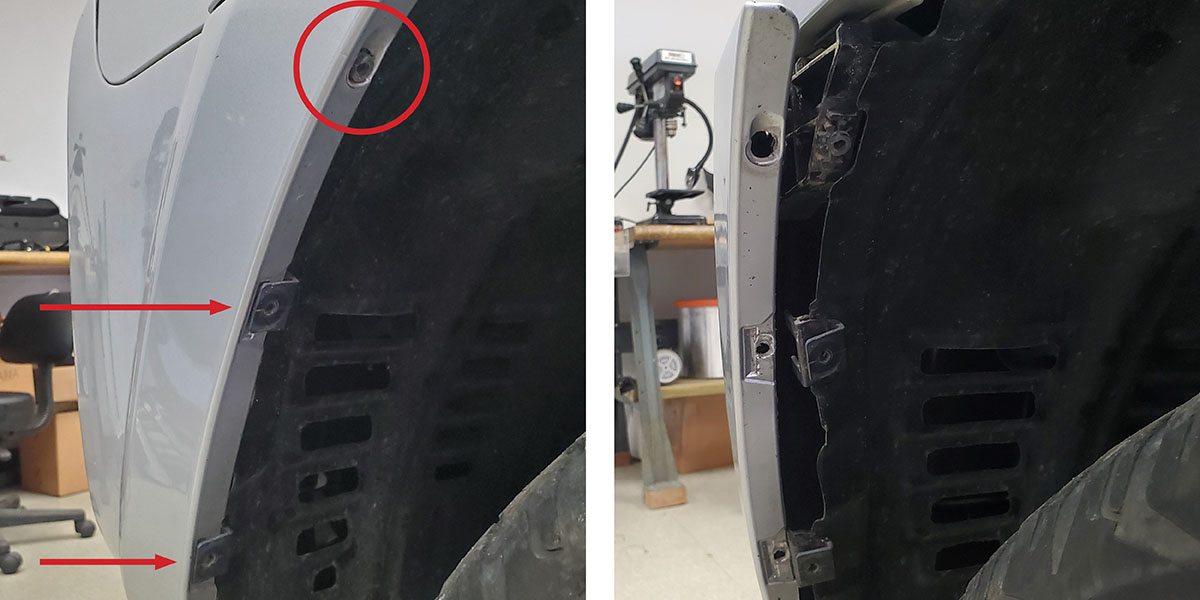
Step 5 - Pull Bumper Away From Fender.
Using a trim removal tool, pull the upper edge of the bumper off the snap feature, and slide the lower two screw-clips off the bumper. Then pull the corner of the bumper away from the fender. Repeat Step 5 on the other side of the bumper.
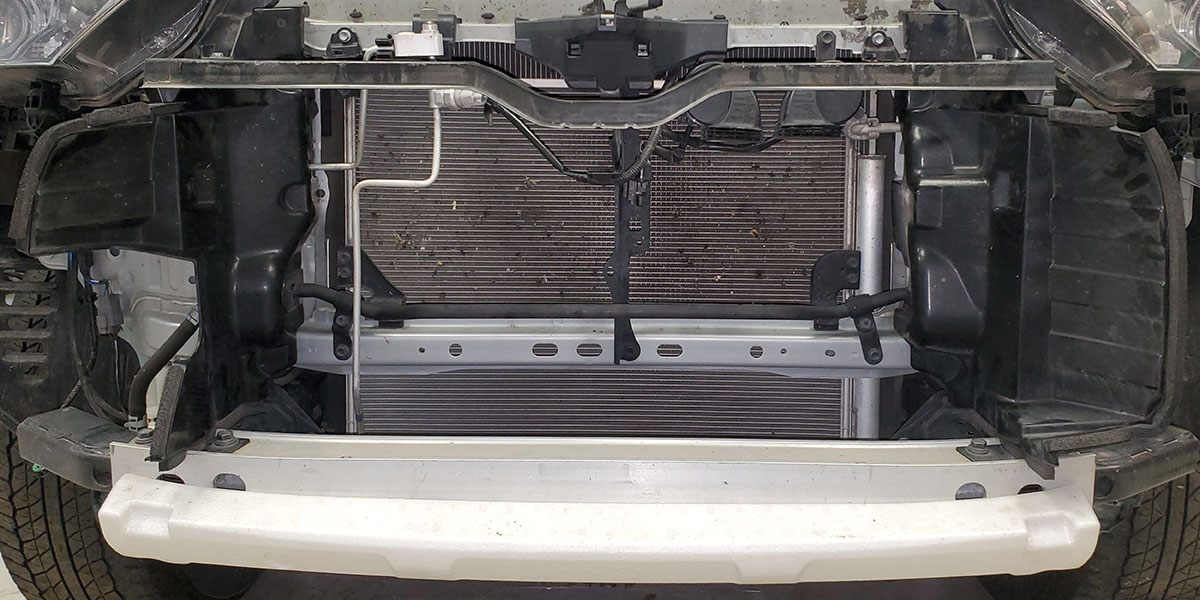
Step 6 - Remove the Bumper.
With help from a second person, pull the bumper straight forward to release snaps around the headlights and remove the bumper.
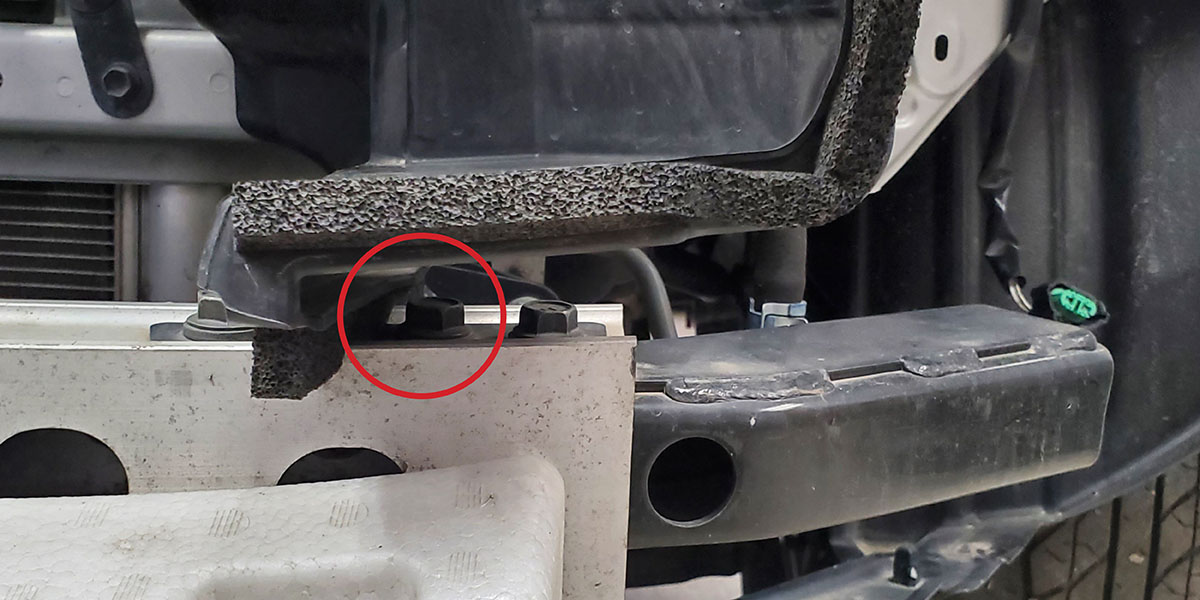
Step 7 - Remove Air Dam Push Rivets.
Using a trim removal tool, remove the two plastic push-rivets from the air dams. Do not remove the air dams.
Step 8 - Loosen Bumper Bar Bolt.
Using a 14mm wrench, loosen the second from the outboard bolt on the bumper bar (driver’s side shown in the picture below).
Step 9 - Position Bracket.
Slide the open slot of your new Diode Dynamics Toyota 4Runner SS30 brackets under the air dams to the bolts loosened in Step 8.
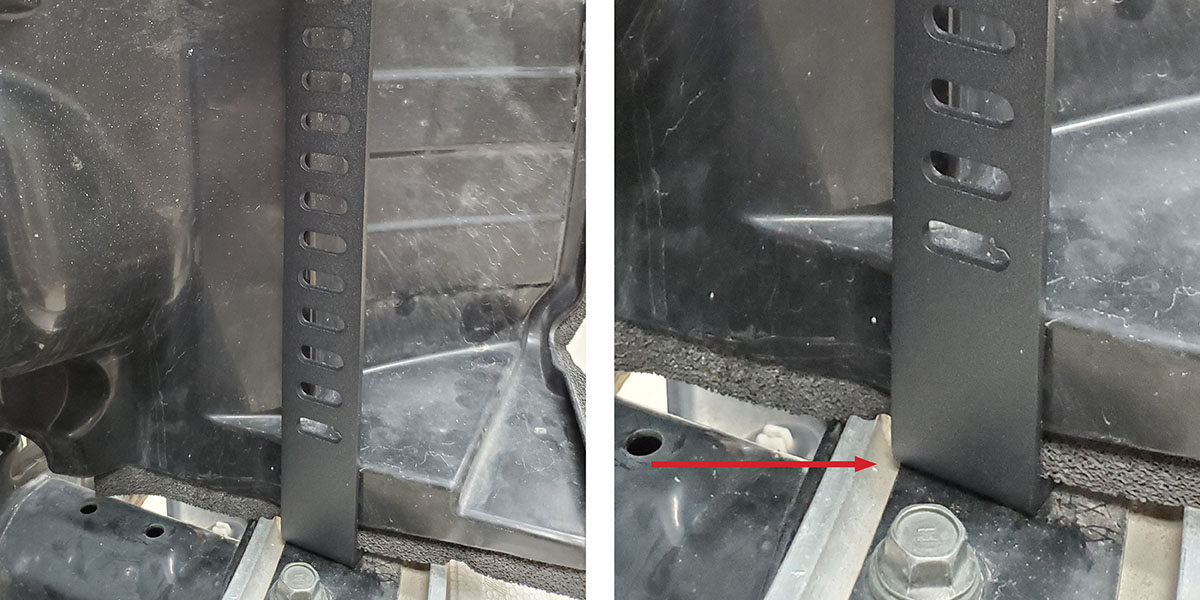
Step 10 - Secure Bracket.
Loosely secure the brackets to the air dams with the provided M6 screw, washer, and nut.
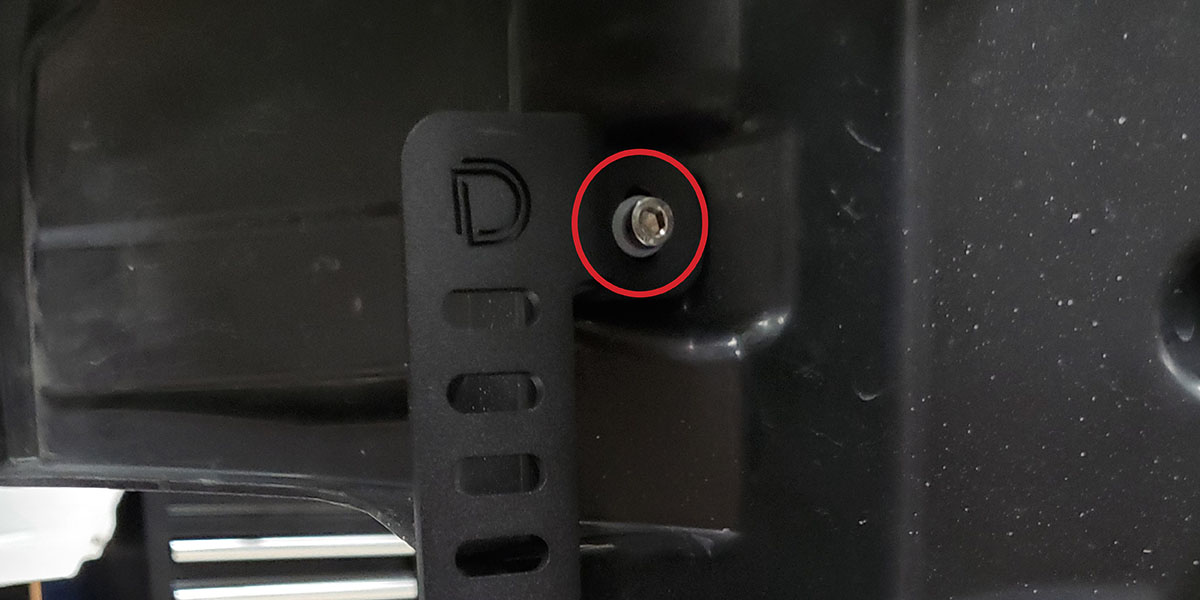
Step 11 - Install LED Light Bar.
Install your Stage Series 30” LED light bars in the brackets with the provided flanged-head M6 hardware. For two bars, we suggest installing in the 1st and 6th, or 1st and 7th slots from the top.
Then tighten down all hardware.
Wiring Instructions
The following instructions are for Toyota 4Runners with an Auxiliary Switch Bank. If you do not have the Auxiliary Switch Bank, use the included toggle switch adapter wire to route a switch. All power sources must be fused.
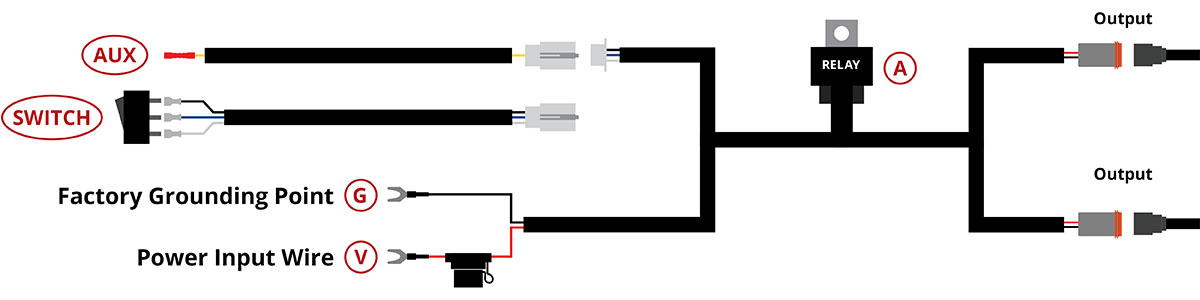
Step 12 - Determine Relay Location.
Determine a suitable location to mount the relay (A), near the battery or main power terminal.
Step 13 - Connect to Power.
Connect the red power input wire (V) to the positive battery/power terminal. Connect the black ground wire to the negative battery terminal or a factory grounding point (G).
Step 14 - Unplug Switch Wires.
At the white connector, unplug the switch wires from the harness, and connect the extra pigtail here instead. Using the butt connector at the end of the pigtail, crimp the yellow wire to an OEM Auxiliary Switch wire lead (AUX).
NOTE: Power will be drawn from the battery, so any OEM Auxiliary Switch wires can be used, regardless of the amperage rating.
Step 15 - Route Wires to LED Light Bar.
Route the output wire(s) to the LED light bar(s), avoiding any moving parts or direct contact with heat sources. Plug the output connector(s) into the LED light bar(s).
Step 16 - Check LED Light Bar Fitment.
Loosely push the bumper into place and check the LED light bar fitment. If contact occurs, move the light bars rearward in the slots.
Step 17 - Reinstall Bumper.
Reverse Steps 1-6 to reinstall the bumper and complete the installation.
Questions About the Installation?
If you have any questions or issues installing the SS30 Stealth Bumper LED Light Bar Kit for the 2014-2019 Toyota 4Runner, please contact us for further assistance.
Where Can I Buy an SS30 Stealth LED Light Bar Kit for the 2014-2019 Toyota 4Runner?
If you’re ready to upgrade your 2014-2019 Toyota 4Runner with an SS30 Stealth Bumper LED Light Bar Kit, you can purchase one by clicking here or using our dealer locator to find a dealer near you.
If you are looking to add additional Off-Road LED Lights to your Tundra, we have a variety of LED Light bars and Pod Light kits here!
Want to know more about Diode Dynamics products? Visit DiodeDynamics.com and subscribe to our newsletter for new product releases and more!
This Installation Guide is for the following SKUs: DD6759P, DD6760, DD6761, DD6762, DD6763, DD6764, DD6765, DD6766, DD6767.

Share This Post