














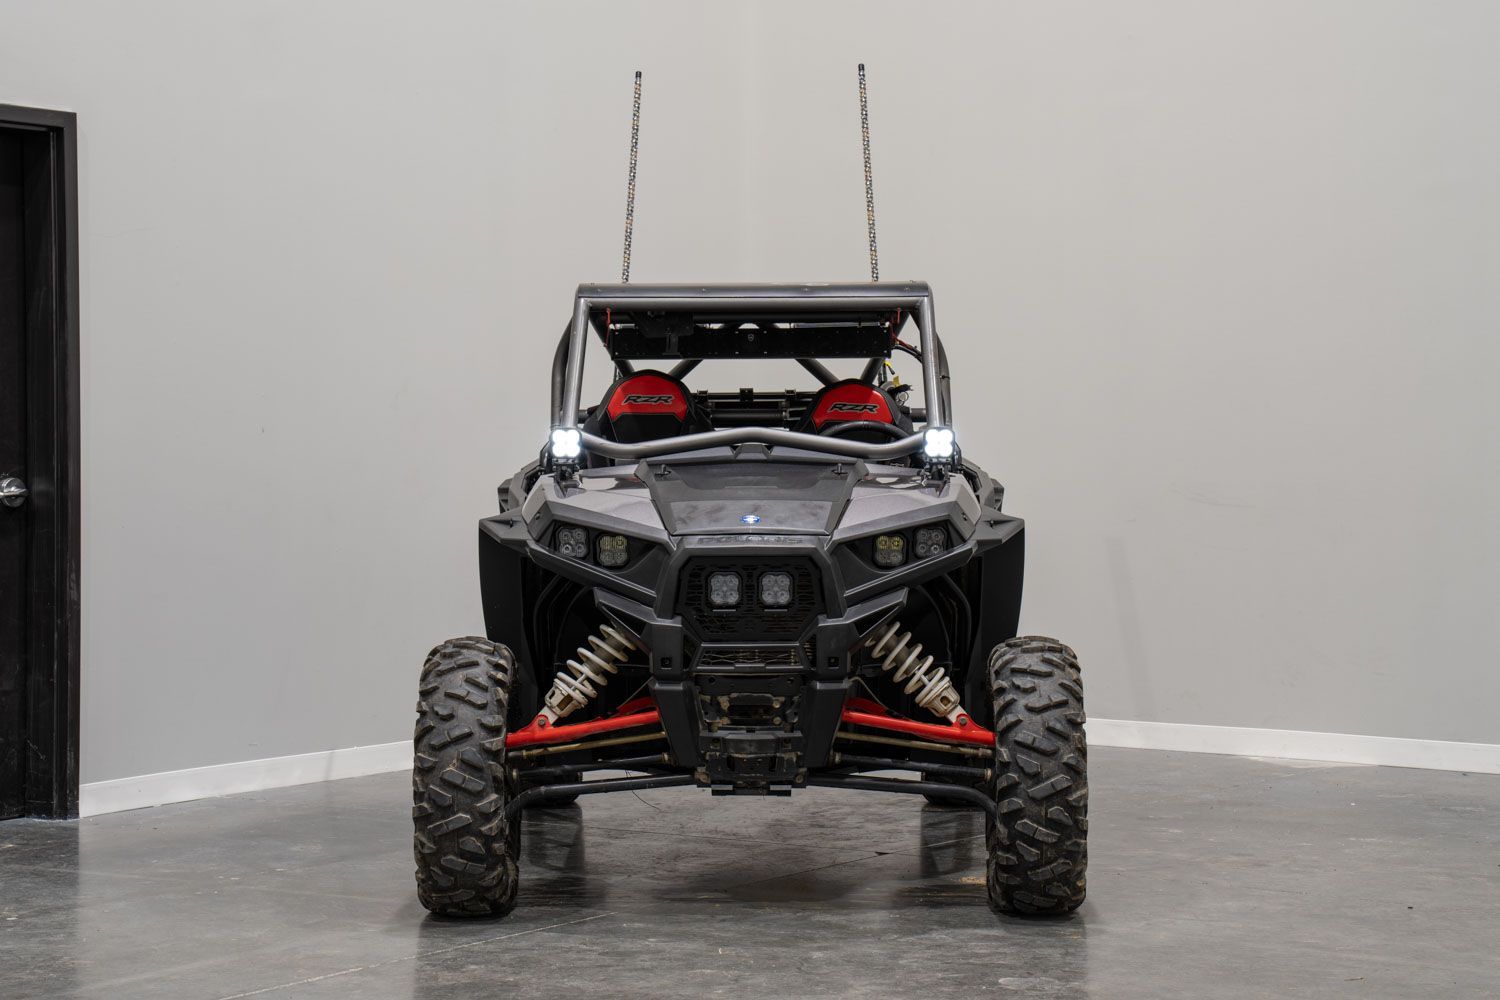
The Stage Series A-Pillar LED Pod Kit for the 2014-2018 Polaris RZR XP allows you to easily mount two SS3 or SS5 LED Pods to the A-Pillars of your UTV. This kit provides a custom off-road appearance and a powerful increase in light output for nighttime rides and better visibility in dusty conditions.
For kits equipped with SS5 LED Pods, the SS5 backlights feature eight selectable colors, including White, Red, Blue, Green, Purple, Yellow, Amber, and Teal. SS5 backlight programming and reset instructions are included below.
The following installation guide will provide you with detailed instructions on how to install the Stage Series A-Pillar LED Pod Kit for the 2014-2018 Polaris RZR XP. Check out our installation video or continue reading for step-by-step instructions below!
Table of Contents
Installation Video
Installation Tools
- Ratchet
- 10mm Socket
- 18mm Socket
- 13mm Wrench
- 18mm Wrench
- 5/32 Allen Key
Installation Instructions
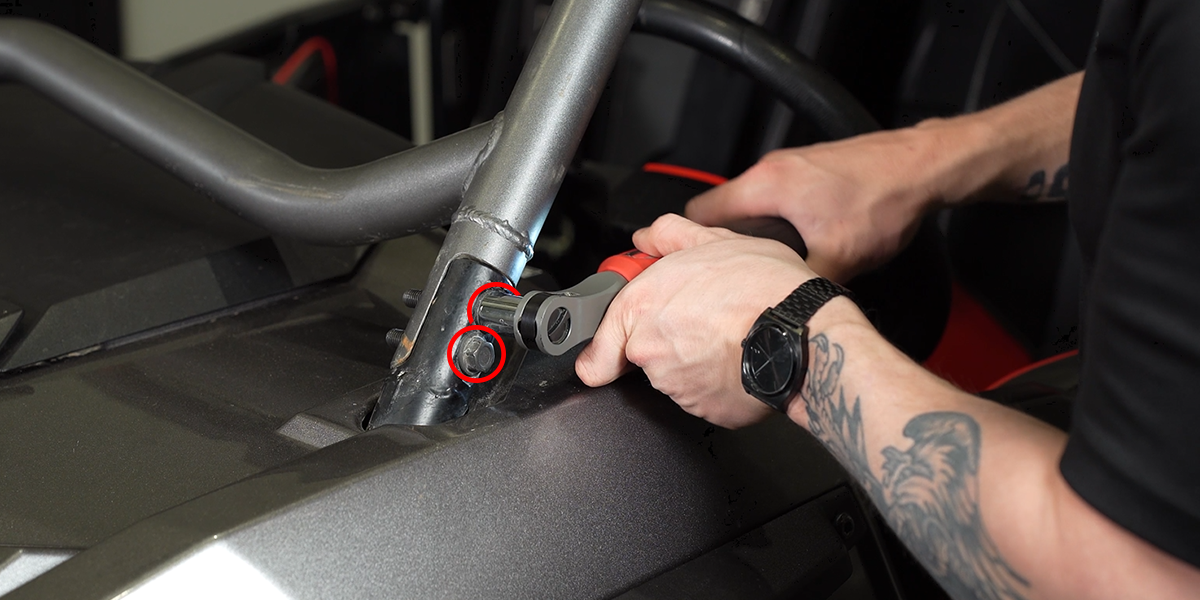
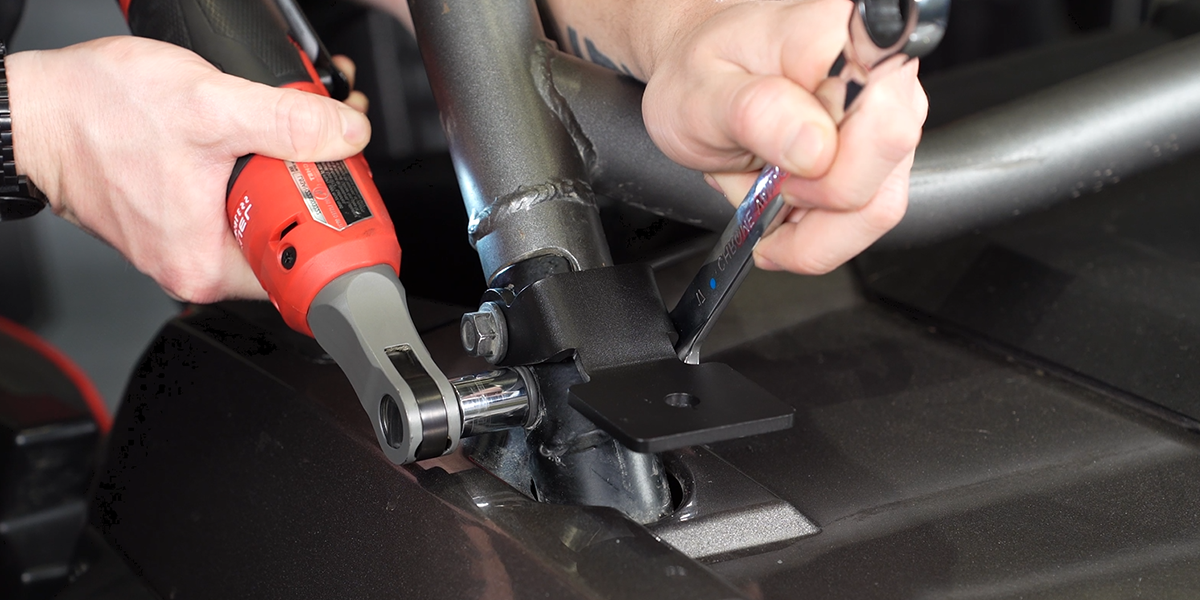
Step 1 - Remove A-Pillar Cage Bolts
Remove two (2) 18mm bolts using an 18mm socket on the driver side of the vehicle.
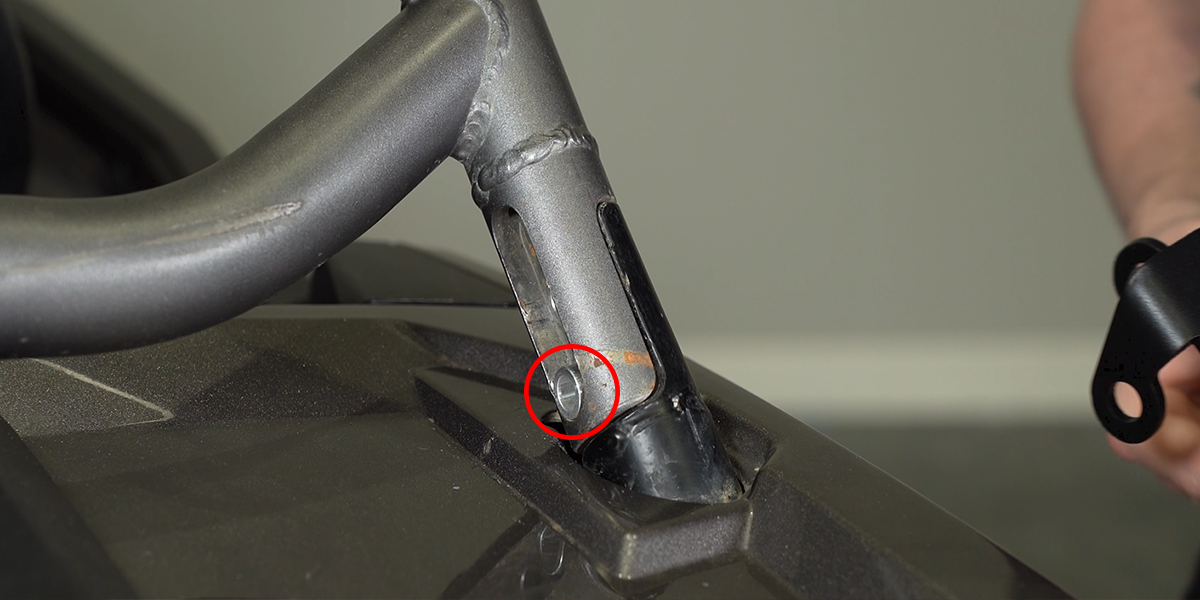
Step 2 - Install Included Spacer
Drop-in one (1) included spacer on the inside of the frame.
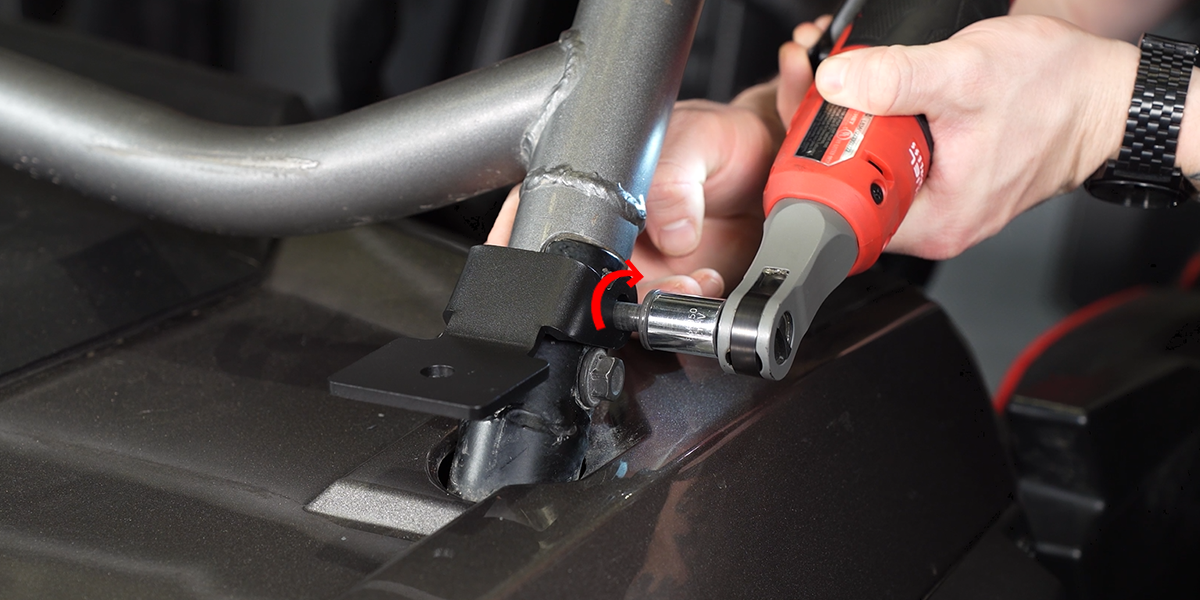
Step 3 - Install A-Pillar Bracket
Place the included bracket over the cage and secure it using the two (2) factory 18mm bolts previously removed.
Step 4 - Repeat on the Passenger Side
Repeat the same steps on the passenger side of the vehicle performed in steps 1-3.
Step 5 - Assemble Stage Series LED Pods
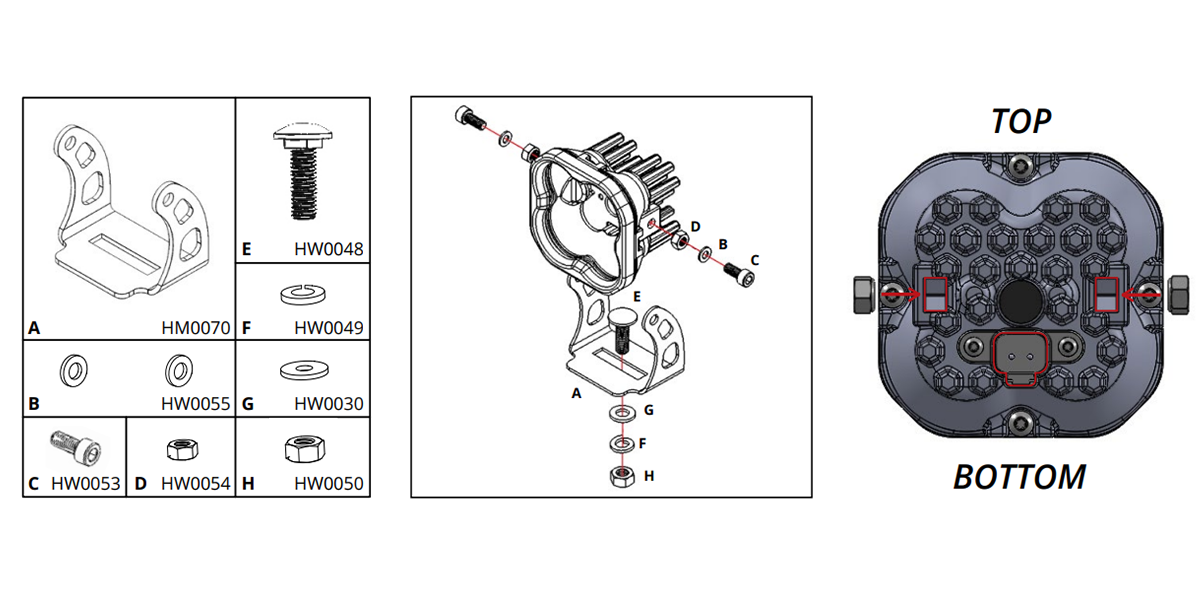
SS5 LED Pod - Installation Guide
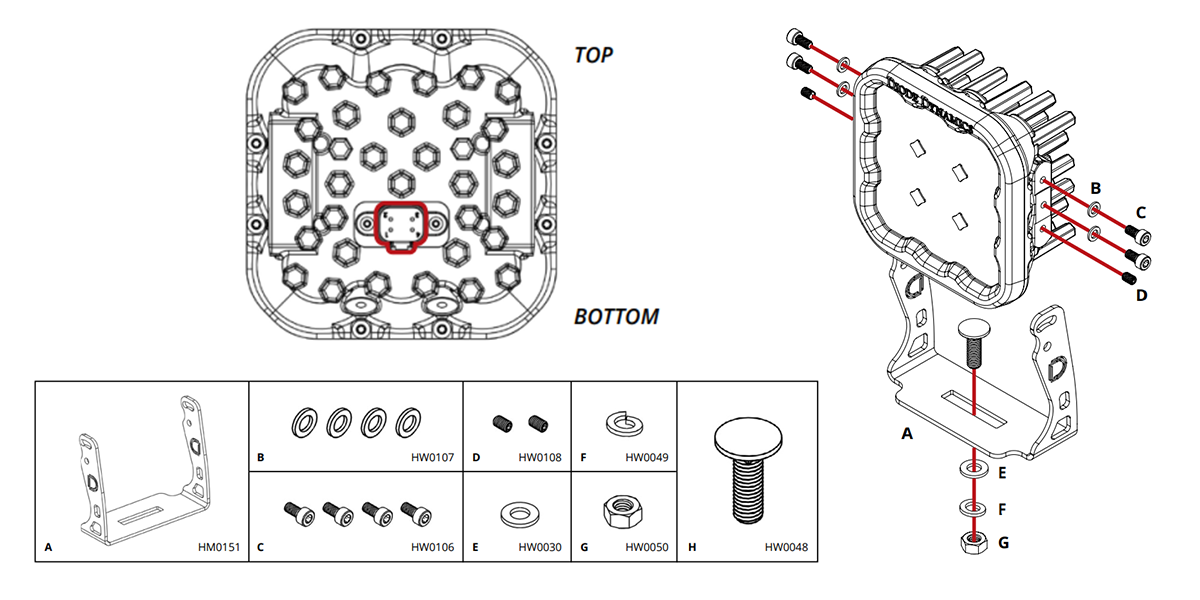
Step 6 - Install Stage Series LED Pods to A-Pillar Bracket
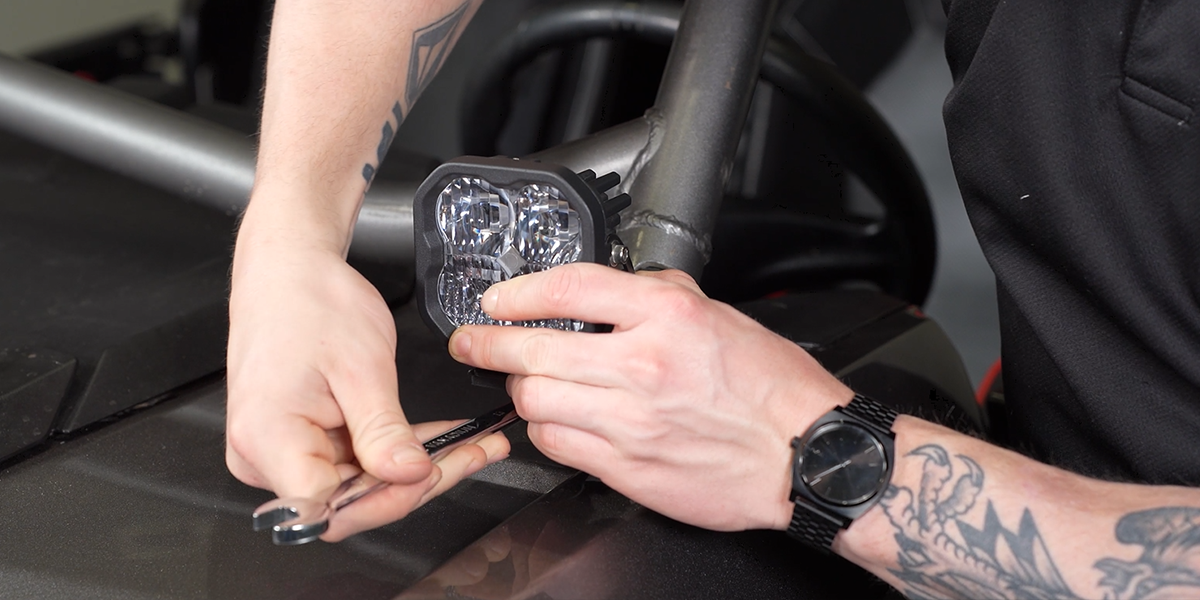
Place the pod on the a-pillar bracket and secure it by dropping the carriage bolt through the u-bracket and a-pillar bracket.
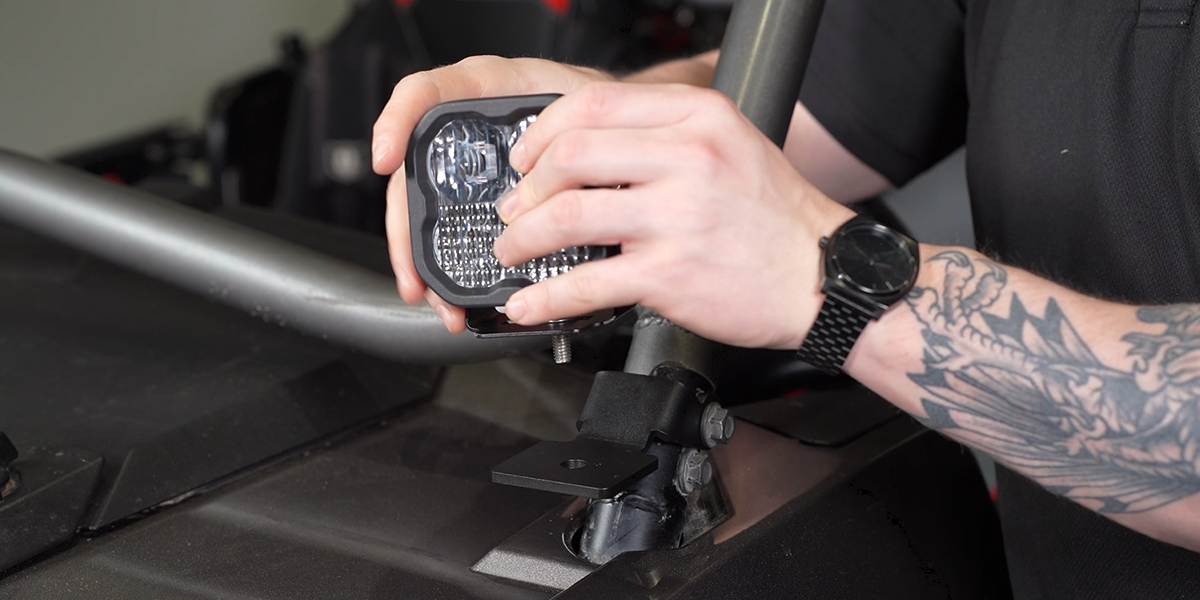
Then feed on our washer, lock washer, and fasten the nut with a 13mm wrench.
Step 7 - Adjust Aim / Secure Position
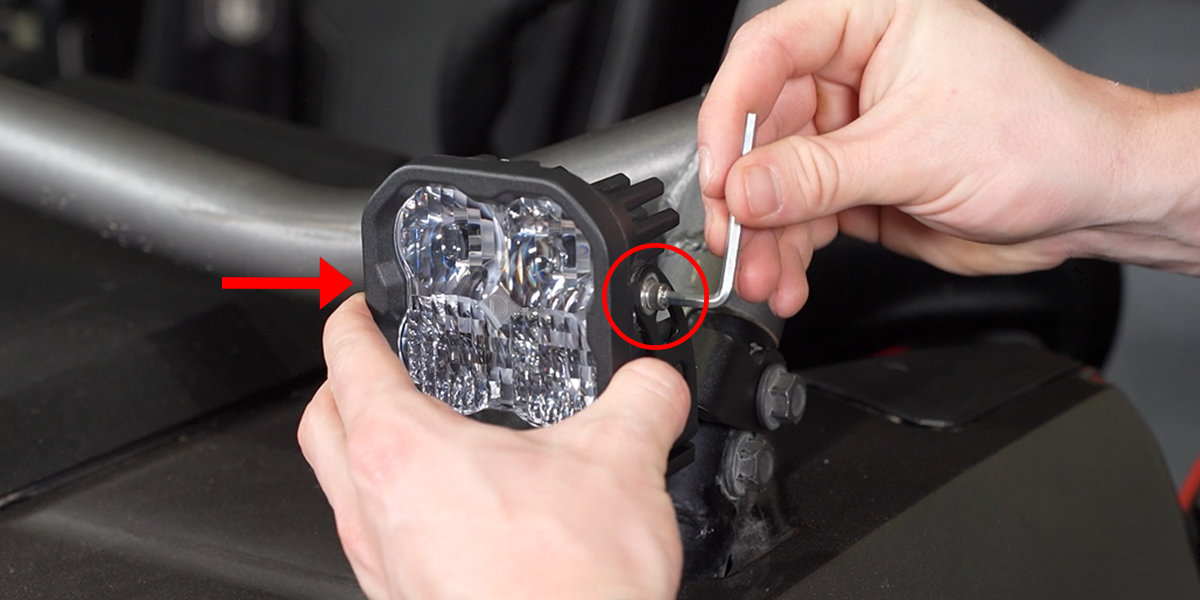
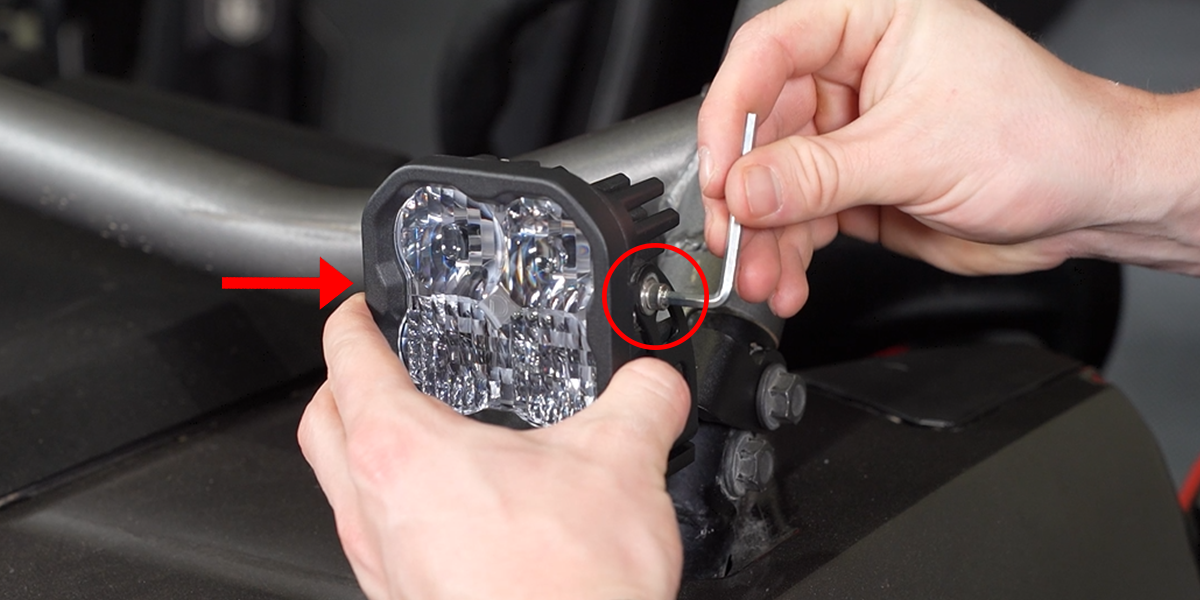
Tilt the pod up/down to adjust the aim to your preference and fasten the 5/32 bolt on the left and right side to secure the position.
Step 8 - Repeat on the Passenger Side
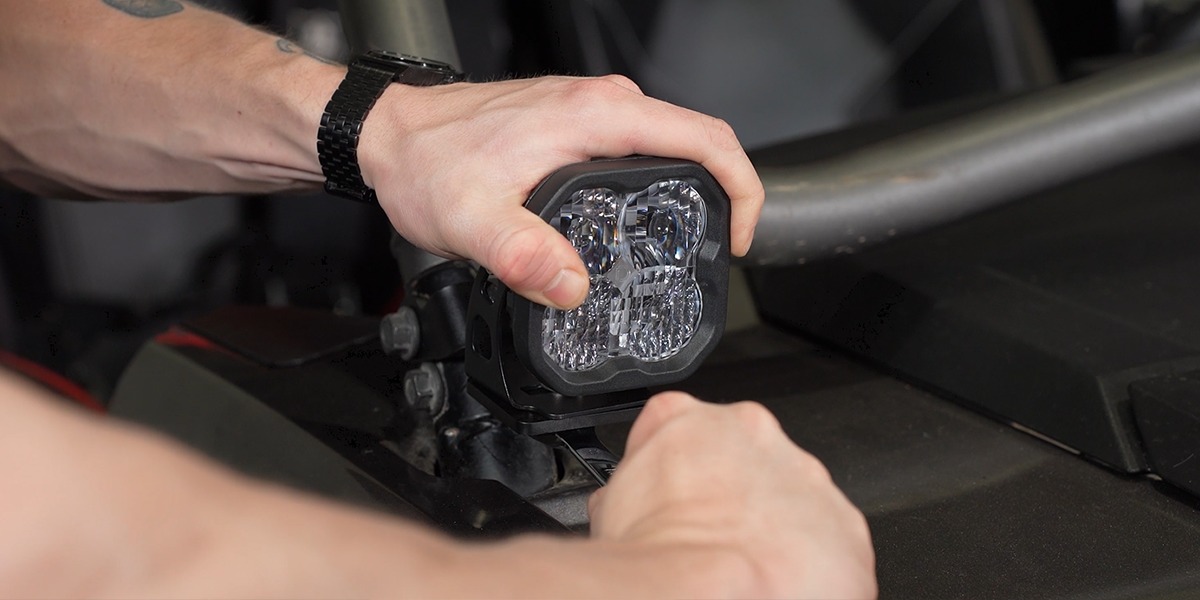
Repeat the same steps on the passenger side of the vehicle performed in steps 6-7.
Wiring Instructions
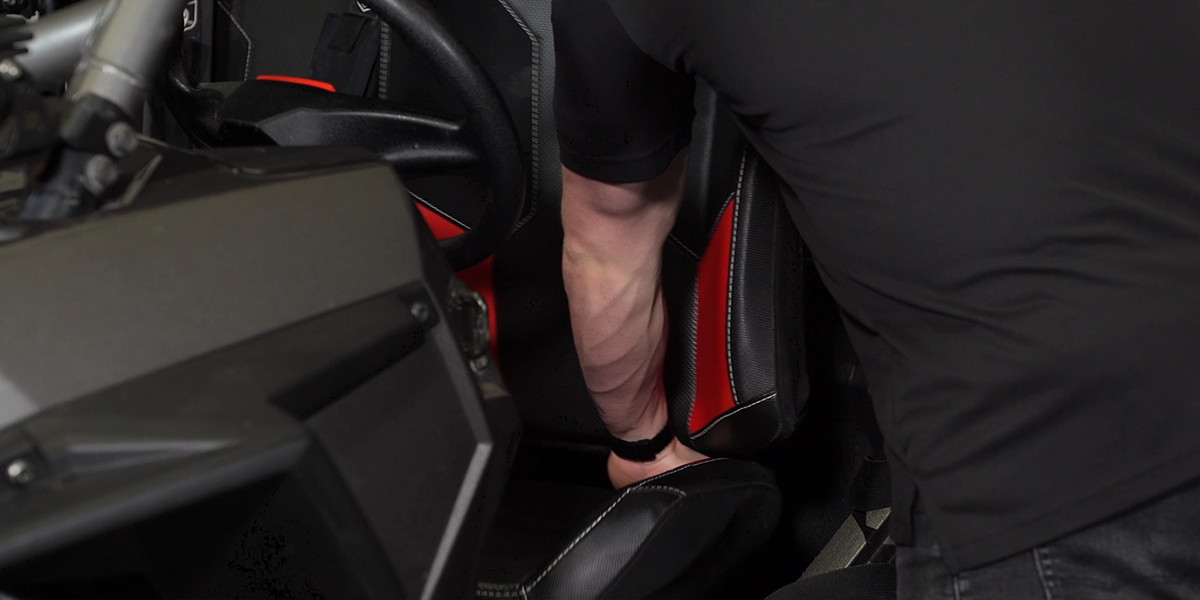
Step 9 - Removing Drivers Seat (Battery Access)
Reach in between the driver's seat to lift the release lever on the backside.
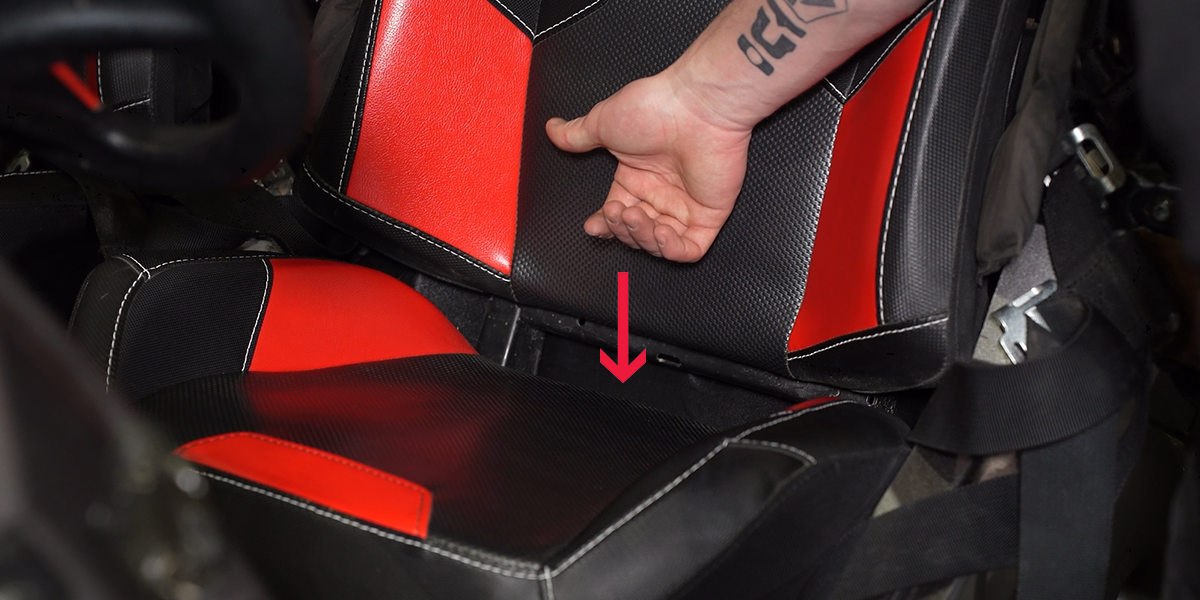
Then pull the seat forward, up, and out of the vehicle.
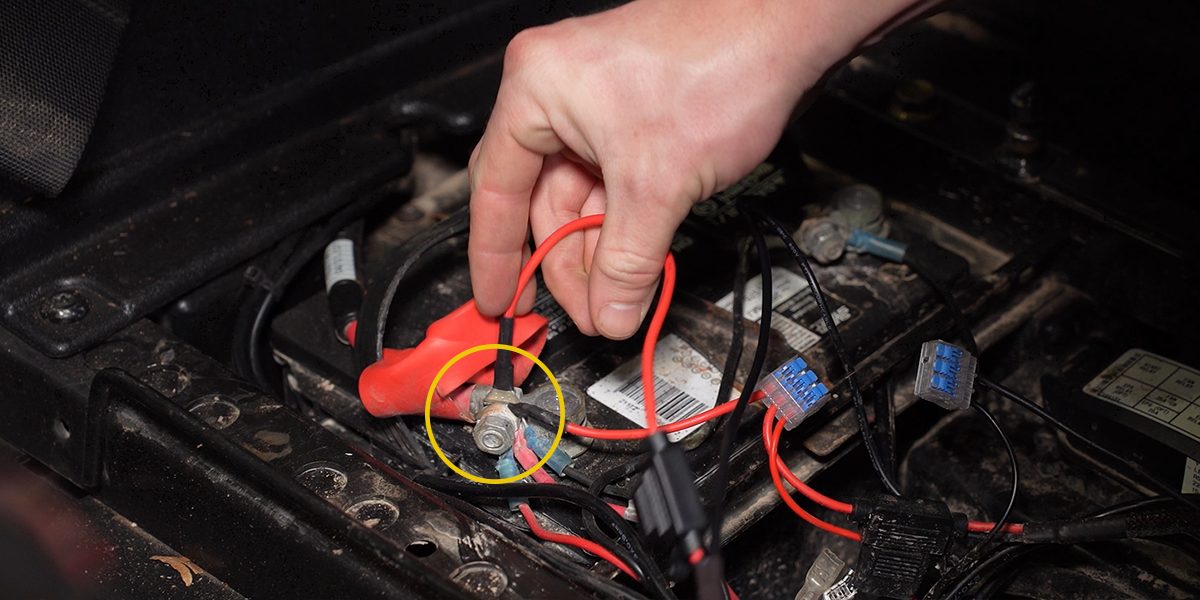
Step 10 - Connecting Wiring Harness to Battery
Use a 10mm socket to loosen the negative and positive terminals of our battery.
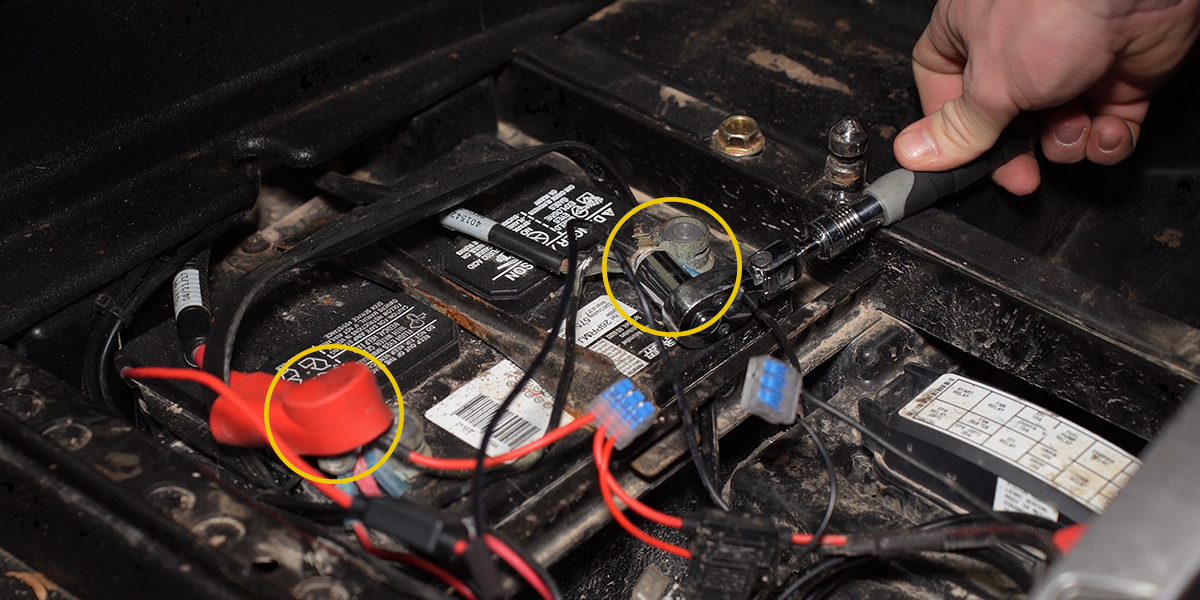
Slide the terminals of our included harness in place, and re-secure them.
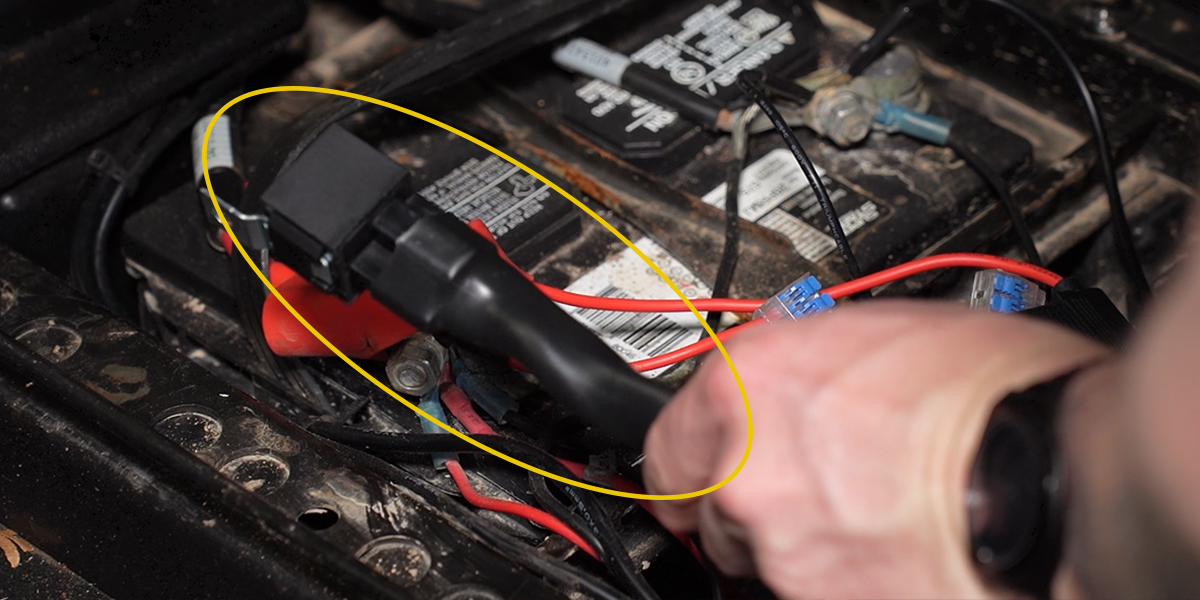
Now take the relay harness and mount it to the location of your choice or store it away under the seat.
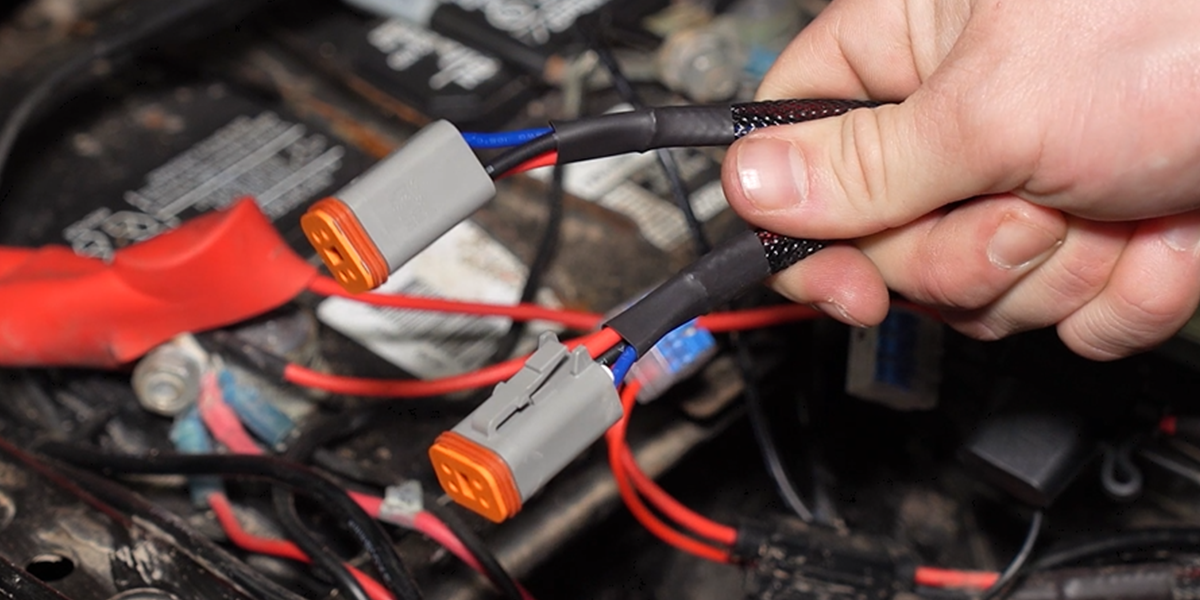
Step 11 - Routing DT Connectors
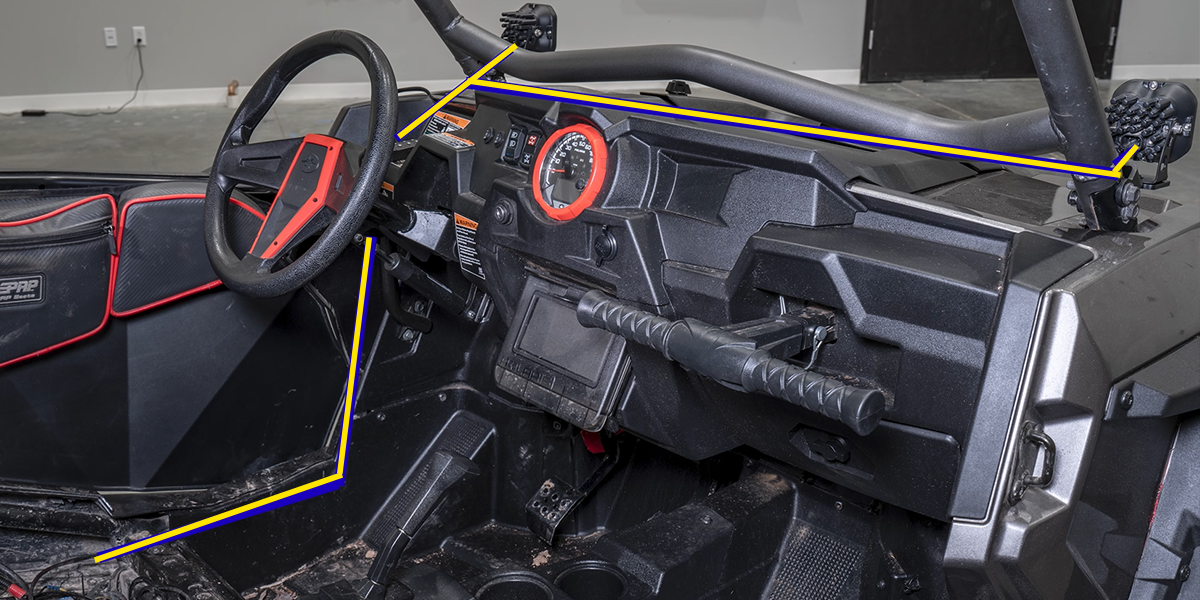
Take your two (2) 4-Pin DT Connectors and route them to your SS3 or SS5 LED Pods.
You can route the 4-Pin DT connectors to your preference, but we've provided an example diagram below for reference.
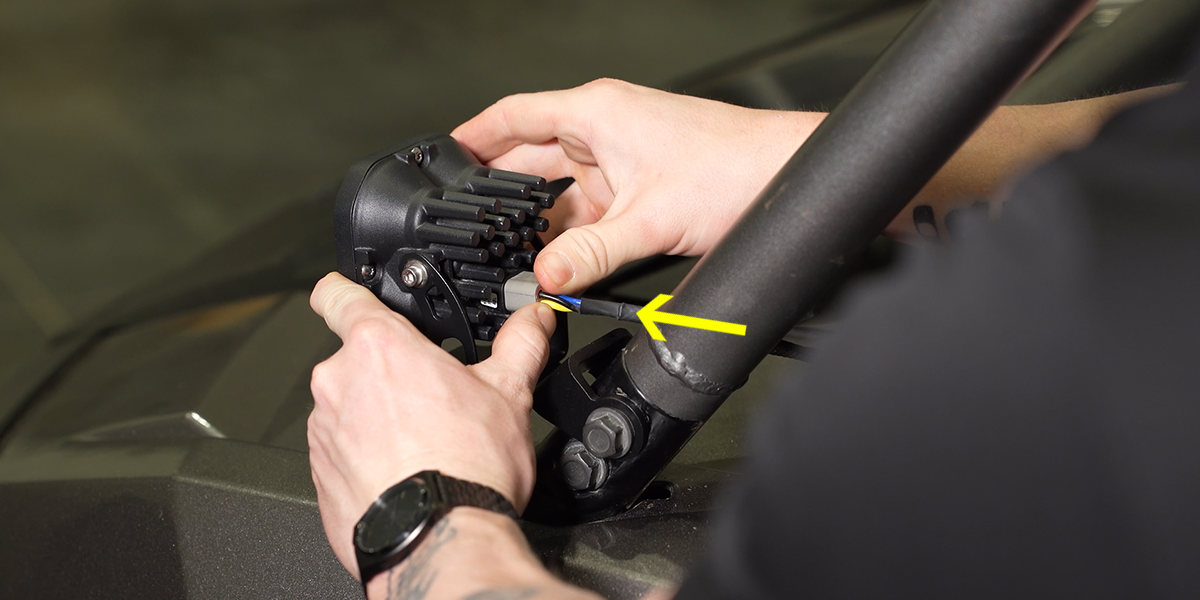
Step 12 - Plugging in DT Connectors
Take the 4-Pin DT connectors after routing them and plug them into the back of your SS3 or SS5 LED Pods on the driver and passenger side of the vehicle.
Step 13 - Mounting Toggle Switch
Mounting the toggle switch is based on the user. We've simply zip-tied ours under the dash due to this being a test vehicle. 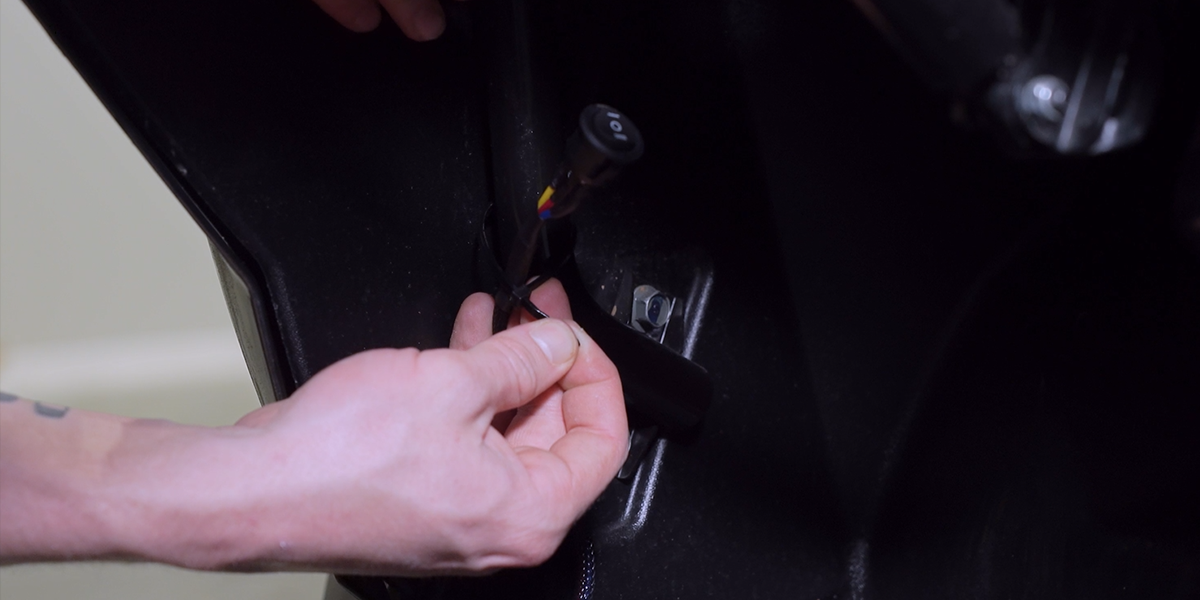
Users can connect to an aftermarket switch bank or drill and mount their toggle to the dash.
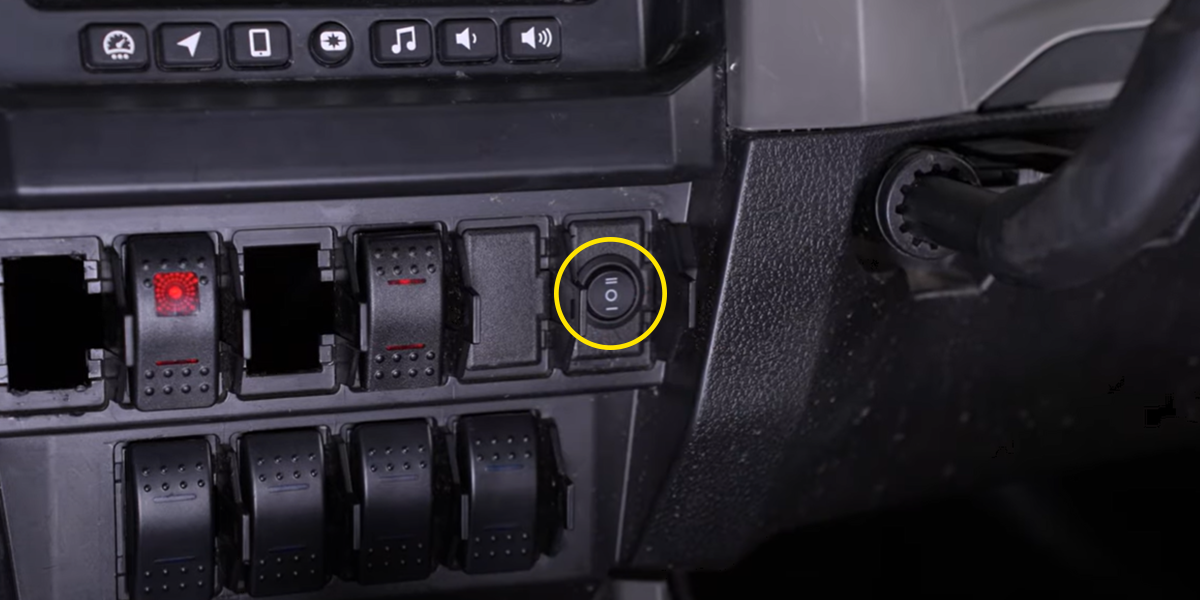
Install Rectangular Rocker Switch (Optional)
If desired, the included wiring harness can be controlled using the Diode Dynamics Rectangular Rocker Switch. To install the switch, disconnect the factory harness switch by unplugging it from the white connector on the switch lead. Connect the rectangular rocker switch directly to this connector.
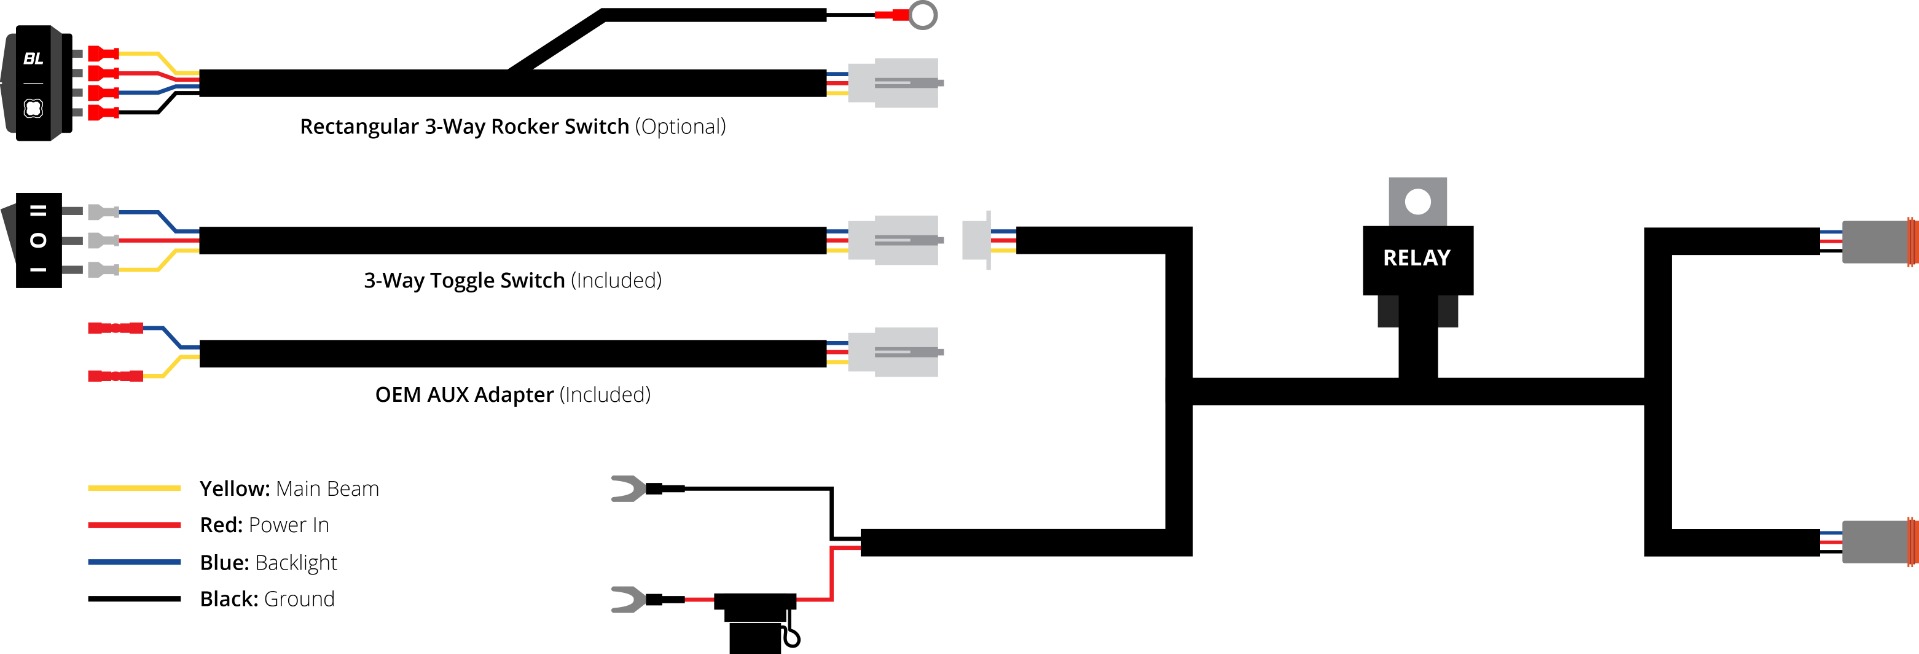
Route the switch wiring to your preferred mounting location and remove the factory switch blank from the dashboard or switch panel. Insert the rocker switch into the opening until it is fully seated.
The rocker switch features integrated backlighting and must be grounded for illumination. Attach the black wire with the ring terminal to a suitable chassis ground point on the vehicle.
Step 14 - Test for Function
With everything installed properly, you can test for function starting with the backlight feature.
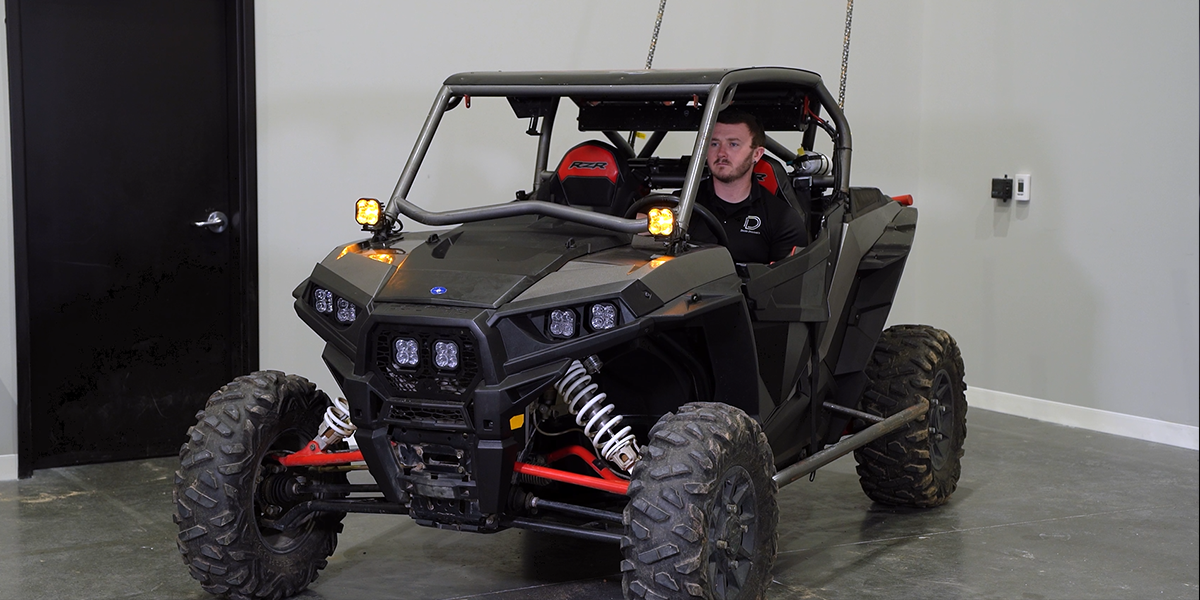
With the backlight functioning, you can test the main beam.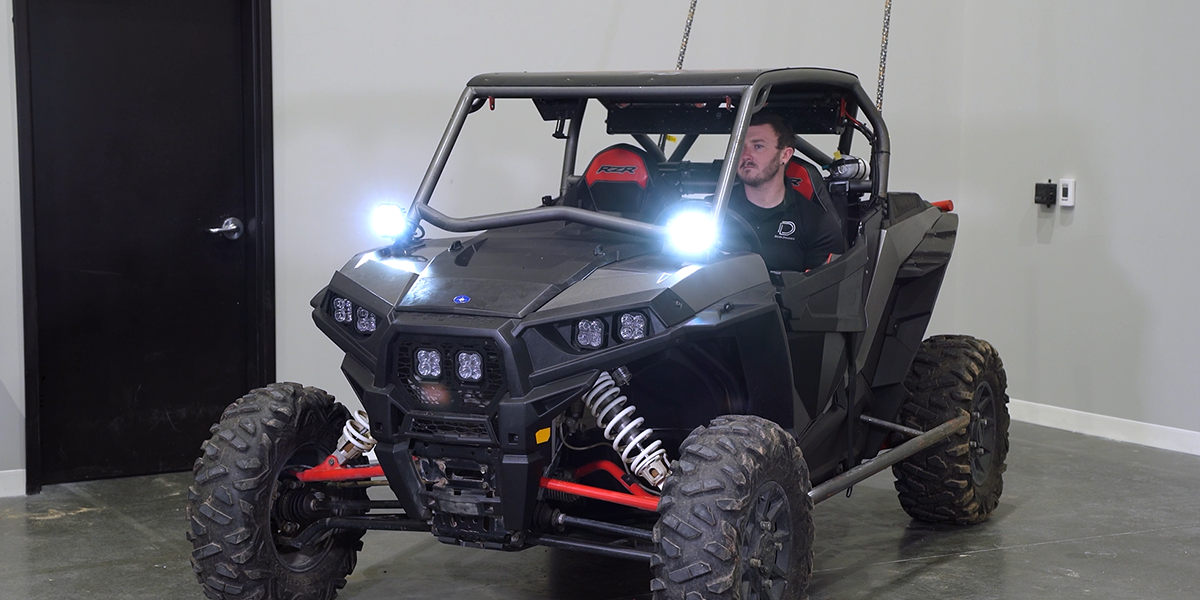
Step 15 - Aiming Adjustments
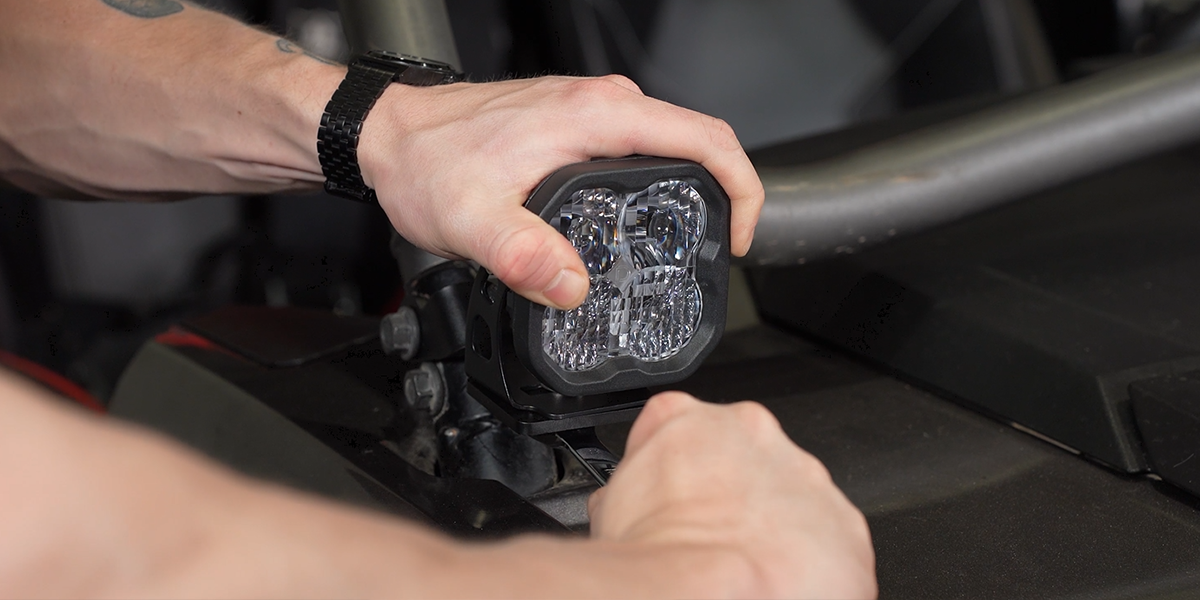
Finally, we can aim our Stage Series pods as you desire. We can rotate our pods left and right and tighten them down using a 13mm wrench.
Then we can tilt the pod up and down and secure it using a 5/32" allen key.
The installation is now complete. Enjoy your Stage Series A-Pillar LED Pod Kit for the 2014-2018 Polaris RZR XP!
SS5 Backlight Color Programming
The following programming instructions apply only to A-pillar kits equipped with SS5 LED Pods. SS5 LED Pods offer multiple backlight color options, including White (default), Red, Blue, Green, Purple, Yellow, Amber, and Teal.
- Start with all backlight power OFF.
- Cycle backlight power ON and OFF three times within three seconds, spacing each ON press about one second apart.
- After the third cycle, the backlight will enter programming mode.
- Continue cycling power at the same steady pace to scroll through the available colors.
- When the desired color is displayed, leave the backlight ON.
- After five seconds, the color will save automatically and exit programming mode.
- Turn power OFF.
The selected color will appear any time backlight power is applied during normal operation.
SS5 Backlight Color Reset
The following reset procedure applies only to A-pillar kits equipped with SS5 LED Pods. If the SS5 LED Pods become unsynchronized, perform the following reset procedure.
- Enter backlight programming mode by cycling power ON and OFF three times, using the same one-second timing.
- Continue cycling power through all available colors twice. This requires at least sixteen total power cycles.
- After all colors have displayed twice, the SS5 LED Pods will reset to White.
- Leave the backlight ON for five seconds to save the reset.
- Program the desired backlight color as outlined above if needed.
Questions About the Installation?
If you have any questions or issues installing the Stage Series A-Pillar LED Pod Kit for the 2014-2018 Polaris RZR XP, please contact us for further assistance.
Where Can I Buy A 2014-2018 Polaris RZR XP Stage Series A-Pillar Pod Kit?
If you’re ready to upgrade your 2014-2018 Polaris RZR XP with the Stage Series A-Pillar Pod Kit, you can purchase one by clicking here or by using our dealer locator to find a dealer near you.
Want to know more about Diode Dynamics products? Visit DiodeDynamics.com and subscribe to our newsletter for new product releases and more!
This Installation Guide is for the following SKUs: DD7845P, DD7846, DD7848, DD7850, DD7852, DD7847, DD7849, DD7851, DD7853
Share This Post