


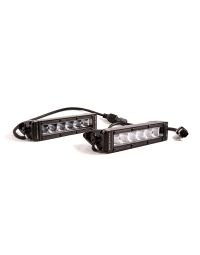
The 2013-2018 Dodge Ram Standard SAE/DOT LED Lightbar Kit adds powerful forward-facing illumination while maintaining a clean, factory-style appearance. This installation guide will provide you with detailed instructions on how to install the 2013-2018 Dodge Ram Standard SAE/DOT LED Lightbar Kit. Continue reading for step-by-step instructions below!
Table of Contents
- Installation Tools
- Installation Instructions
- Questions About the Installation?
- Where Can I Buy the 2013-2018 Dodge Ram Standard SAE/DOT LED Lightbar Kit?
Installation Tools
- 18mm deep well socket
- 10mm wrench
- 10mm socket with extension (Standard bracket kit only)
- Dremel rotary tool (Sport/Express bracket kit only, optional)
Installation Instructions
Before you begin: This kit includes different prep steps depending on trim/package. Follow the section below that matches your bracket kit (Standard vs. Sport/Express). After that, the instructions resume at Step 3 for both kits.
Step 1 — Remove factory bezel bolts (Standard bracket kit only)
Using a 10mm socket, remove the four (4) bolts holding the bezel to the bumper.

Step 2 — Remove factory bezel (Standard bracket kit only)
Remove the bezel from the bumper. The bezel will not be used again. Repeat Steps 1–2 for the other side of the vehicle.

Step 1 — Modify trim panel (Sport/Express bracket kit only)
Remove the trim panel and take it to a soft working area. Using one of the lightbars, determine where you need to make your cuts on the factory trim panel. Next, use a Dremel to cut an opening on both sides of the panel.

Step 2 — Reinstall trim panel (Sport/Express bracket kit only)
Ensure your cut is large enough for the lightbar to fit through. Then reinstall the trim panel back onto the truck.

Step 3 — Remove bumper support nuts
Remove the two (2) 18mm nuts on the backside of the bumper support and set them aside.

Step 4 — Install bracket on bumper support
Feed your lightbar bracket through the opening in the bumper, looping the ends around the bolts on the bumper support. Ensure the longer arm of the bracket is towards the center of the vehicle. Hand-tighten the nuts on the bracket to hold it in place for the next step.

Step 5 — Attach lightbar to bracket
Secure the lightbar to the bracket and hand-tighten with the included screws.

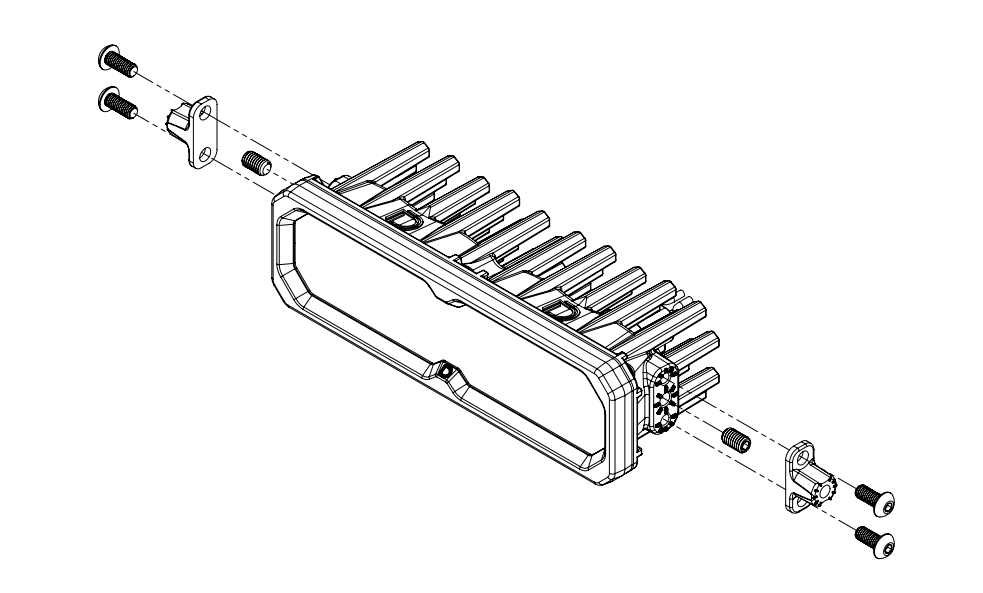
New Stage Series Lightbars — Mounting Adapter Bracket
New Stage Series Lightbars include a mounting adapter bracket that allows them to work with existing mounting brackets used across current kits. This adapter ensures proper fitment without requiring a redesigned bracket.
If your kit includes this adapter, it must be installed onto the lightbar before attaching the lightbar to the main mounting brackets.
Install the included set screws in the center mounting position on both sides of the lightbar. Then, attach the adapter to the lightbar using the included Torx screws in the top and bottom mounting holes. Once the adapter is secured, use the supplied hex bolt to mount the lightbar to the main mounting bracket as normal.
Step 6 — Adjust height and fully tighten
Adjust the lightbar to your desired height, then fully secure using an 18mm socket.

Step 7 — Test and aim
Test thoroughly and aim the light bar in the desired direction before tightening all mounting hardware. Please check your local laws and regulations for aiming, installation, and applicability.

The installation is now complete. Enjoy your new 2013-2018 Dodge Ram Standard SAE/DOT LED Lightbar Kit!
Questions About the Installation?
If you have any questions about installing the 2013-2018 Dodge Ram Standard SAE/DOT LED Lightbar Kit, contact us via our support page.
Where Can I Buy the 2013-2018 Dodge Ram Standard SAE/DOT LED Lightbar Kit?
If you're ready to upgrade your 2013-2018 Dodge Ram with the 2013-2018 Dodge Ram Standard SAE/DOT LED Lightbar Kit, visit DiodeDynamics.com or use our Dealer Locator to find a dealer near you.
Want to know more about Diode Dynamics products? Visit DiodeDynamics.com and subscribe to our newsletter for new product releases and more!
This Installation Guide is for the following SKU: DD8859, DD8605, DD8609, DD6012, DD8861, DD8607, DD8611, DD8860, DD8606, DD8610, DD6013, DD8862, DD8608, DD8612, DD6015, DD8864, DD8866, DD8865, DD8867, DD8613, DD8615, DD8614, DD8616, DD8617, DD8619, DD8618, DD8620, DD6016, DD6017, DD6019, DD8858, DD8863

Share This Post