


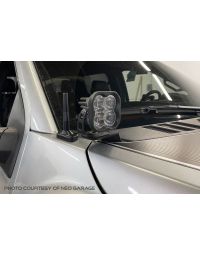
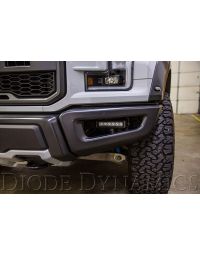
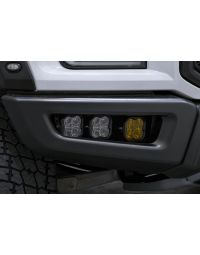
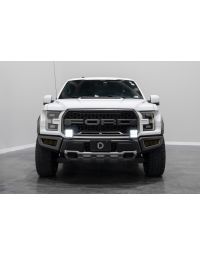
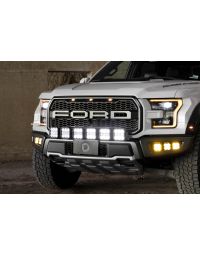
The Diode Dynamics SS3 LED Fog Light Kit for the 2017–2020 Ford Raptor is a complete, vehicle-specific solution designed to deliver road-legal fog lighting, integrated backlight illumination, and powerful off-road output. This kit utilizes custom-designed brackets and factory mounting points for a secure, OEM-style installation.
This guide walks through the installation process for mounting the SS3 fog light brackets, installing the pods, routing wiring, and properly aiming the fog lights.
Table of Contents
- Installation Tools
- Installation Instructions
- Fog Light Aiming Instructions
- SmartSelect Programming
- Questions About the Installation?
- Where Can I Buy This Kit?
Installation Tools
- 8mm socket
- 10mm socket
- 13mm socket
- Ratchet and socket extension
- 4mm Allen key
Time Required: Approximately 1–2 hours.
Installation Instructions
Step 1 – Loosen factory bumper hardware
Using a 13mm socket, loosen the factory bumper mounting screw. Do not fully remove the screw. Next, remove the adjacent 13mm screw completely.

Step 2 – Loosen strut mounting hardware
Using an 8mm socket, loosen the screw on the strut mounting point without fully removing it. Then remove the adjacent strut screw completely.

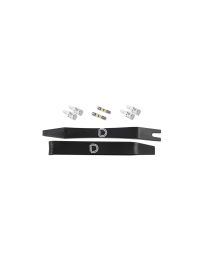
Step 3 – Install the fog light bracket
Slide the fog light bracket between the bumper and the support. Using the factory mounting point, reinstall the original 13mm screw and hand-tighten only.

Step 4 – Secure the bracket to the strut
Slide the other side of the bracket between the strut and the bumper. Using the included M6 hardware, install the bolt and hand-tighten only.

Step 5 – Tighten all mounting hardware
Once the bracket is properly aligned, tighten all previously loosened and hand-tightened fasteners to fully secure the bracket.
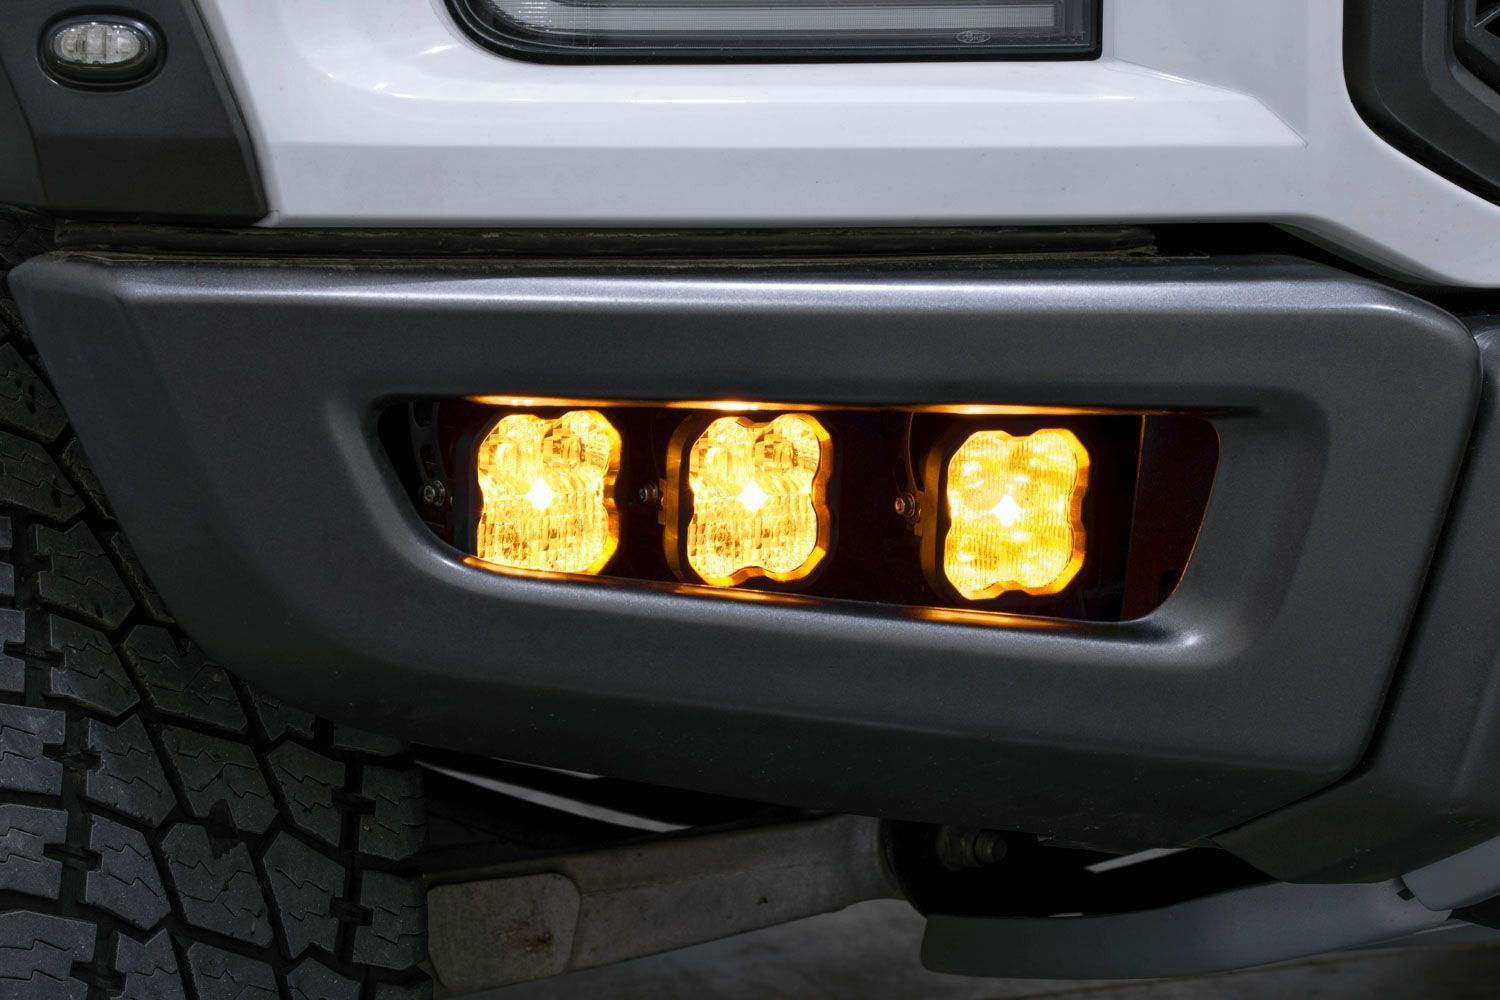
Step 6 – Mount the SS3 pods
Using the included hardware, attach your SS3 pods to the included bracket. Then attach it to the bracket on the vehicle as shown. Ensure all mounting hardware is secure while allowing slight adjustment for final aiming.

Step 7 – Route and connect wiring
Route the wiring harnesses following factory wire paths and avoiding hot or moving components. The included harness allows switching between road-legal fog lights, ambient backlight illumination, and off-road lighting using either the supplied 3-way switch or the factory upfitter switches.
Secure all wiring and verify proper connections before proceeding.


Fog Light Aiming Instructions
Step 8 – Aim the fog lights
Park the vehicle on a level surface 25 feet from a wall or garage door. Measure the distance from the ground to the center of the SS3 pods and mark this height on the wall using tape.
Add a second strip of tape four inches below the mounting height to create the fog light cutoff line.
Loosen the 5/32” Allen bolts on each side of the SS3 pods just enough to allow adjustment. Aim the pods so the top of the beam pattern aligns with the cutoff line, then retighten the bolts to complete the installation.
Note: Do not overtighten or use power tools when tightening the adjustment bolts.
SmartSelect Programming
If your SS3 Fog Light Kit includes dual-color LED Pods, SmartSelect technology allows you to switch the main beam between white and yellow using your factory fog light controls. Single-color kits do not include SmartSelect programming and can skip this section.
Dual-color SS3 LED Pods are set to the white main beam from the factory. To change the main beam color, turn the fog lamps off and back on two times within three seconds. The next time the fog lamps are turned on, the main beam will change from white to yellow.
Repeat this process to continue switching between the white and yellow main beam colors. After two complete color cycles, the lamps will reset to the factory-default white main beam.
Questions About the Installation?
If you have any questions about installing the Diode Dynamics SS3 LED Fog Light Kit for 2017–2020 Ford Raptor, contact us via our support page.
Where Can I Buy the SS3 LED Fog Light Kit?
If you're ready to upgrade your Ford Raptor with the Diode Dynamics SS3 LED Fog Light Kit, visit DiodeDynamics.com or use our Dealer Locator to find a dealer near you.
Want to know more about Diode Dynamics products? Visit DiodeDynamics.com and subscribe to our newsletter for new product releases and more!
This Installation Guide is for the following SKUs: DD6363, DD6364, DD7360, DD6365, DD6366, DD7361

Share This Post