


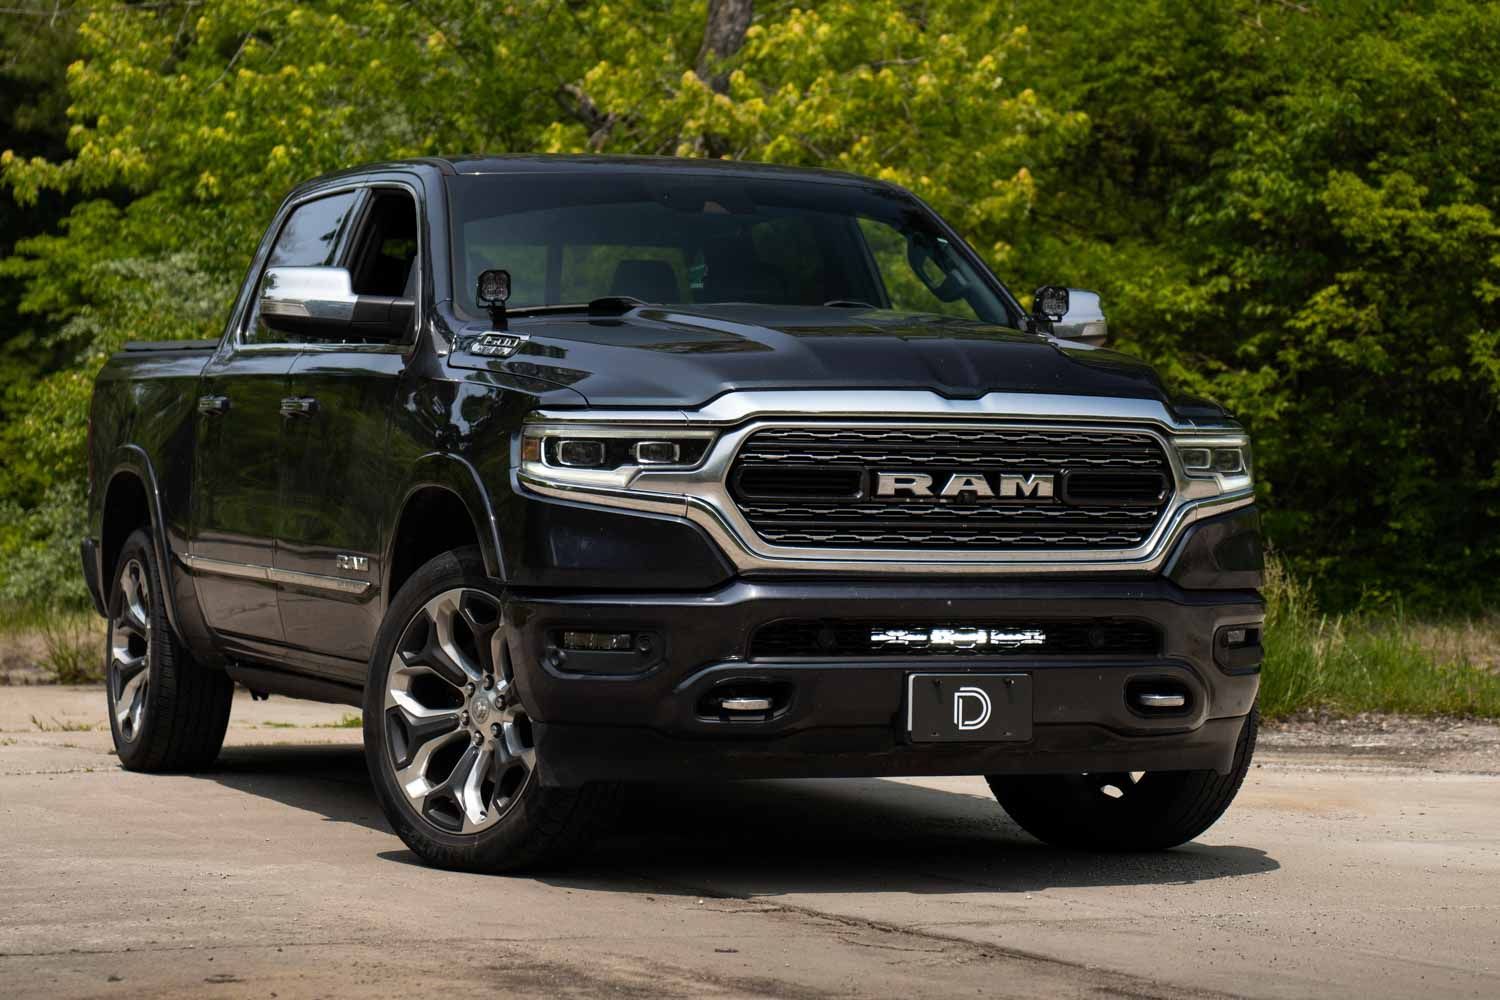
The Stealth LED Light Bar Kit for the 2019-2023 Ram 1500 from Diode Dynamics allows you to easily mount an 18" LED light bar in the factory lower grille opening. The following installation guide will provide you with detailed instructions on how to install the SS18 LED Light Bar Kit for the 2019-2023 Ram 1500. Keep reading for step-by-step instructions!
Table of Contents
Installation Tools
- 1/4" & 3/8" Ratchets
- 8mm Shallow Socket
- 10 & 13mm Sockets
- Wire Cutters
- Metal Pry Tool
- Plastic Trim Removal Tool
Mounting Instructions
Note: The cover behind the vented grille must be removed for installation. If your truck uses a solid lower grille, you will need to retrofit a vented lower grille for proper installation.
Step 1 - Remove Splash Shield.
If equipped, remove the plastic splash shield from underneath the engine bay area of the vehicle.
If the vehicle is equipped with a vented lower plastic grille, proceed to Step 6. If the vehicle is equipped with a solid lower plastic grille, proceed to Step 2.
Step 2 - Disconnect Parking Sensors.
If the vehicle has parking sensors, disconnect the factory harnesses on both the passenger and driver sides of the grille. These harnesses are accessible from the underside of the vehicle.
Note: If you're removing the parking sensors, note their installed placement before removal. Improper reinstallation of the factory parking sensors can cause the sensors to malfunction.
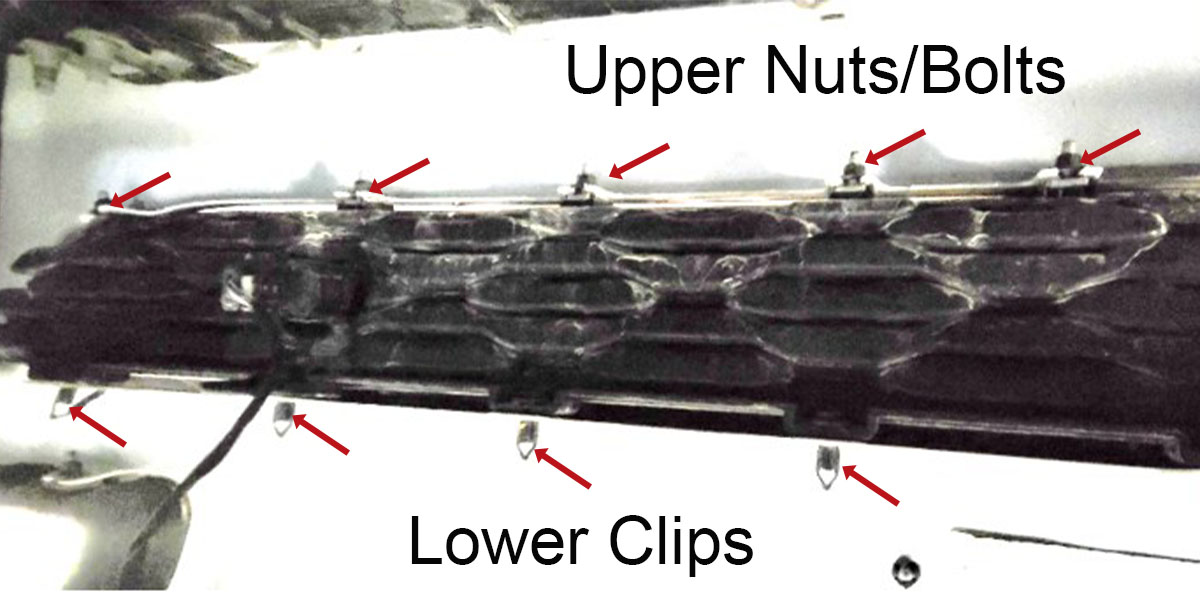
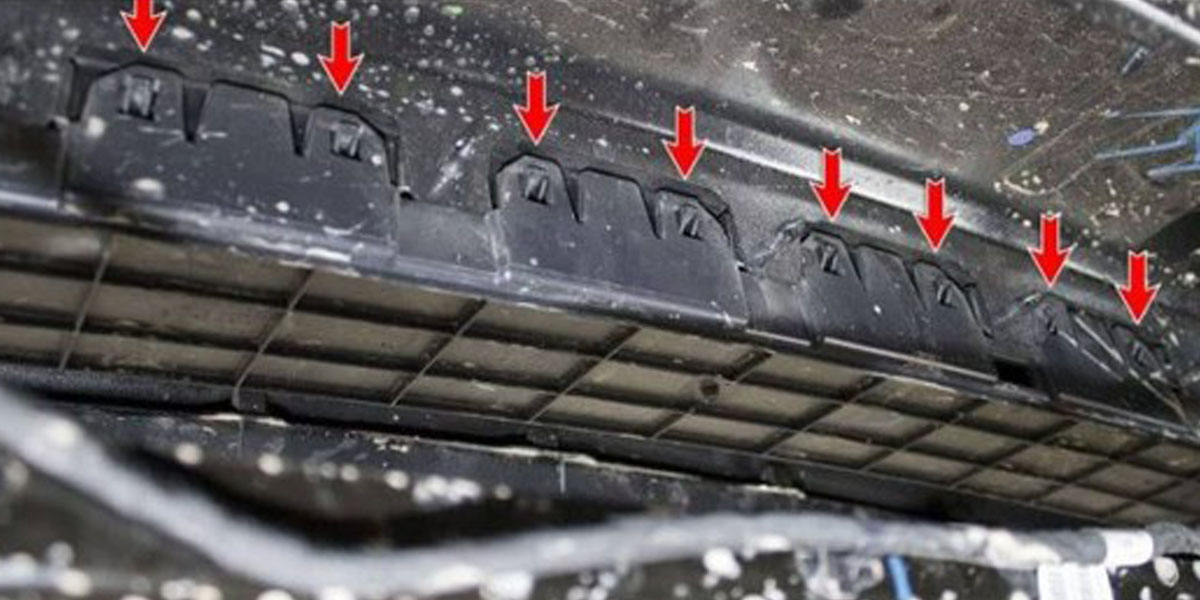
Step 3 - Remove Solid Plastic Grille.
The solid lower plastic grille is secured with 9 lower plastic clips and 9 upper nuts/bolts.
Using a metal pry tool, remove the 9 lower clips by prying them upward. Then, using an 8mm shallow socket, loosen, but do not remove the 9 nuts on the top. Slide the plastic grille forward from the bumper to remove it.
Step 4 - Remove Parking Sensors.
If equipped, swap the parking sensors from the solid plastic grille to the new vented plastic grille. Be sure to note the orientation of the driver and passenger sensors.
Using a plastic trim tool, gently pry the 2 retention tabs (circled in red in the picture below) outwards on the solid plastic grille.
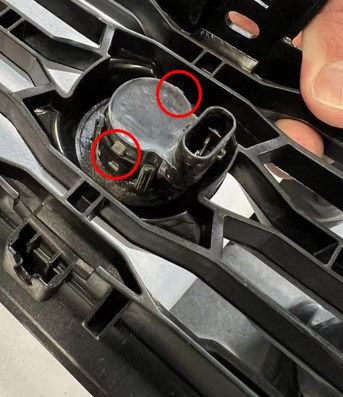
Carefully remove the passenger-side parking sensor by pulling it towards you, and label it "LH" (left-handed). Then, remove the driver-side parking sensor and label it "RH" (right-handed) accordingly.
Remove the sensor brackets by gently compressing the 4 slim tabs (circled in blue in the picture below) and pushing the sensor bracket forward through the front of the solid plastic grille.

Step 5 - Install Parking Sensors on Vented Grille.
Reverse the process outlined in step 4 to install the parking sensors and sensor brackets into your new vented grille. Be careful to install the previously marked LH and RH parking sensors into the correct positions.
Step 6 - Install Vented Grille.
Slide the new vented plastic grille into the lower bumper opening.
Using the 8mm shallow socket, loosely secure the top of the grille with the 9 nuts/bolts previously removed in Step 3 so that the grille stays in place.
Install the 9 lower clips previously removed in Step 3, then tighten the 9 nuts/bolts at the top of the vented grille.
Reconnect the parking sensor harnesses, if equipped.
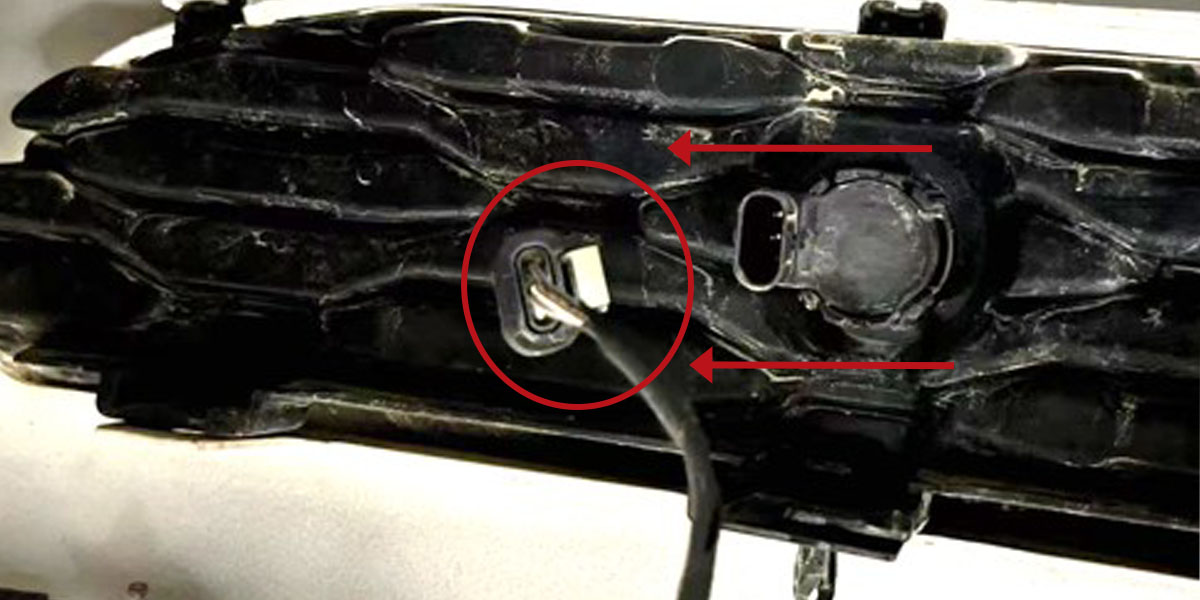
Step 7 - Remove Rear Cover.
On vehicles with a vented plastic lower grille, there is a rear cover behind the bumper that is attached to the backside of the lower grille. The cover is accessible from the underside of the vehicle.
If equipped, remove the rear cover by pulling the retention tabs away from their mating clips (shown below). Then slide the cover back and away from the lower grille to remove it.
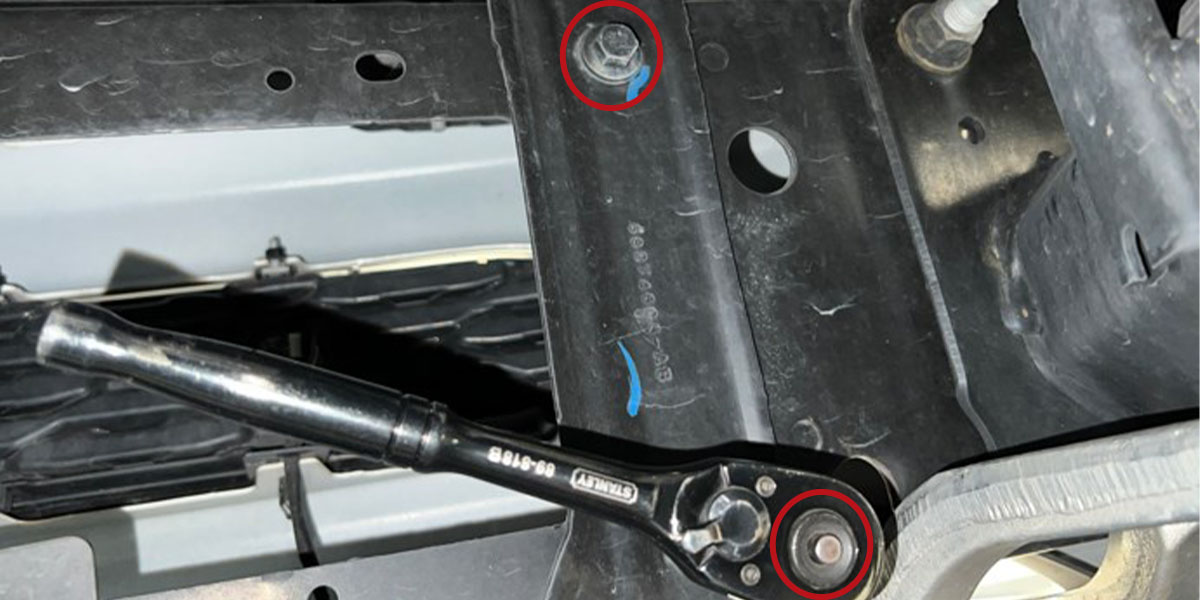
Step 8 - Remove Support Bolts.
On the passenger side of the vehicle, remove the two 13mm bolts from the factory bumper support bracket. Do not remove the factory bumper support bracket. Repeat this step on the driver's side of the vehicle.
Step 9 - Install Bracket.
Install the Stealth LED Light Bar Kit bracket marked “R” onto the passenger-side bumper support bracket using the bolts removed in Step 8. Tighten using a 13mm socket.
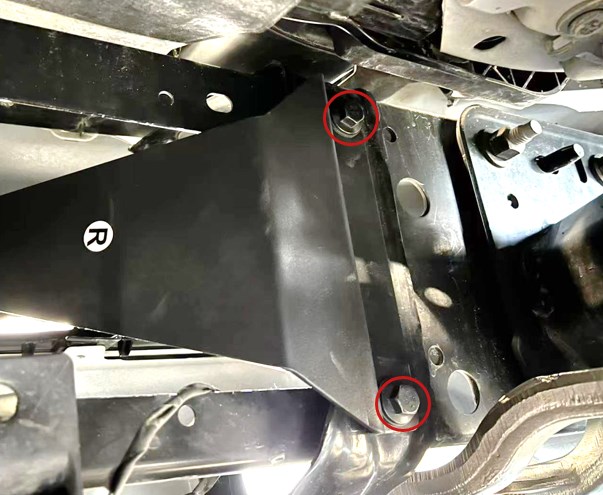
Then, repeat this step on the driver's side of the vehicle using the bracket marked "L".
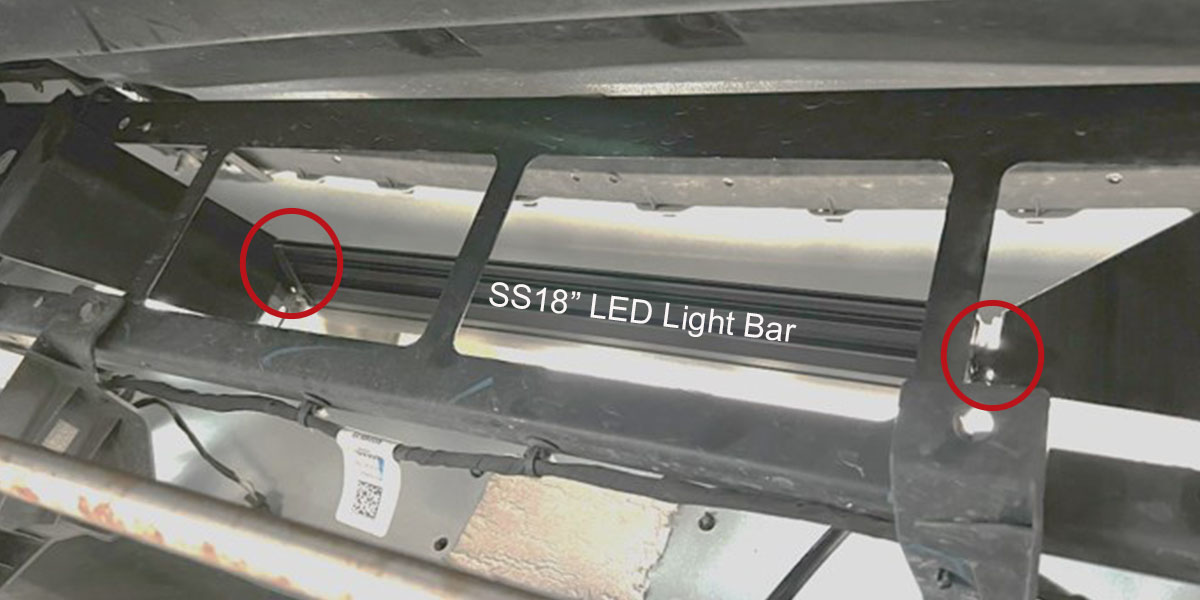
Step 10 - Attach Light Bar.
Slide the SS18 LED light bar in place between the two brackets installed in Step 8 (indicated in the red circles in the picture below).
Then, install the LED light bar using the included M6 hardware. Hand-tighten the hardware for this step.
Step 11 - Route Wiring Harness.
Once the light bar is mounted onto the brackets, refer to the wiring guide here to connect the wiring harness.
Step 12 - Test Function.
Test the function and aim the LED light bar. Once the LED light bar is aimed appropriately, tighten down the M6 hardware that was hand-tightened in Step 10 using a 10mm socket to complete the installation.
Questions About the Installation?
If you have any questions or issues installing the 2019-2023 Ram 1500 SS18 Stealth LED Light Bar, please contact us for further assistance.
Where Can I Buy an SS18 Stealth LED Light Bar for the 2019-2023 Dodge Ram 1500?
If you’re ready to upgrade your 2019-2023 Dodge Ram 1500 with a Stealth Bumper LED Light Bar Kit, you can purchase one by clicking here or using our dealer locator to find a dealer near you.
Want to know more about Diode Dynamics products? Visit DiodeDynamics.com and subscribe to our newsletter for new product releases and more!
This Installation Guide is for the following SKUs: DD7626P, DD7627, DD7628
Share This Post