


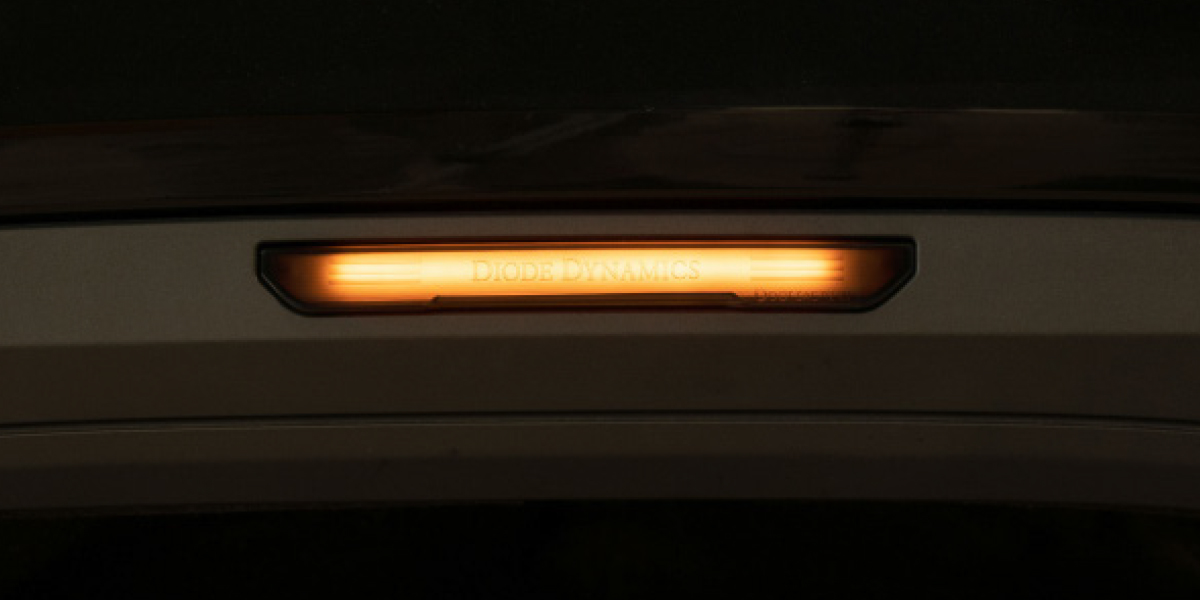
The LED Sidemarkers For 2020-2025 GMC Sierra HD 2500/3500 add an updated and aggressive appearance to your 2020-2025 GMC Sierra HD. The following installation guide will provide you with step-by-step instructions on how to install the 2020-2025 GMC Sierra HD LED Sidemarkers. Check out our installation video, or continue reading for step-by-step instructions below!
Table of Contents
Installation Tools
- T15 Torx Driver
- T20 Torx Driver
- Trim Removal Tool
- Zip Ties (for sequential turn signal option only)
- Pick Tool
Installation Video
Front Mounting Instructions
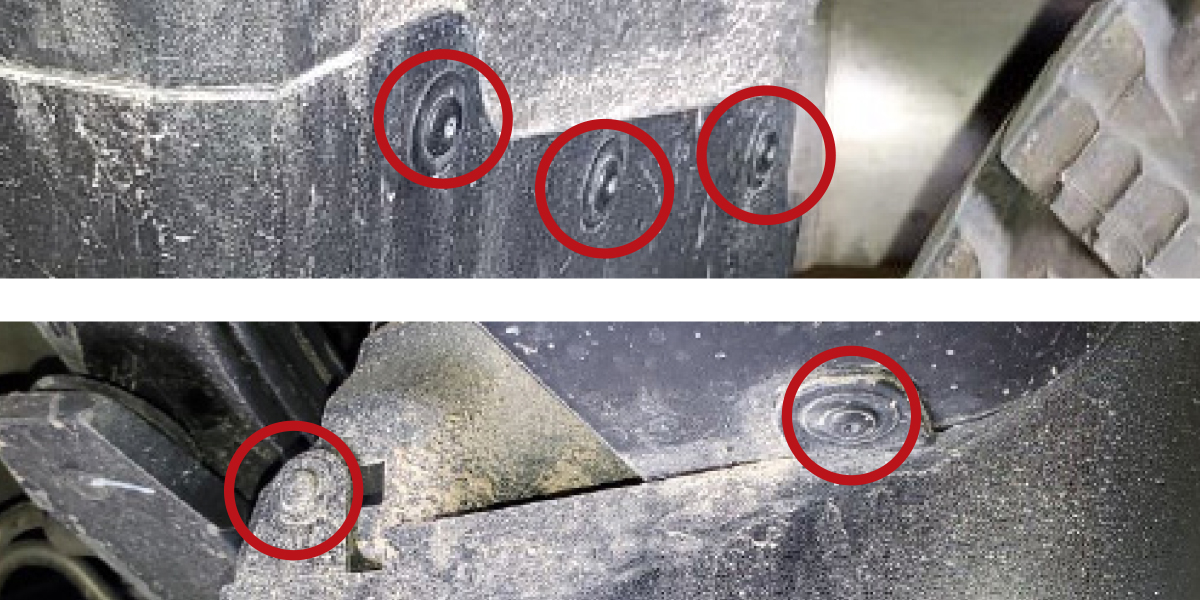
Step 1 - Remove Mud Flap Screws
Using a T15 Torx driver, remove the five (5) screws holding the mud flap in place. There is no need to fully remove it. You may need to turn the wheel to gain access to the screws.
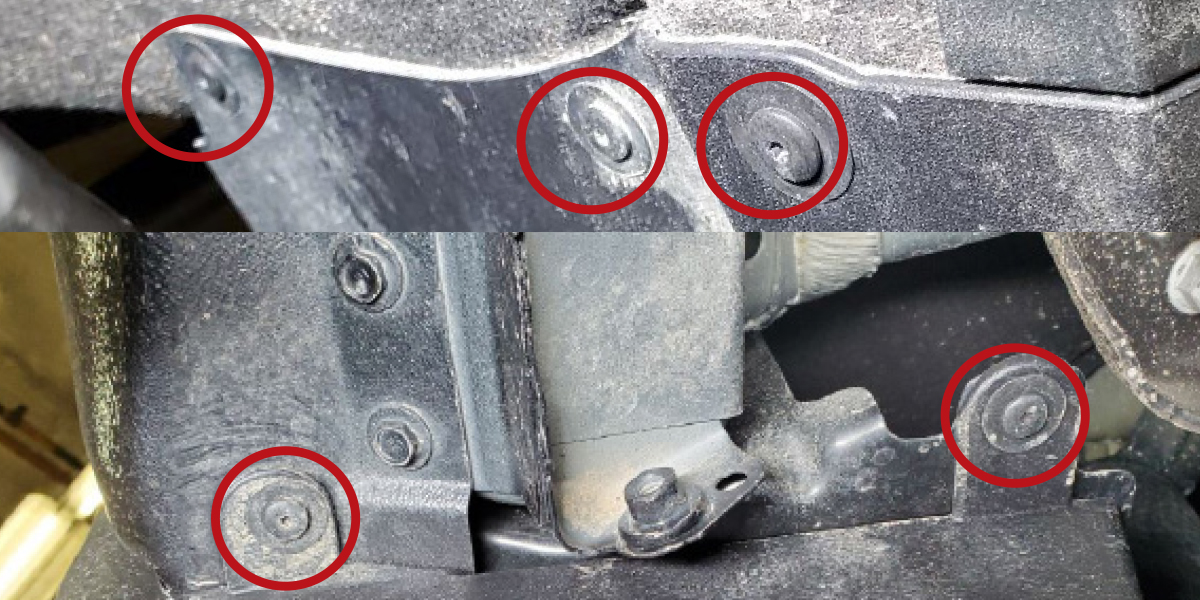
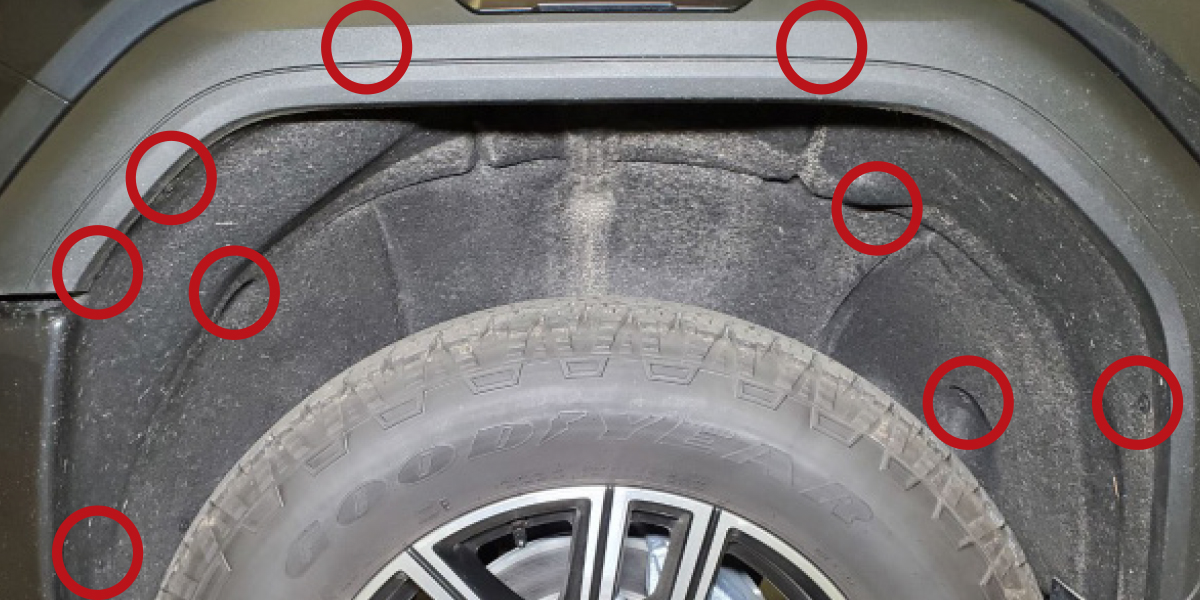
Step 2 - Remove Fender Liner Screws
Remove the ten (10) T15 Torx screws holding the fender liner in place.
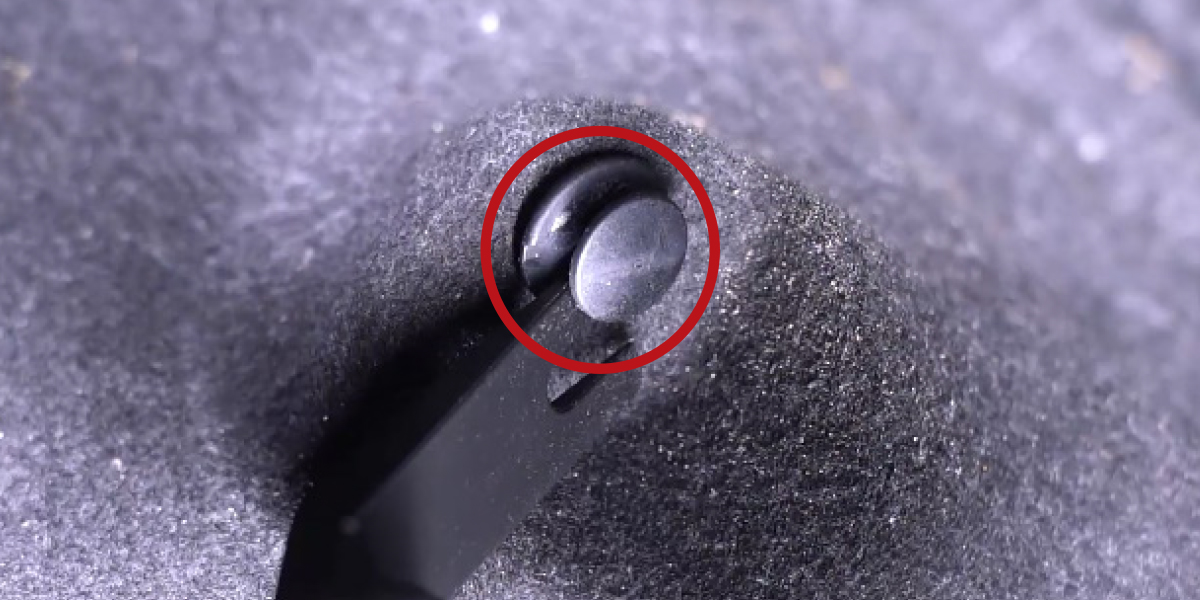
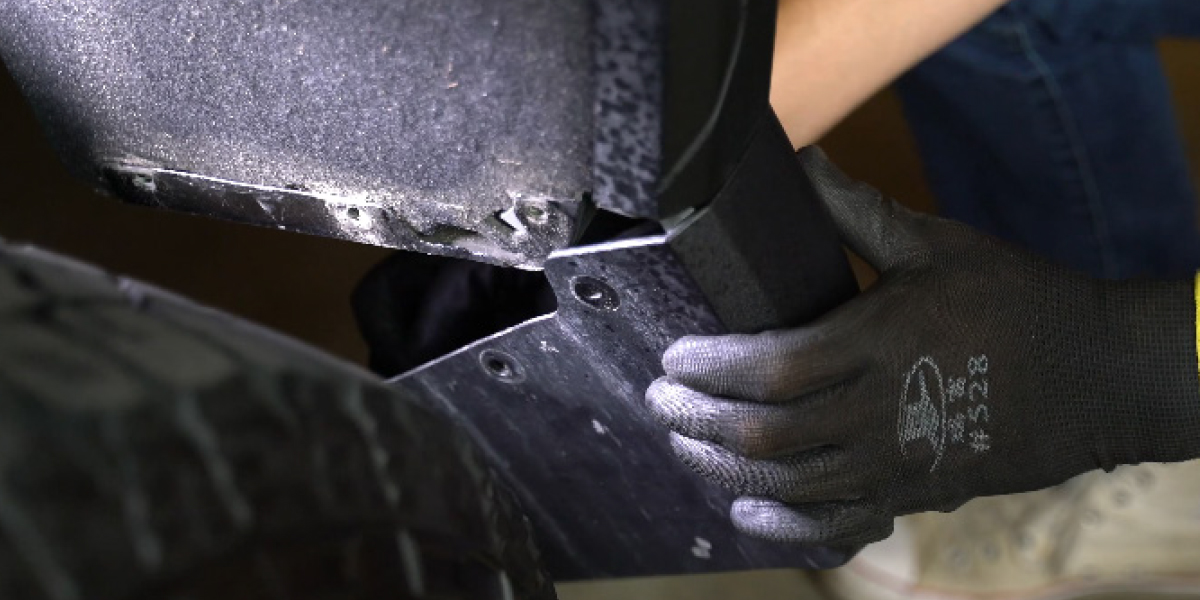
Step 3 - Remove Fender Liner
Using a trim removal tool, remove the one (1) plastic push-rivet from the fender liner. Remove the fender liner from the vehicle.
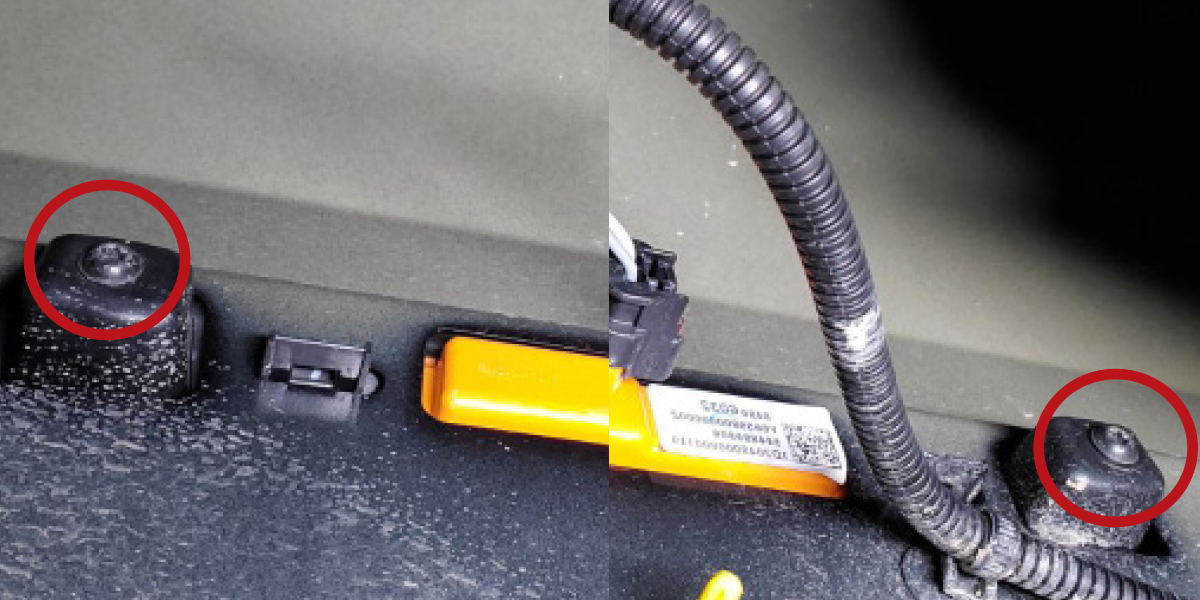
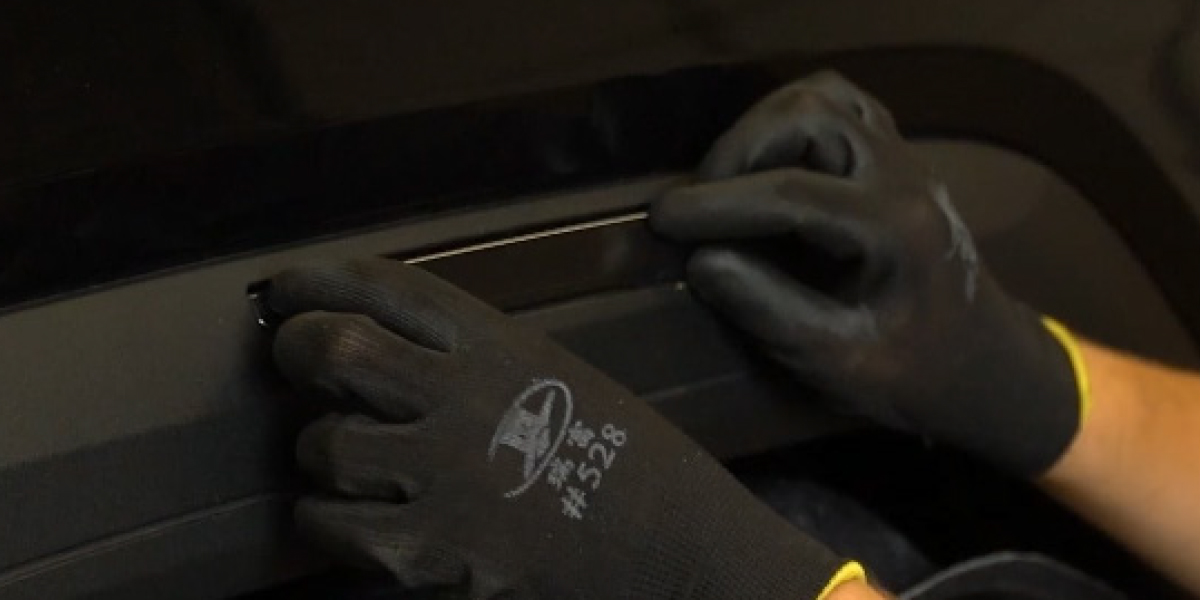
Step 4 - Remove Sidemarker Screws
Using a T20 Torx driver, remove the two (2) screws holding the factory sidemarker in place.
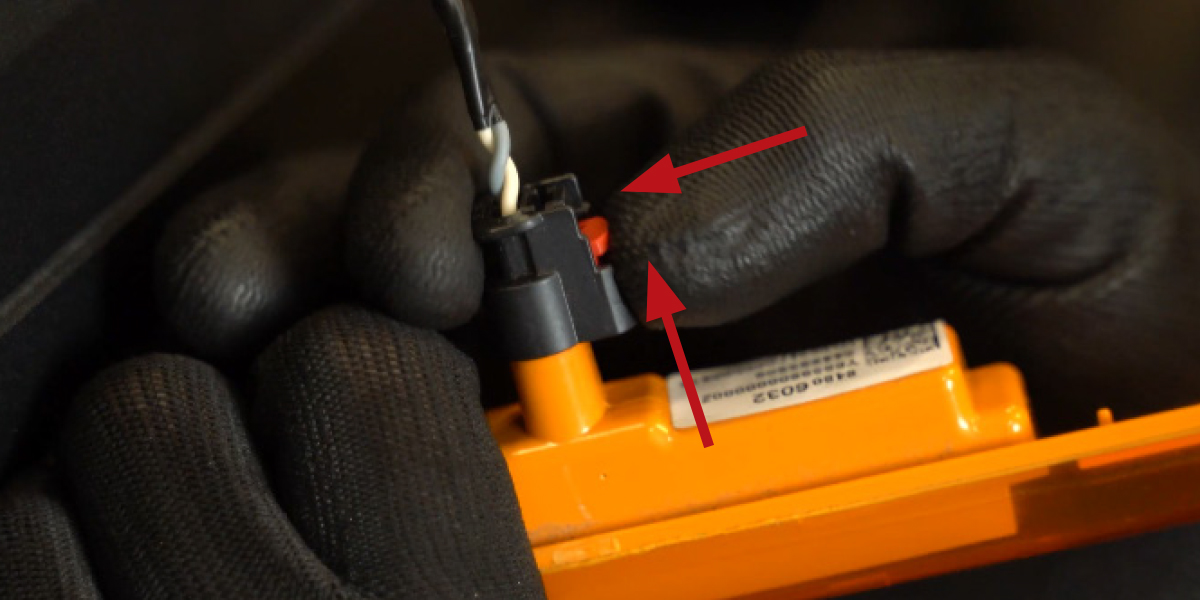
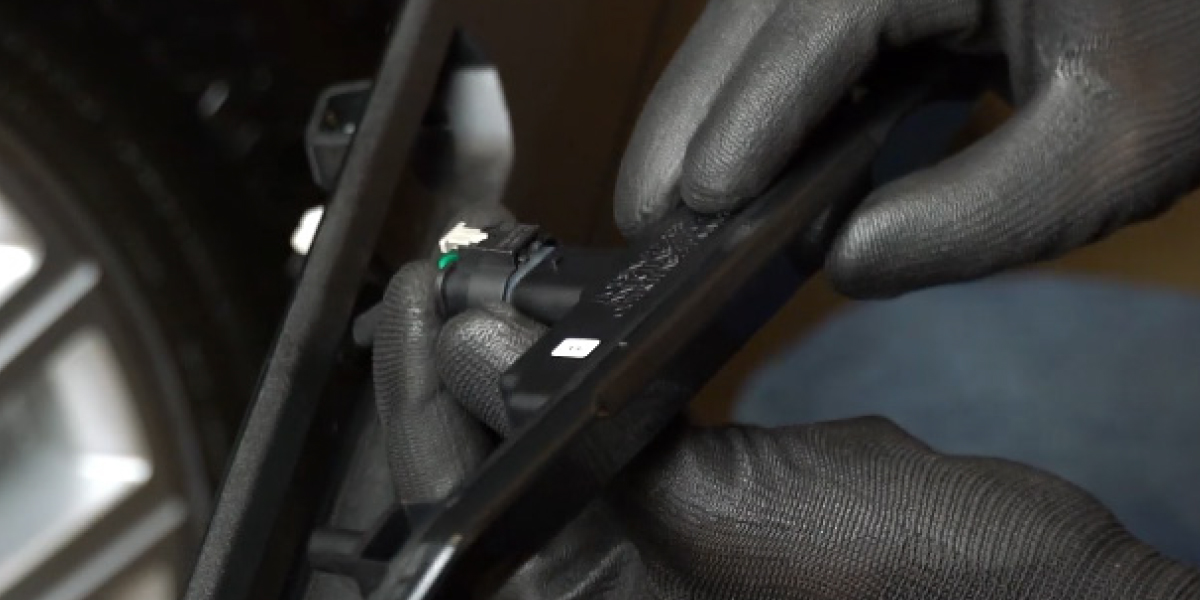
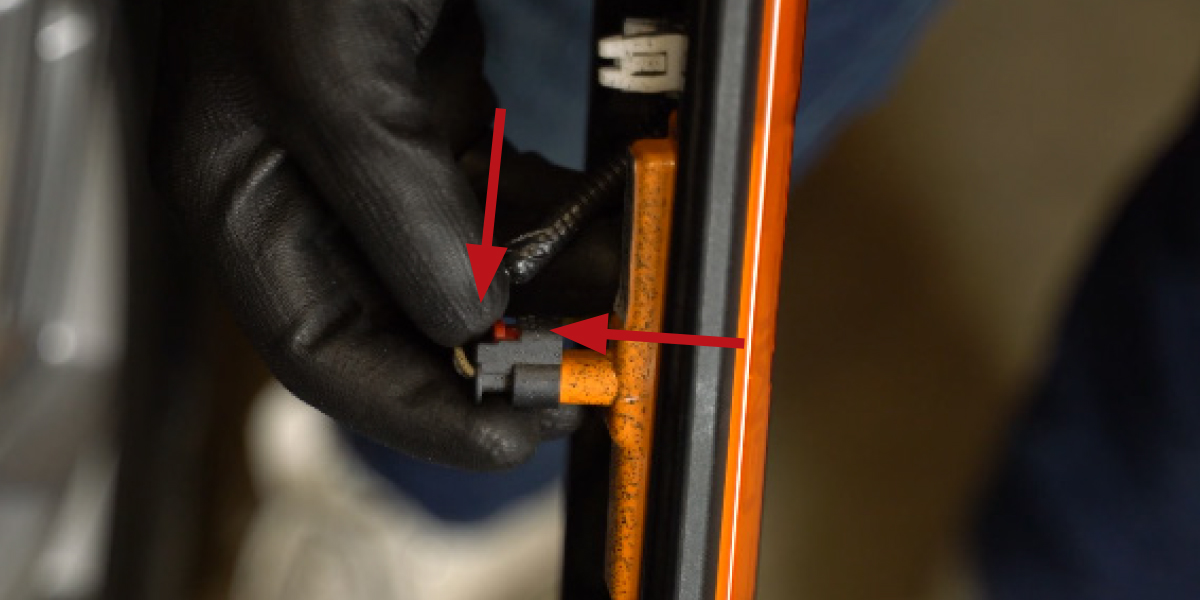
Step 5 - Disconnect Sidemarker
Remove the sidemarker by pulling it out through the front of the fender flare. Pull the red locking tab back and then depress the black tab to remove the connector.
Step 6 - Complete Installation (Standard Only)
If installing the standard sidemarker, simply reverse steps 1 through 5 with your new sidemarker to complete the installation.
Note: All four (4) sidemarkers are the same.
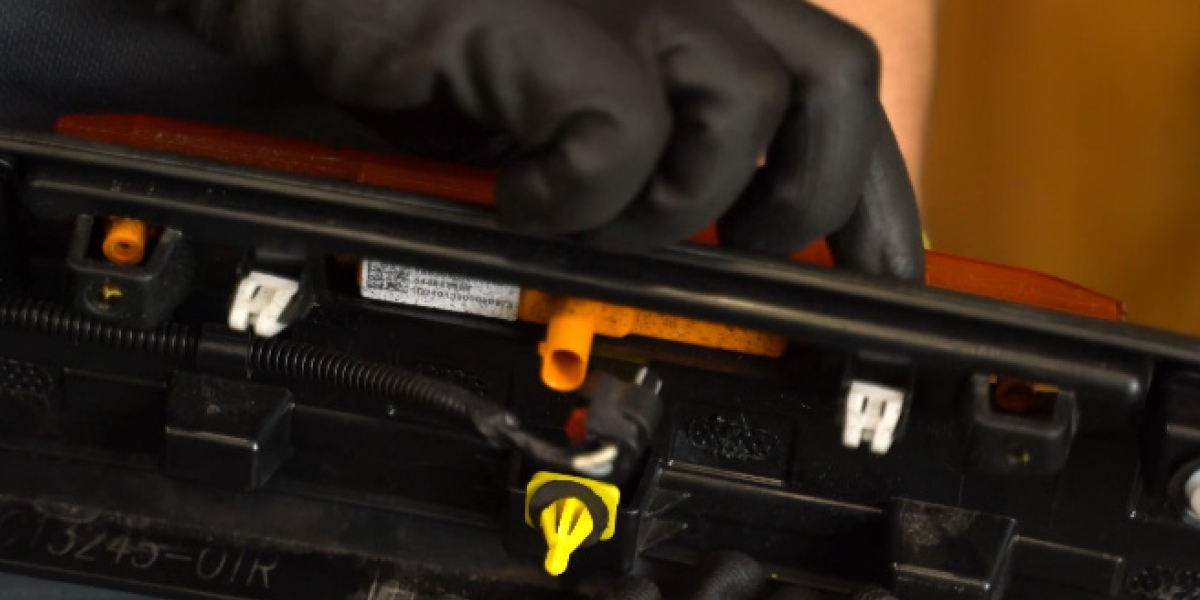
Step 7 - Re-pin 4-pin Connector
If installing the sequential sidemarker, choose which direction you would like the sidemarker to sequence. Use a pick or similar tool to slide open the purple lock tab on the 4-pin connector housing body. Insert the green wire into Pin 1 of the 4-pin connector to sequence Right-to-Left (passenger’s side). Insert the green wire into Pin 4 of the 4-pin connector to sequence Left-to-Right (driver’s side). Insert the included rubber terminal plug into the unused pin location in the 4-pin connector for weather sealing.
Note: Pin numbers are marked in fine print on the harness, inside of the connector.
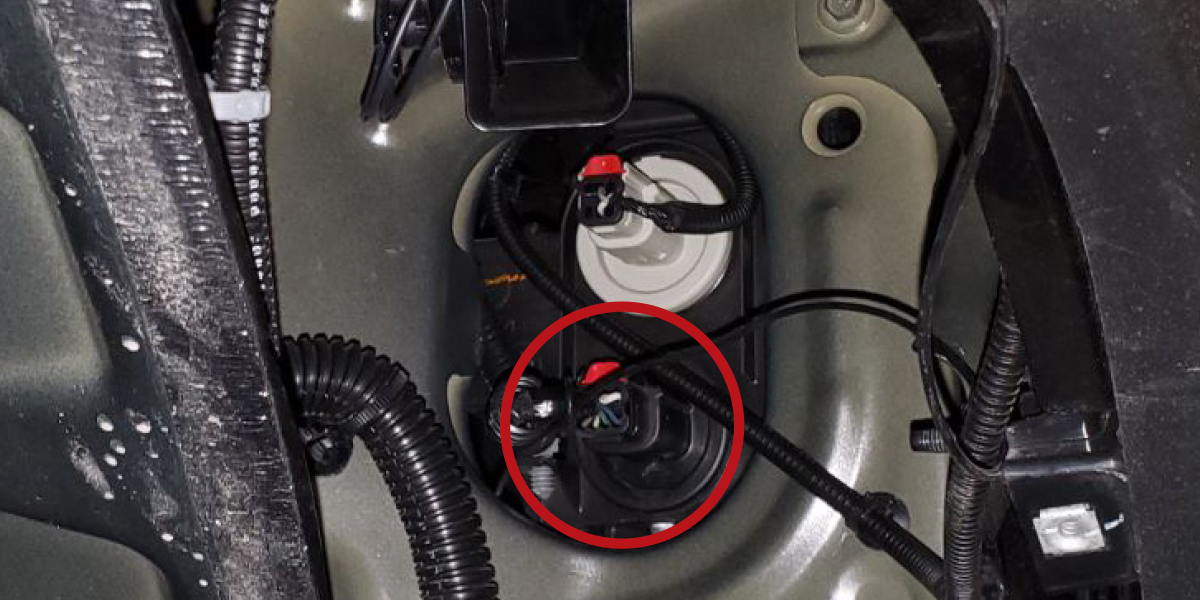
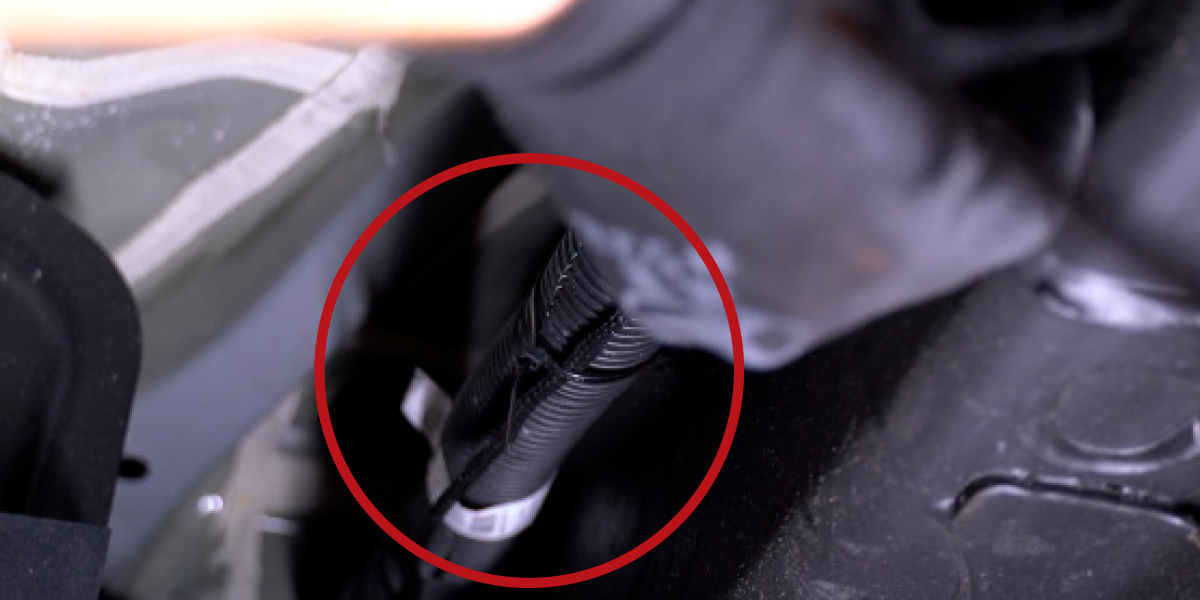
Step 8 - Unplug Headlight Connector
From the wheel well, unplug the lower black connector from the headlight. To do so, slide the red tab back and then depress the black tab.
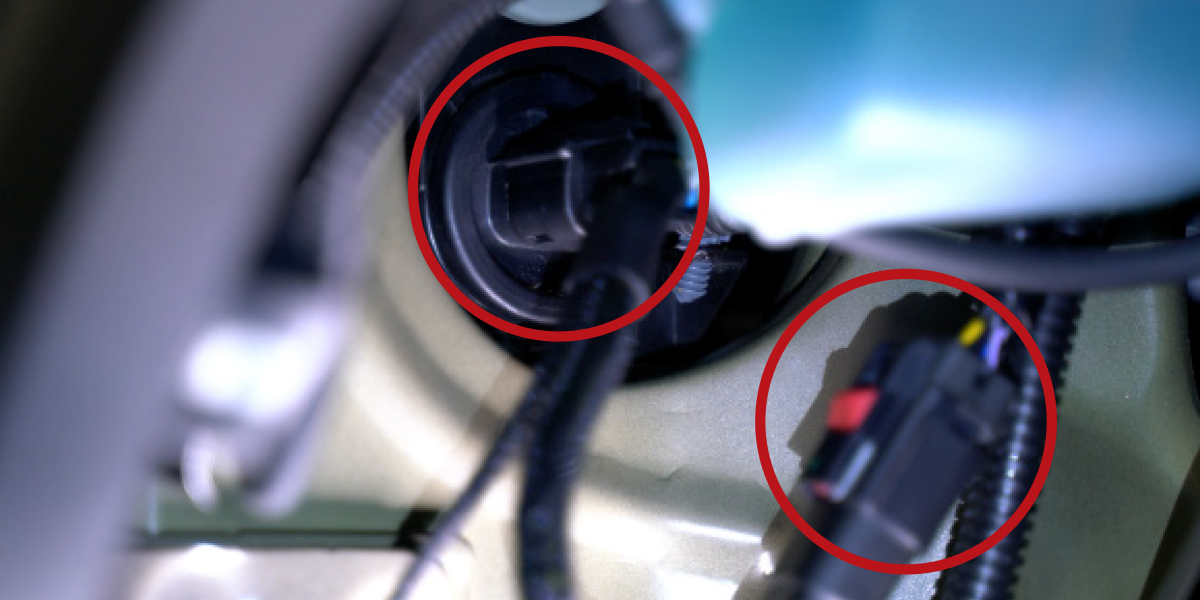
Step 9 - Plug in Adapter Harness
Plug the headlight connector into the included adapter harness and then plug the adapter harness into the headlight. Be sure to slide the red tab back.
Step 10 - Route Harness Along Inside Fender Flare
Route the harness along the inside of the front fender flare. Secure to the original sidemarker input harness with zip ties.
Step 11 - Install New Sidemarker
Using a T20 Torx driver and original hardware, install your new sidemarker in the front fender flare.
Step 12 - Connect New Sidemarker
Plug the first-in-line 4-pin connector into your new sidemarker.
Step 13 - Mount CrossLink Lightbar
Route the adapter harness through the inside of the wheel well, securing it with zip ties such that it is away from any hot or moving parts.
Step 14 - Route Adapter Harness Along Framerail
Route the harness along the frame rail to behind the rear wheel of the truck, securing with zip ties along the way. Ensure the harness passes over the rear axle along the frame rail and is secured such that it cannot get pinched or caught in any moving parts.

Rear Mounting Instructions
Step 1 - Remove Mud Flap Screws
Using a T15 Torx driver, remove the five (5) screws from the mud flap in the rear wheel well.
Step 2 - Remove Mud Flaps
Remove the rear-most mud flap by pulling down and tilting slightly outboard.
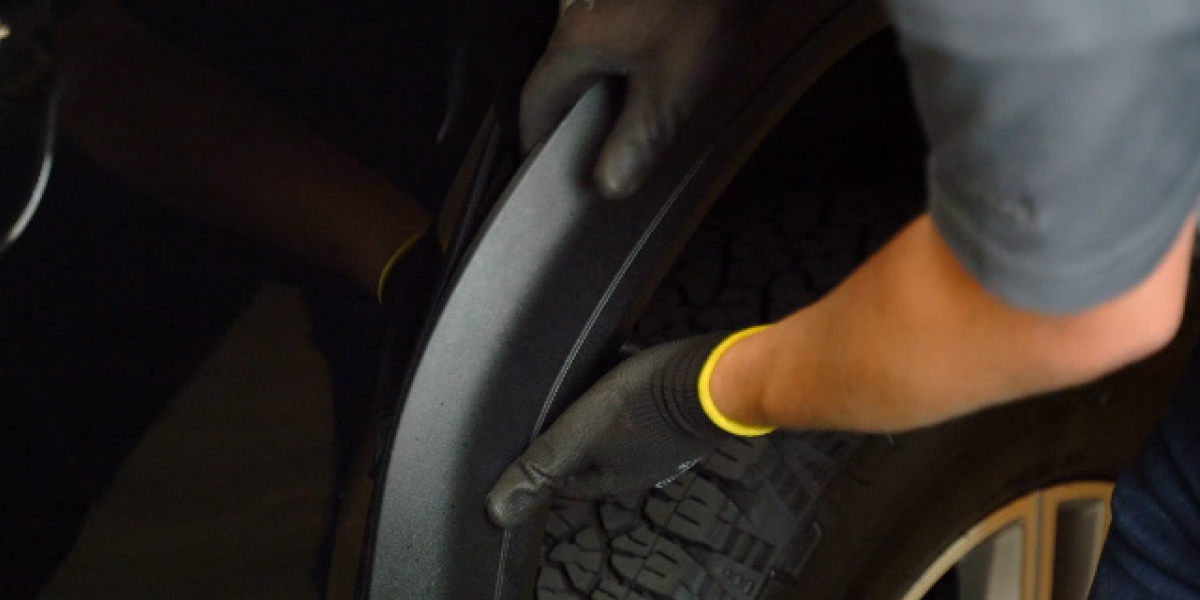
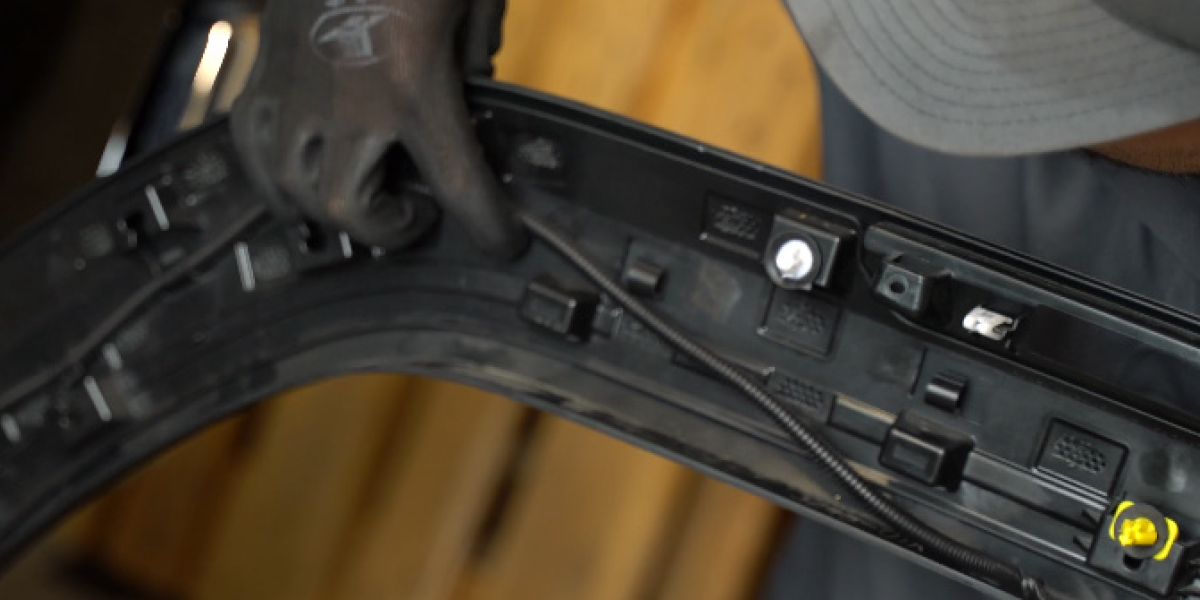
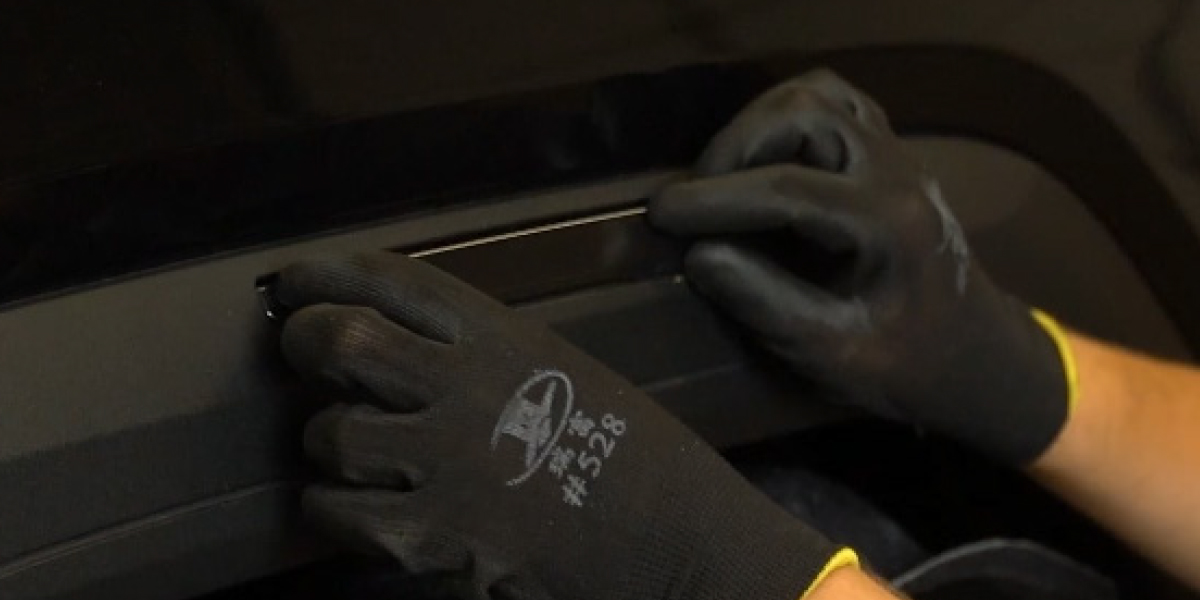
Step 3 - Pry Rear Fender Flare Off
Using a trim removal tool carefully pry the rear fender flare off the bed. It is held in place by twenty-two (22) plastic clips.
Note: These clips will be reused. However, ten (10) replacement clips have been included in the event that some break while removing the fender flare.
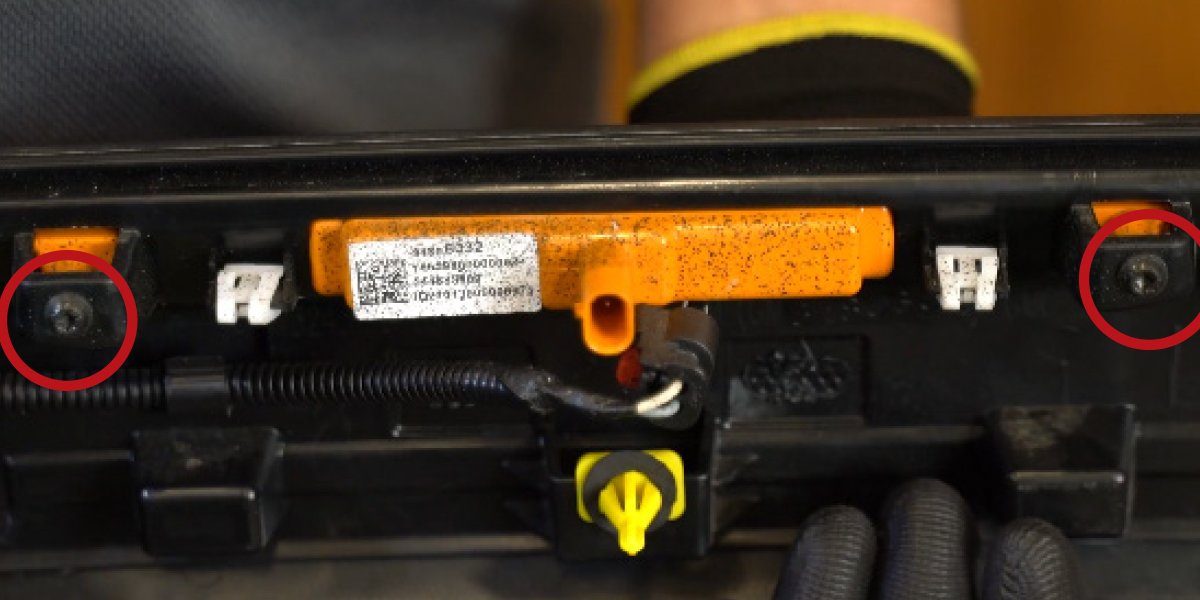
Step 4 - Remove Rear Sidemarkers
Using a T20 Torx driver, remove the two screws holding the rear sidemarker in place.
Step 5 - Disconnect Factory Connector
Pull the red locking tab back and then depress the black tab to remove the connector.
Step 6 - Remove Factory Sidemarker
Remove the sidemarker by pulling it out through the front of the fender flare.
Step 7 - Reinstall New Sidemarker
If installing the standard sidemarker, simply reverse steps 1 through 6 with your new sidemarker to complete the installation.
Step 8 - Re-pin Connector (Sequential Only)
If installing the sequential sidemarker, choose which direction you would like the sidemarker to sequence. Use a pick or similar tool to slide open the purple lock tab on the 4-pin connector housing body. Insert the green wire into Pin 1 of the 4-pin connector to sequence Right-to-Left (passenger’s side). Insert the green wire into Pin 4 of the 4-pin connector to sequence Left-to-Right (driver’s side). Insert the included rubber terminal plug into the unused pin location in the 4-pin connector for weather sealing.
Note: Pin numbers are marked in fine print on the harness, inside of the connector.
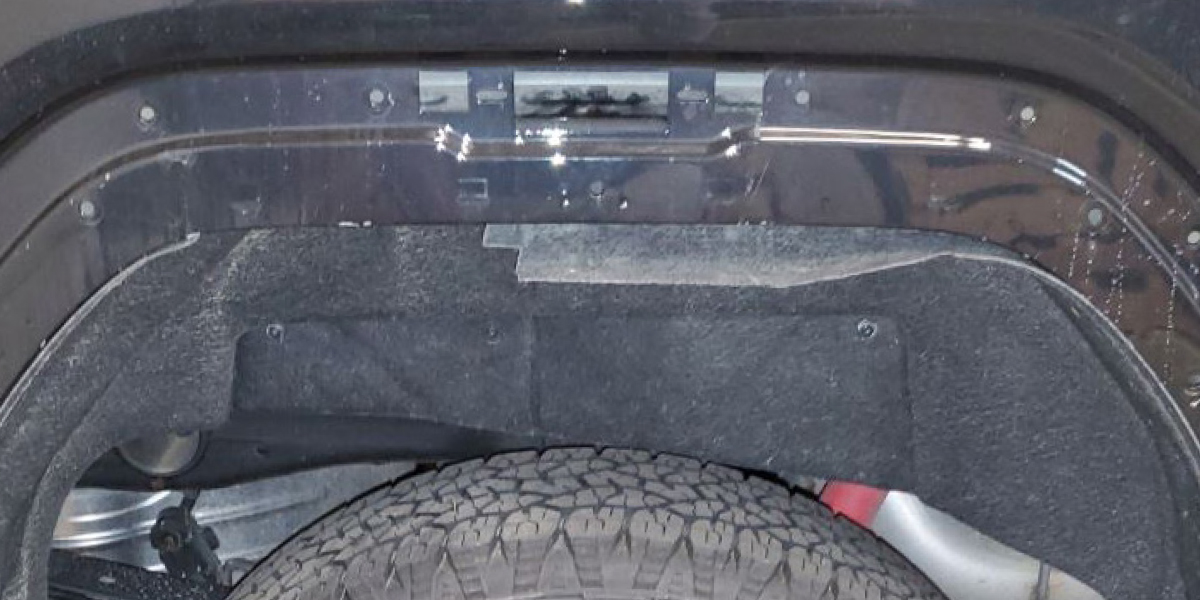
Step 9 - Remove OEM Harness
Remove the OEM sidemarker harness from the fender flare. Pass the OEM harness back through the hole in the truck bed and secure in a bundle with zip ties.
Step 10 - Secure New Sidemarker
Using a T20 Torx driver and OEM hardware, install your new sidemarker.
Step 11 - Route Adapter Harness Through Fender Flare
Pass the adapter harness through the hole in the bed and route along the fender flare using the path of the OEM harness.

Step 12 - Plug in New Sidemarker
Plug in your new sidemarker and move the locking tab to the locked position.

Step 13 - Reinstall Fender Flare
Reverse Steps 1 through 3 to reinstall the fender flare and mud flap.
Step 14 - Complete Installation
Repeat both front and rear sidemarker steps for the other side of the vehicle to complete the installation.
Enjoy your new LED sidemarkers!
Questions About the Installation?
If you have any questions or issues installing the LED Sidemarkers For 2020-2025 GMC Sierra HD 2500/3500, please contact us for further information.
Where Can I Buy LED Sidemarkers for the 2020-2025 GMC Sierra HD?
If you're ready to upgrade your 2020-2025 GMC Sierra HD 2500/3500 with LED Sidemarkers, you can purchase one by clicking here or using our dealer locator to find a dealer near you.
Want to know more about Diode Dynamics products? Visit DiodeDynamics.com and subscribe to our newsletter for new product releases and more!
This Installation Guide is for the following SKUs: DD5125, DD5126, DD5127, DD5150, DD5151, DD5152

Share This Post