


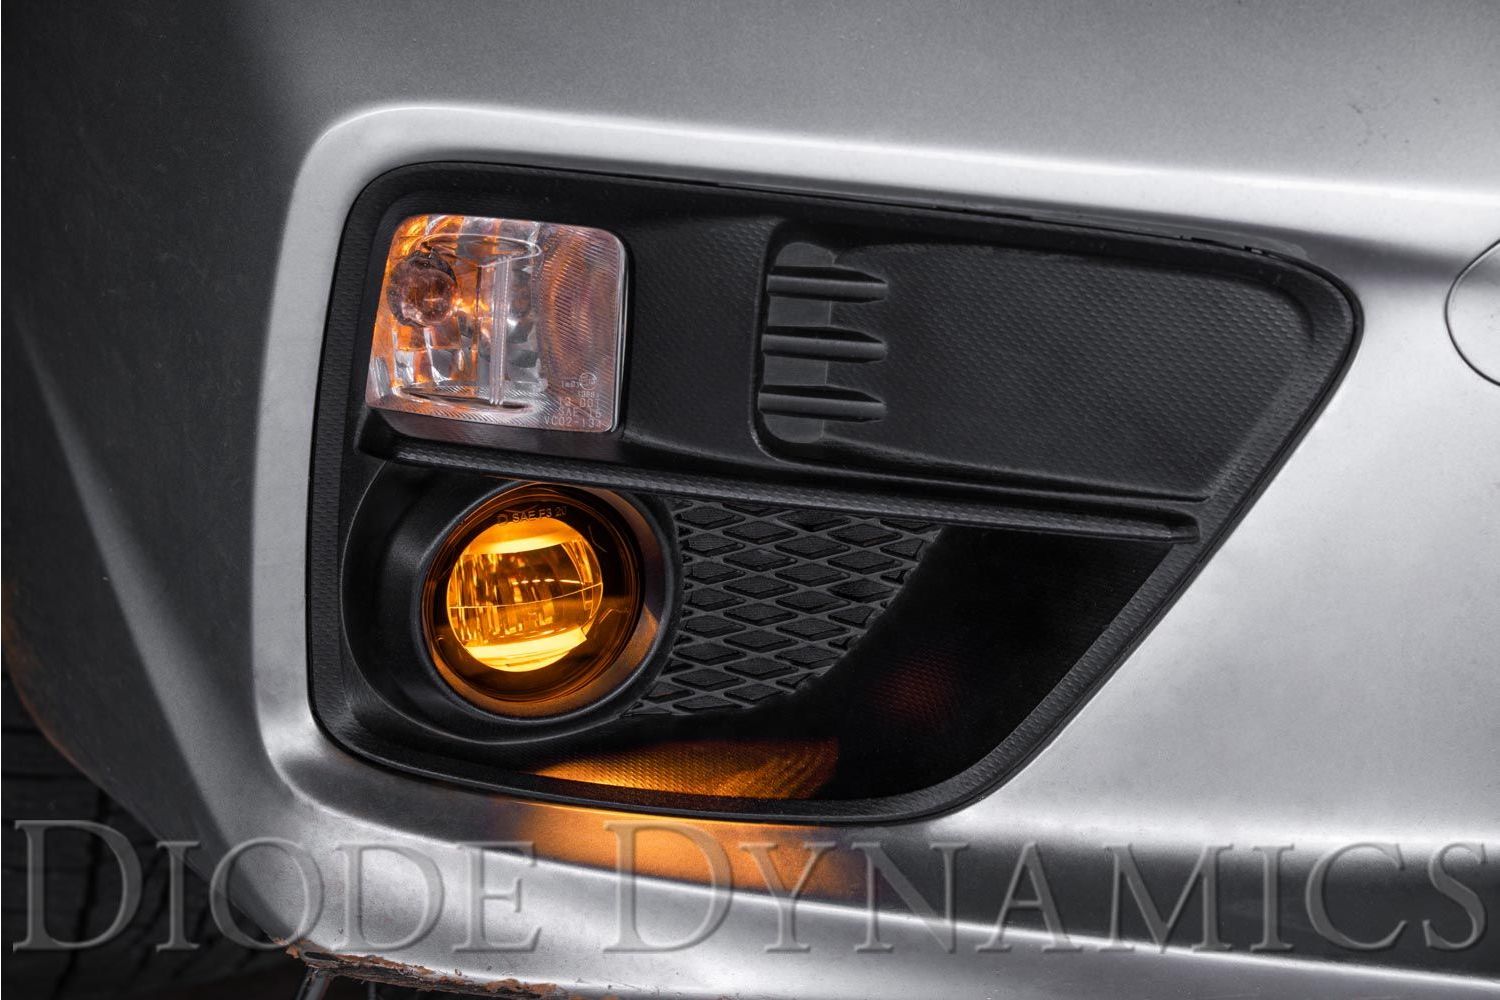
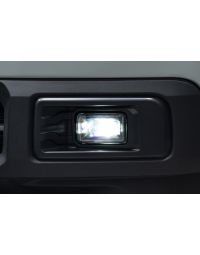
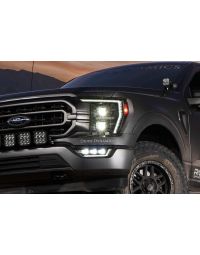
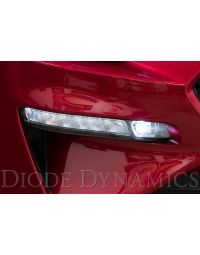
Diode Dynamics Elite Series LED Fog Lamps are OEM-style replacements designed to deliver up to five times more output than factory halogen fog lights. Built with premium optics and durable construction, Elite Series fog lamps provide improved visibility while maintaining a factory appearance.
This guide outlines the universal installation process for Diode Dynamics Elite Series LED Fog Lamps. While vehicle access points may vary, the core installation steps remain the same across applications.
Table of Contents
- Installation Tools
- Installation Instructions
- Aiming Instructions
- SmartSelect Programming
- Questions About the Installation?
- Where Can I Buy Elite Series Fog Lamps?
Installation Tools
- Basic hand tools (varies by vehicle)
- Trim or panel removal tool (if required)
- Included wire adapters and T-taps
Time Required: Approximately 45–90 minutes.
Installation Instructions
Step 1 – Access the factory fog lights
Access the factory fog lights by reaching down behind the bumper near the headlight, or by pulling back the wheel well liner, depending on your vehicle.
Step 2 – Remove the factory fog light
Disconnect the fog light connector from the vehicle wiring harness. Remove the factory fog light housing from the bumper. The factory mounting hardware will be reused.
Step 3 – Install the Elite Series fog lamp
Install the new Elite Series LED Fog Lamp using the factory mounting points and hardware. If your vehicle uses side-specific lamps, the correct side will be labeled on the back of the lamp.
Ensure the mounting tabs and holes align with the factory fog light bracket before tightening securely.
Step 4 – Connect the wiring
Use the included wire adapters to connect the fog lamp to the vehicle wiring harness. Test the light for proper operation. If the lamp does not turn on, flip the connector 180 degrees and test again.
Step 5 – Connect the backlight feature (if applicable)
If your Elite Series fog lamps include a backlight feature, connect the backlight power wire to a fused 12V source such as the parking light or sidemarker circuit. Included T-taps may be used for this purpose.
Note: Power source must be fused. Do not connect directly to the vehicle battery. Check local laws and regulations regarding on-road use of backlighting.
Step 6 – Repeat for the opposite side
Repeat Steps 1–5 for the fog lamp on the other side of the vehicle.
Aiming Instructions
Step 7 – Position the vehicle
Park your vehicle on a level surface, facing a wall or garage door at a distance of 25 feet.
Step 8 – Measure fog lamp height
Measure the distance from the ground to the center of the fog lamp. This is your mounting height.
Step 9 – Mark the cutoff line
Mark the mounting height on the wall with tape. Then place a second strip of tape four inches below that mark. This lower mark is your fog light cutoff line.
Step 10 – Aim the fog lamps
Using the integrated adjustment screw on each fog lamp, adjust the beam so the top of the beam pattern aligns with the cutoff line.

SmartSelect Programming
Your Elite Series Dual-Color Fog Lamps are set to the white main beam from the factory. SmartSelect allows you to switch the main beam between white and yellow using the factory fog light controls.
To change the main beam color, turn the fog lamps off and back on two times within three seconds. The next time the fog lamps are turned on, the main beam will change from white to yellow.
Repeat this process to continue switching between the white and yellow main beam colors. After two complete color cycles, the lamps will reset to the factory-default white main beam.
Questions About the Installation?
If you have any questions about installing Diode Dynamics Elite Series LED Fog Lamps, contact us via our support page.
Where Can I Buy Diode Dynamics Elite Series LED Fog Lamps?
To browse all available Elite Series LED Fog Lamp options, visit our Elite Series LED Fog Lamps page on DiodeDynamics.com.
You can also use our Dealer Locator to find a Diode Dynamics dealer near you.
Want to know more about Diode Dynamics products? Visit DiodeDynamics.com and subscribe to our newsletter for new product releases and more!
This Installation Guide applies broadly to Diode Dynamics Elite Series LED Fog Lamps.
Share This Post