


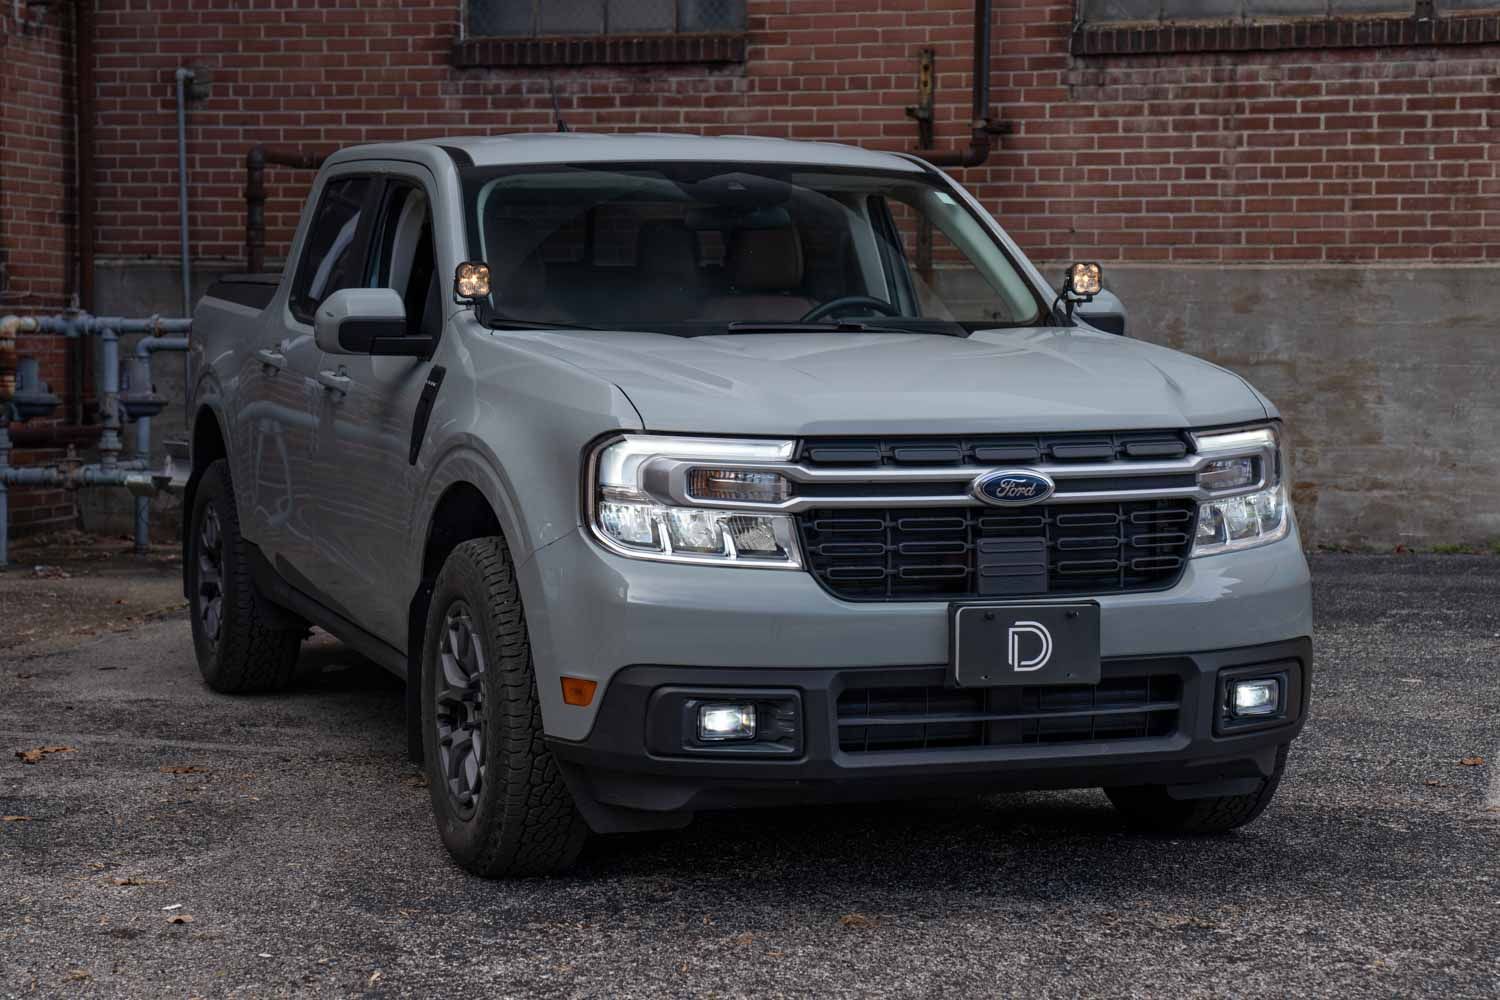
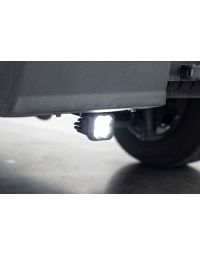
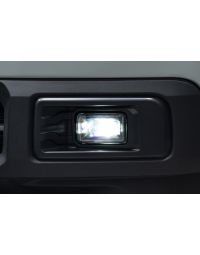
While the Ford Maverick doesn’t come with a factory fog light option, there is still a need for light directly in front of the vehicle to increase your visibility in foggy, dusty, snowy, or rainy conditions. Introducing our new Elite Series LED Add-on Fog Light Kit for the 2022-2024 Ford Maverick! This kit allows you to mount two SAE-compliant LED fog lamps in the factory bumper while maintaining an OEM appearance thanks to the custom-designed bezel.
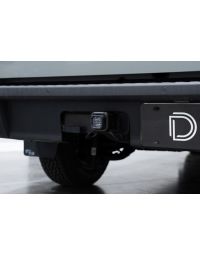
Note: This add-on fog light kit may not be compatible with certain flat tow plates or baseplate-style towing brackets. If your Maverick is equipped for flat towing behind an RV, verify clearance before installation, as many tow plate designs occupy the same mounting space as this kit.
Table of Contents
- Installation Video
- Installation Tools
- What's Included
- Mounting Instructions
- Wiring Instructions
- Aiming Instructions
- Questions About the Installation?
- Where Can I Buy an Elite Series LED Add-on Fog Light Kit for the 2022-2024 Ford Maverick?
Installation Video
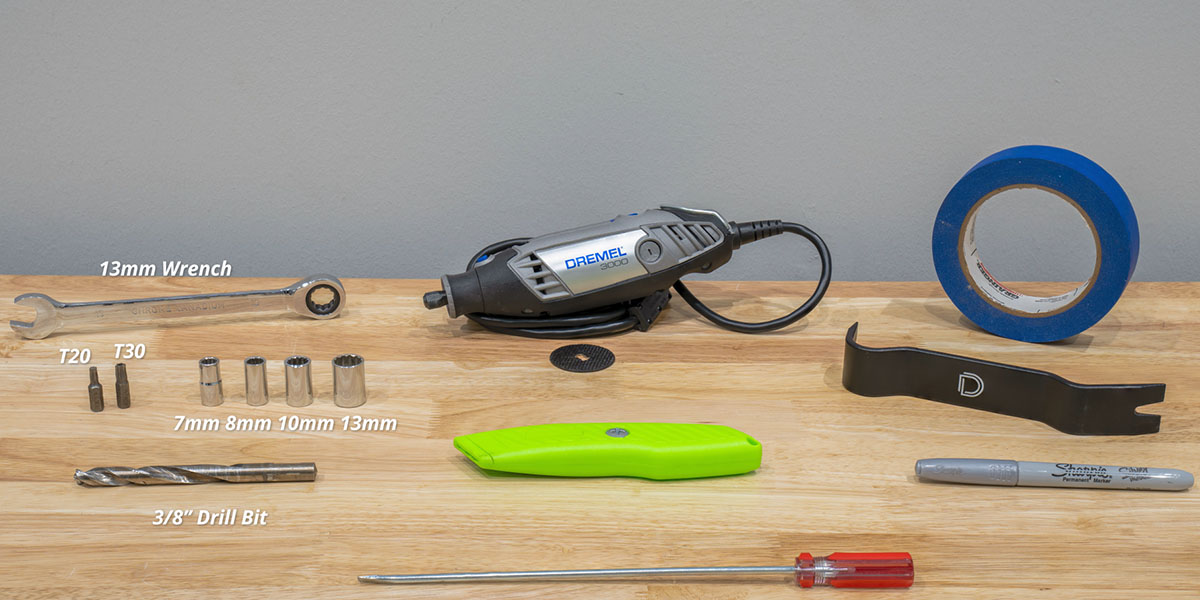
Installation Tools
- 7mm, 8mm, 10mm, 13mm Sockets
- 13mm Wrench
- 3/8" Drill Bit
- T20, T30 Torx Bits
- Pry/Trim Tool
- Silver Sharpie
- Dremel/Similar Cutting Device
- Razor Blade
- #2 Screwdriver, at least 8"
- Masking Tape
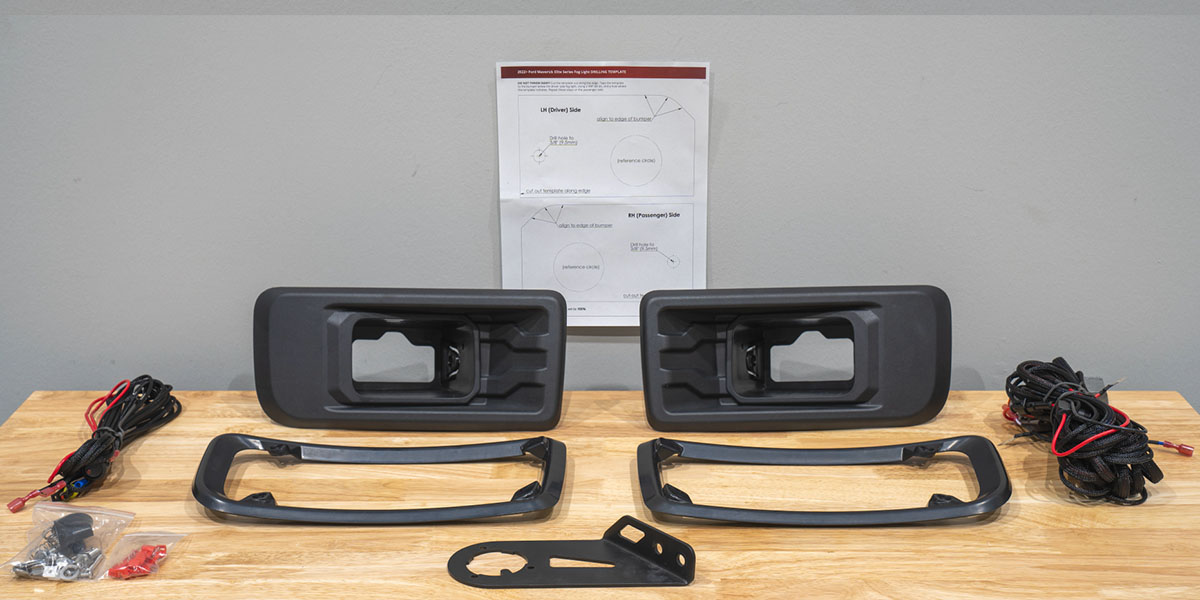
What's Included
- Fog Bezels (x2)
- Support Rings (x2)
- Fog Wiring Harness
- Hardware
- T-taps and Zip Ties
- Hybrid Speaker Bracket
- Paper Drilling Template
- Elite Series Fog Lamps (x2)
Mounting Instructions
Step 1 - Open Hood
Locate the hood latch in the engine bay and pull twice to release the hood, then prop it up using the prop stick.
Step 2 - Remove Bolts and Clips
In the front of the engine bay, find four (4) 10mm bolts (circled in red) and two (2) push clips (circled in blue) that need to be removed.

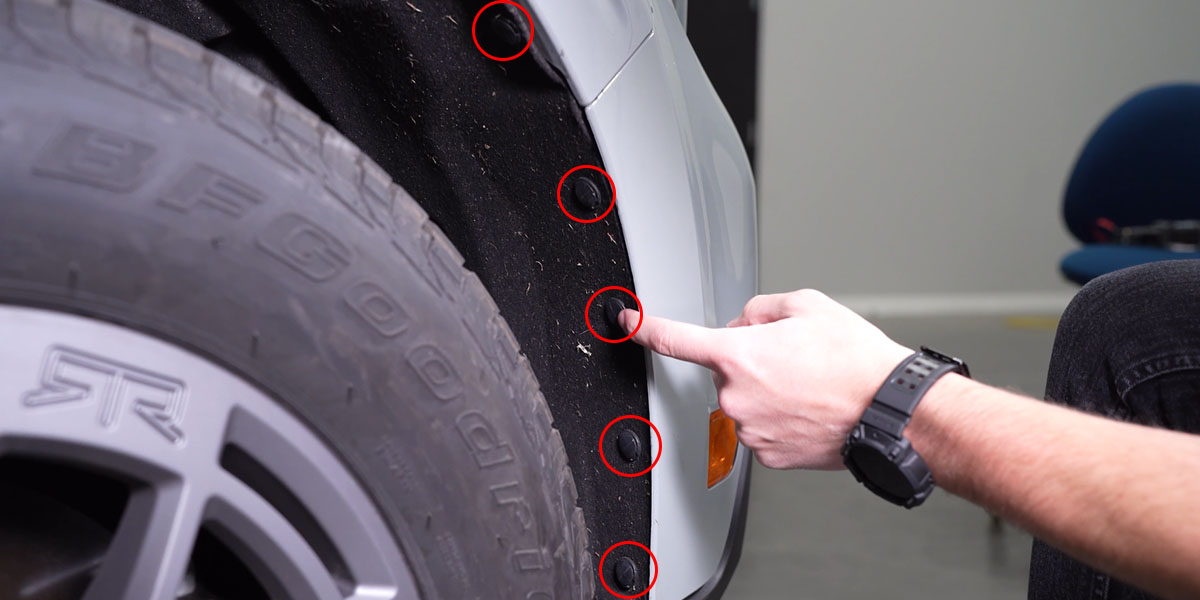
Step 3 - Remove Fender Clips
On the passenger side of the vehicle, five (5) pop clips need to be removed (as shown). Repeat this on the driver's side of the vehicle.
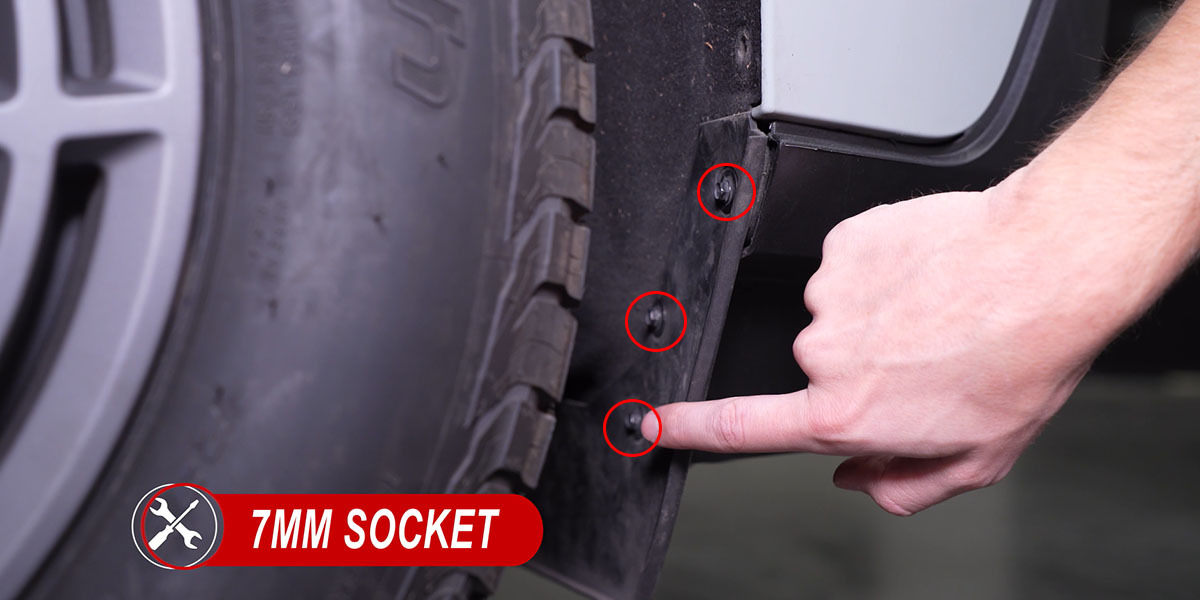
Step 4 - Remove Splash Guard Bolts
On the passenger side, use a 7mm socket to remove three (3) bolts on the splash guard, and one (1) pop clip on the inside using a pry tool. Repeat this step on the driver's side.
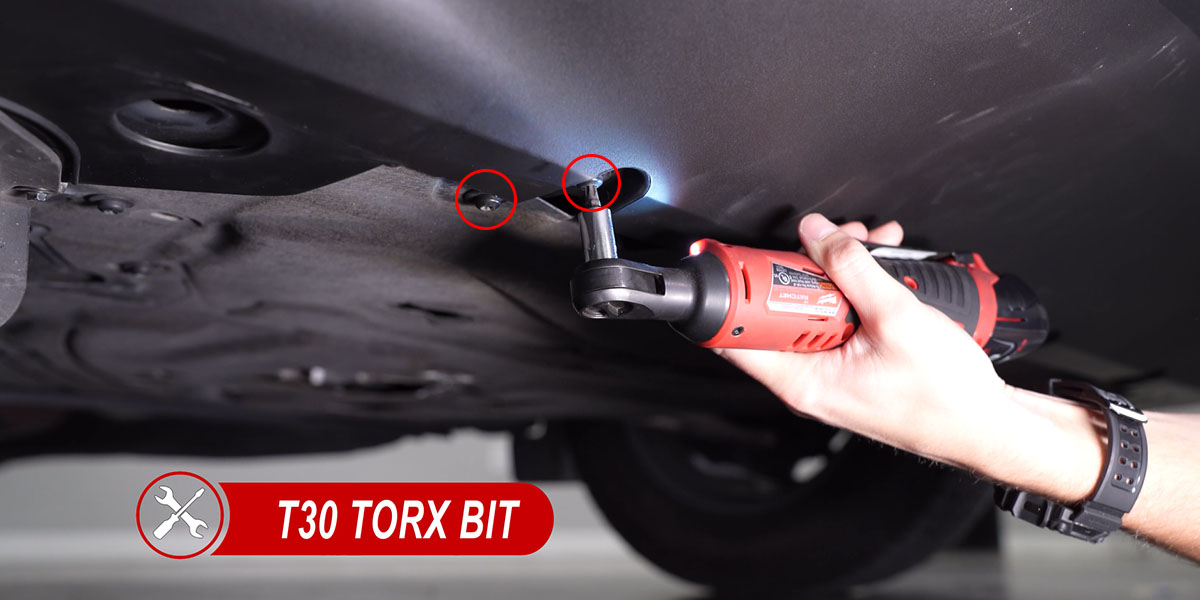
Step 5 - Remove Bumper Bolts
Under the middle of the bumper, remove eight (8) T30 Torx bolts.
Step 6 - Remove Bumper
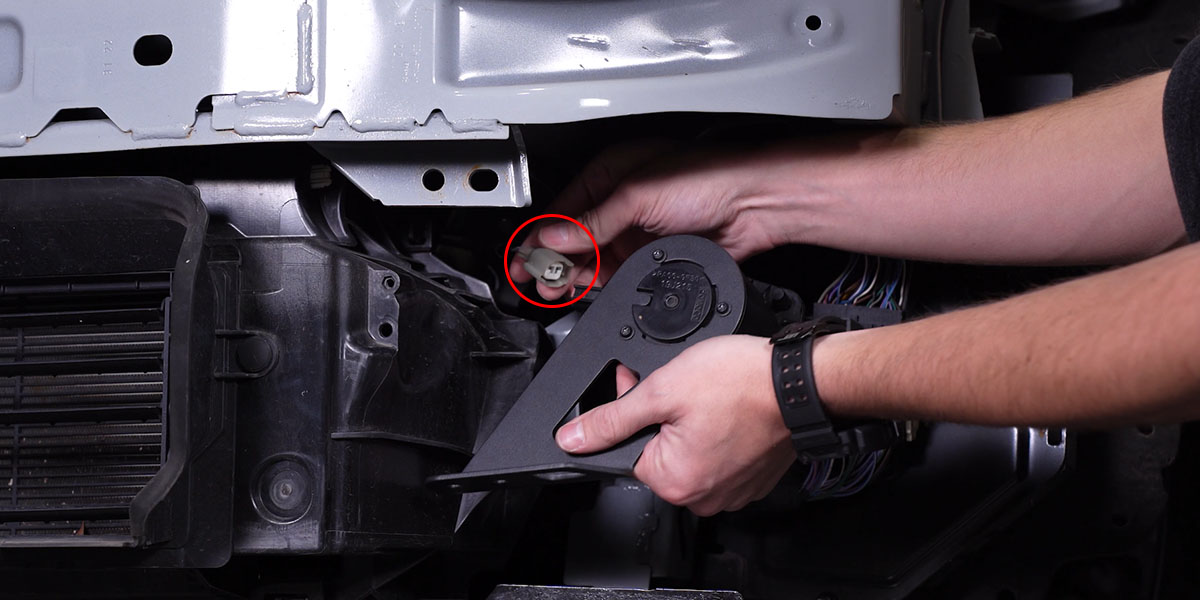
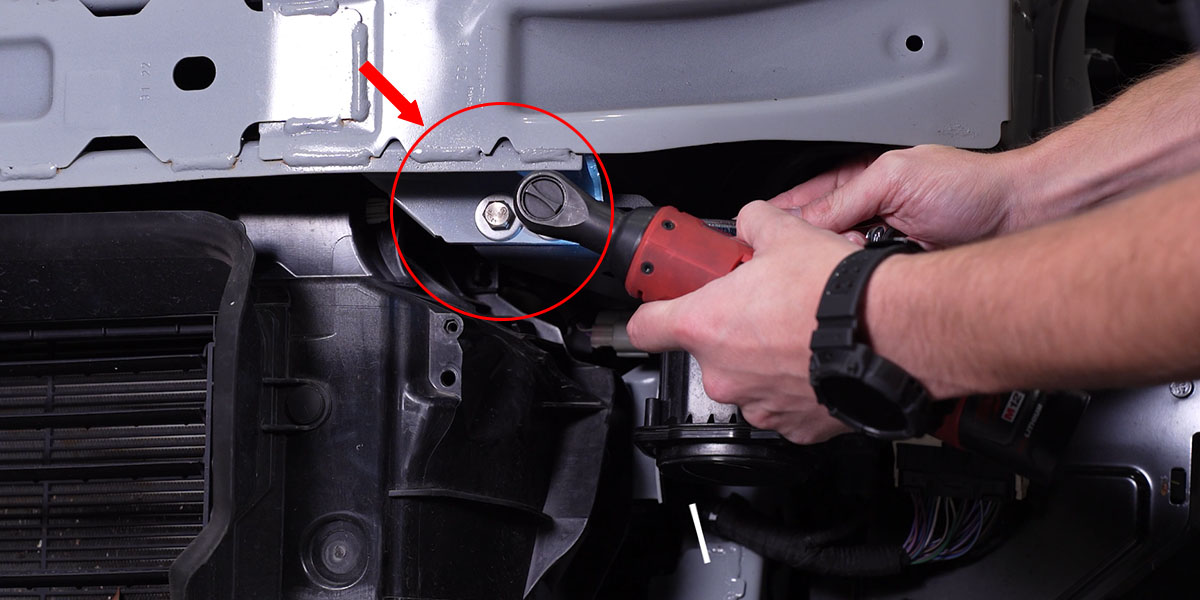
Behind the fender liner in the front wheel well, at the front quarter panel, remove three (3) 10mm bolts holding the bumper to the quarter panel.
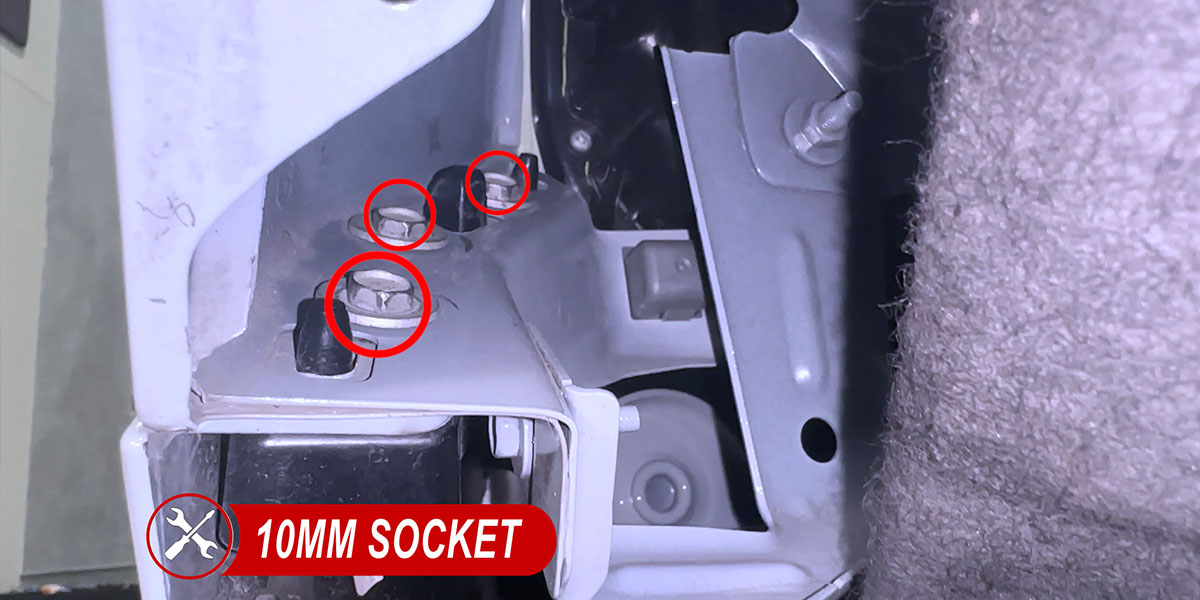
Gently pull down and away from the quarter panel to release either side of the bumper.
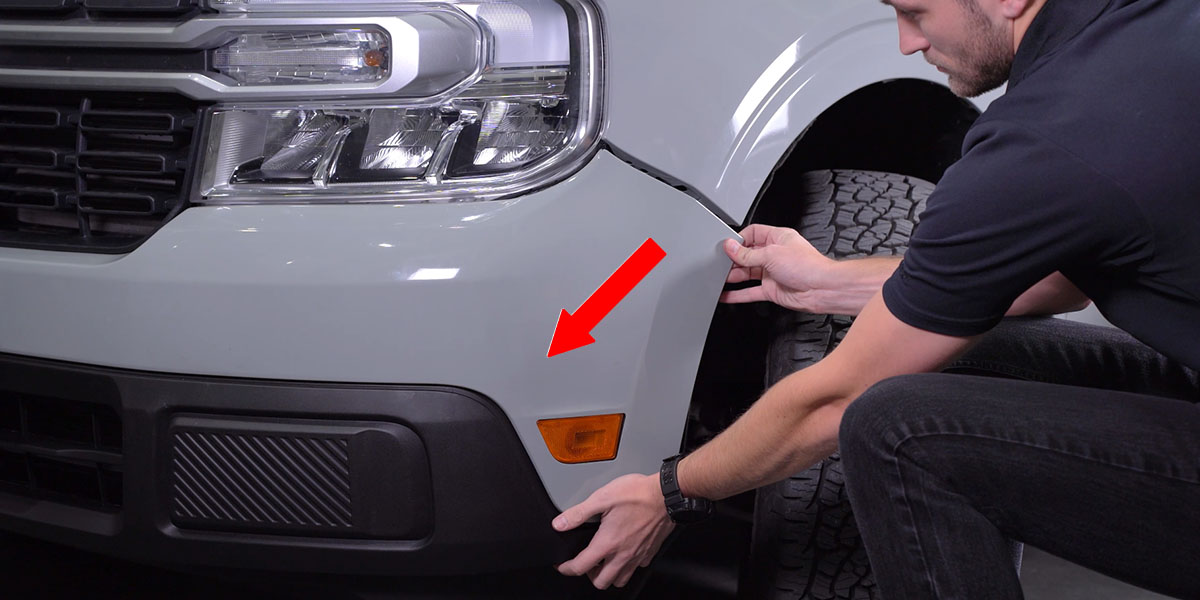
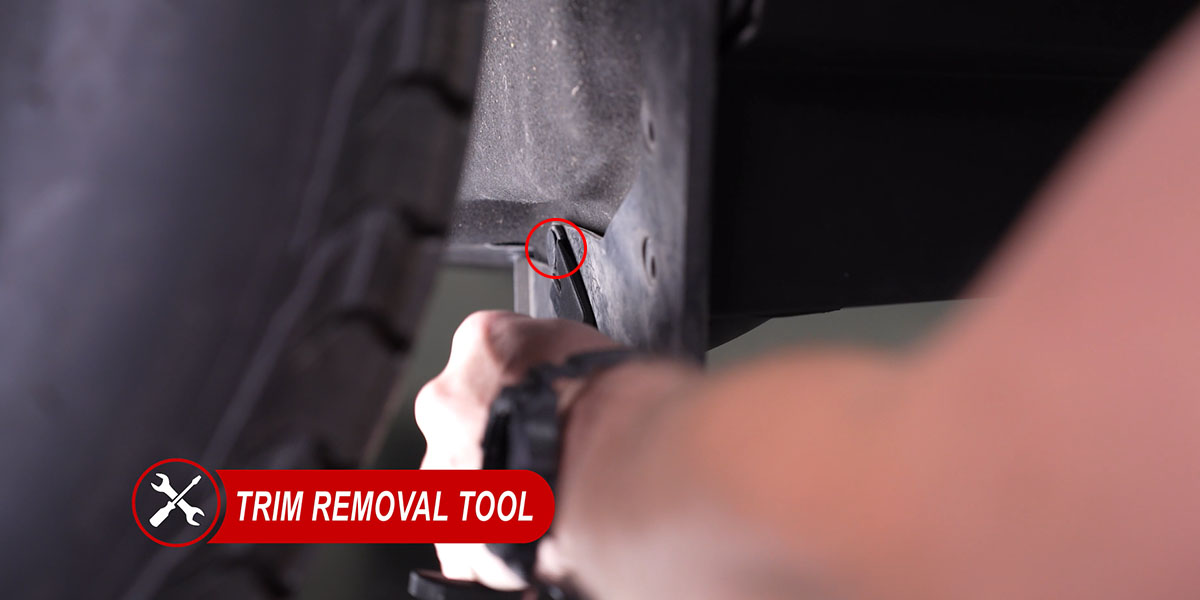
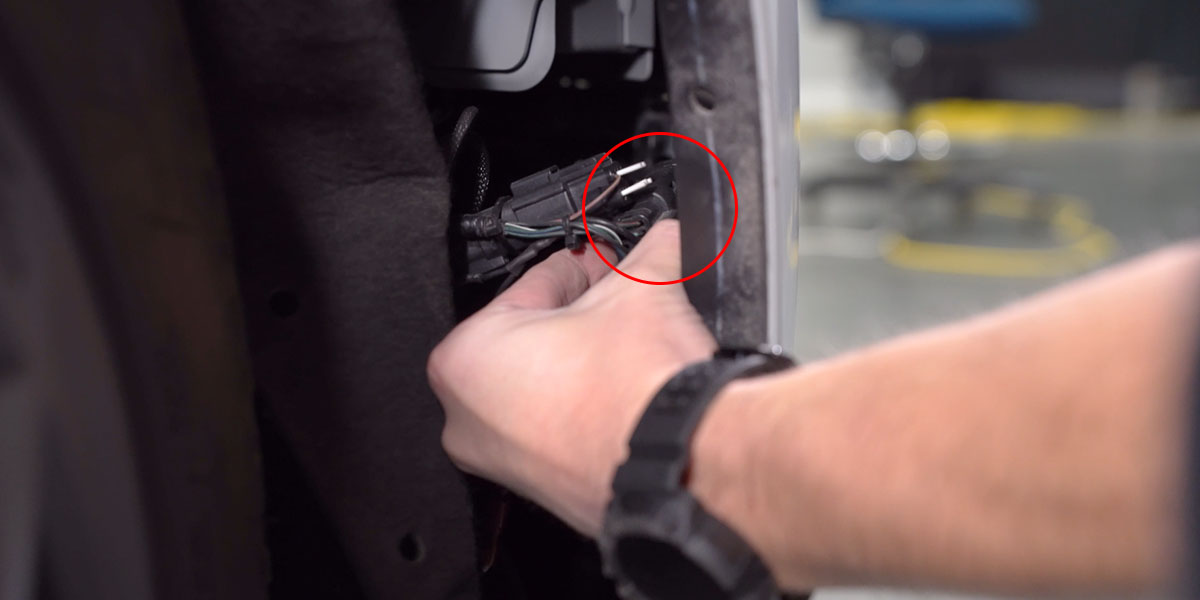
On the passenger side behind the fender liner, disconnect the factory connector attached to the front bumper by depressing the clip and pulling away.
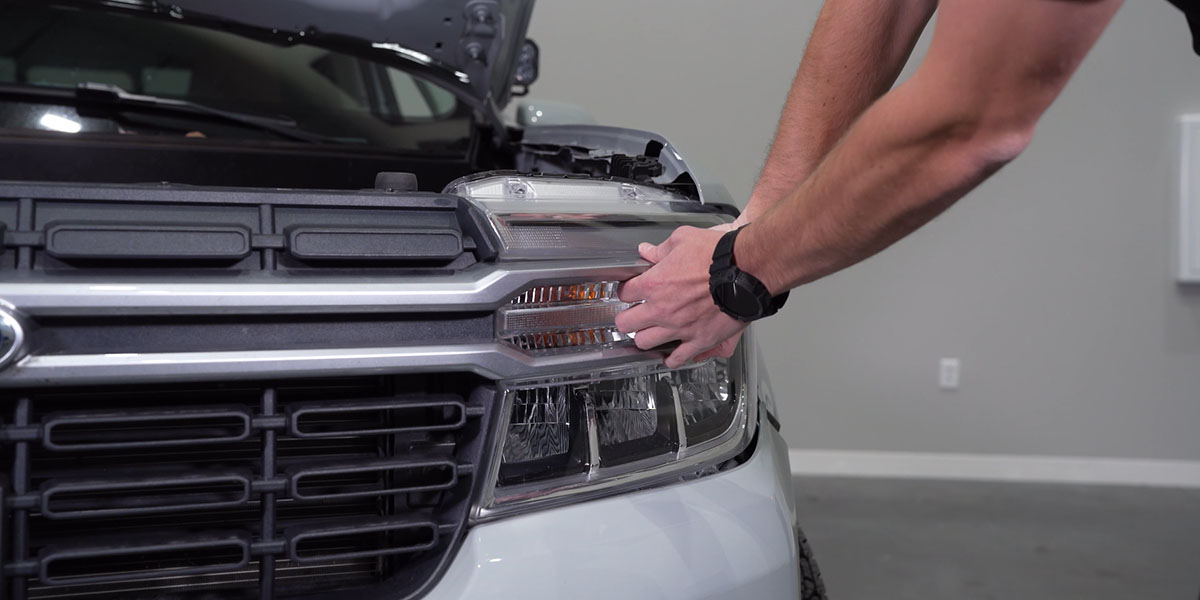
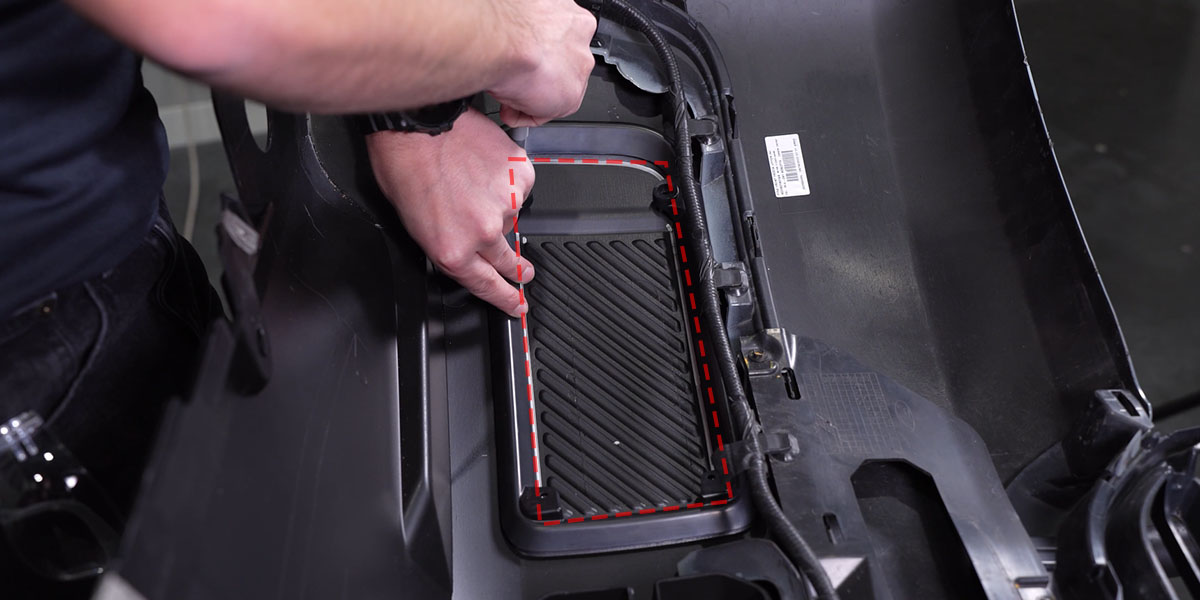
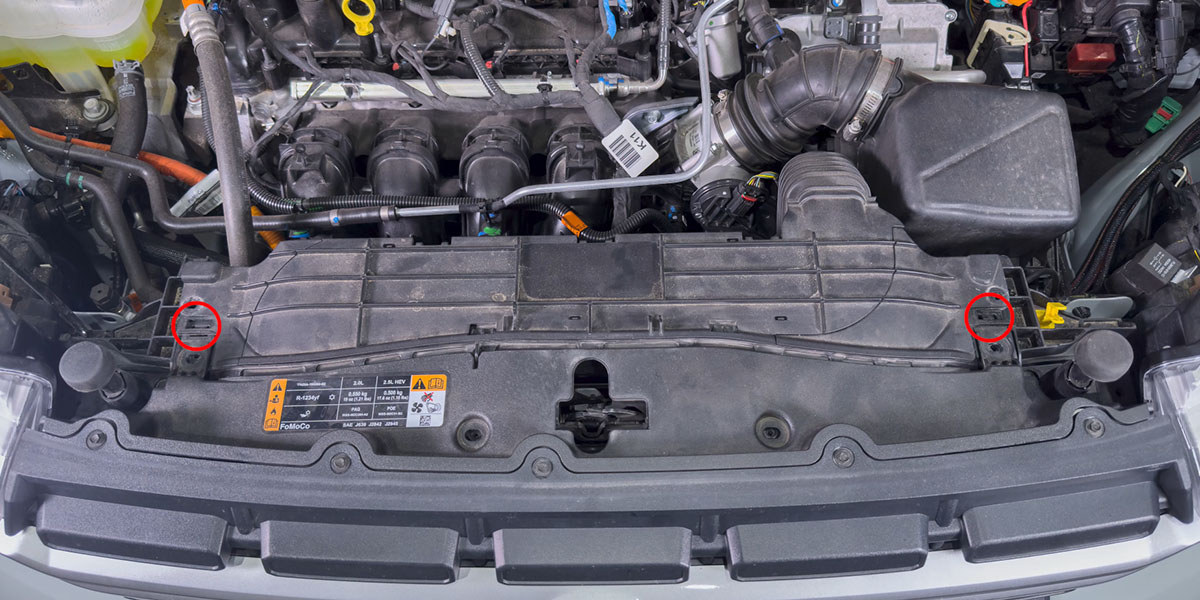
Gently pull the trim molding on the headlight assembly away from the vehicle on both the passenger and driver sides.
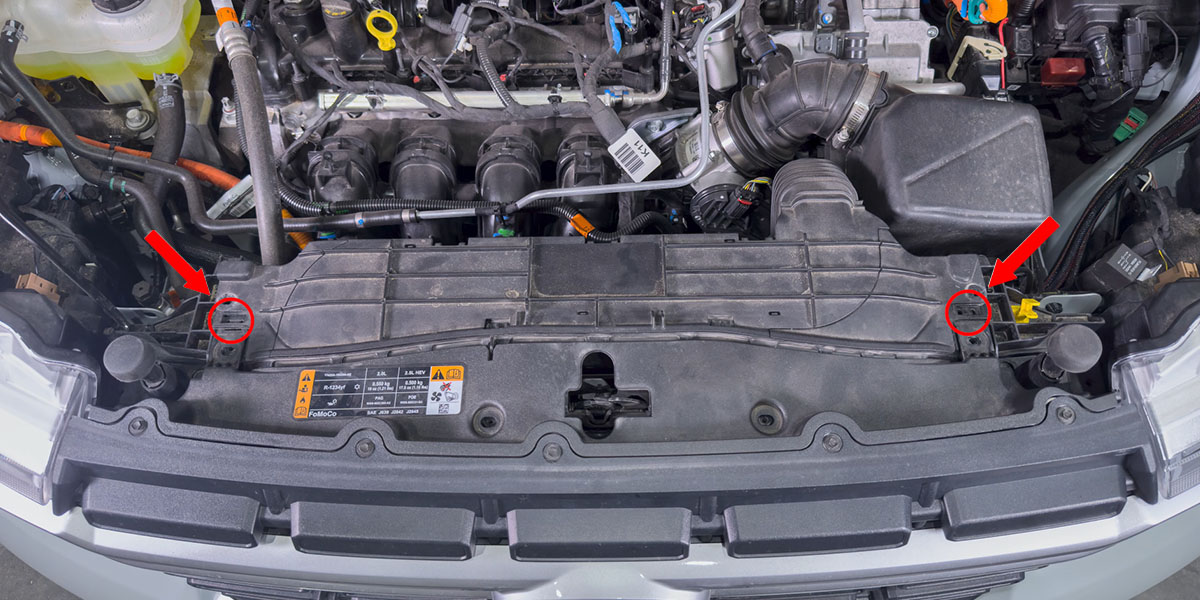
In the engine bay, there are two (2) clips on either side of the radiator shroud. Depress them with a screwdriver or pry tool, and simultaneously pull away from the front of the vehicle.
NOTE: You may need someone to help you with this step.
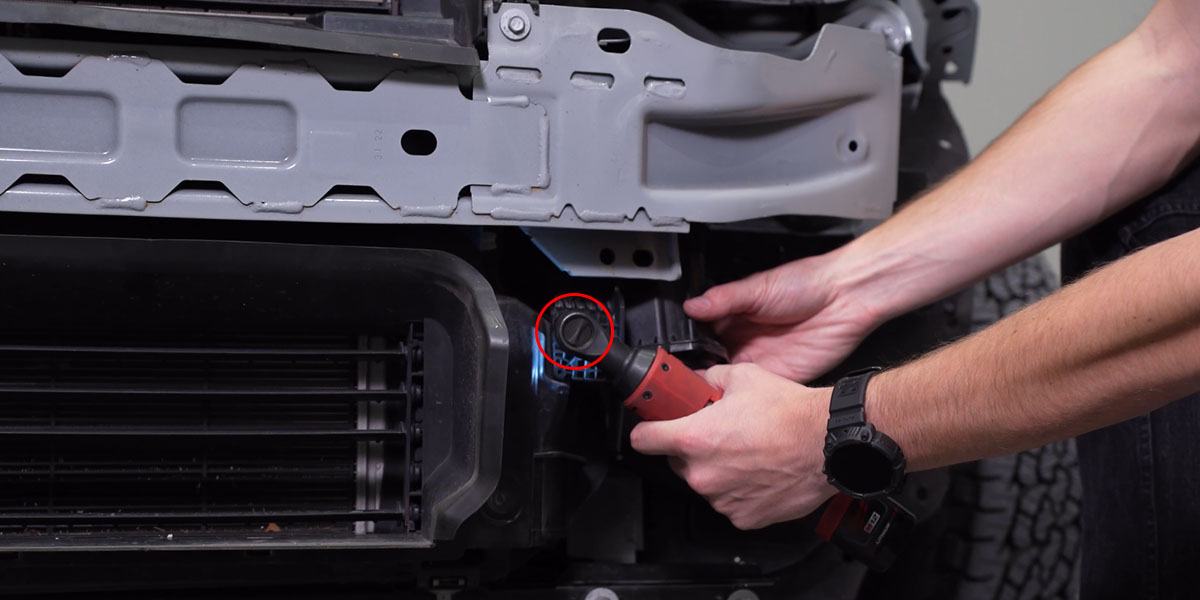
Step 7 - Relocate Speaker (Hybrid Models Only)
NOTE: If you do not have a Hybrid model, skip to step 8.
Use an 8mm socket to remove one bolt holding the assembly in place.
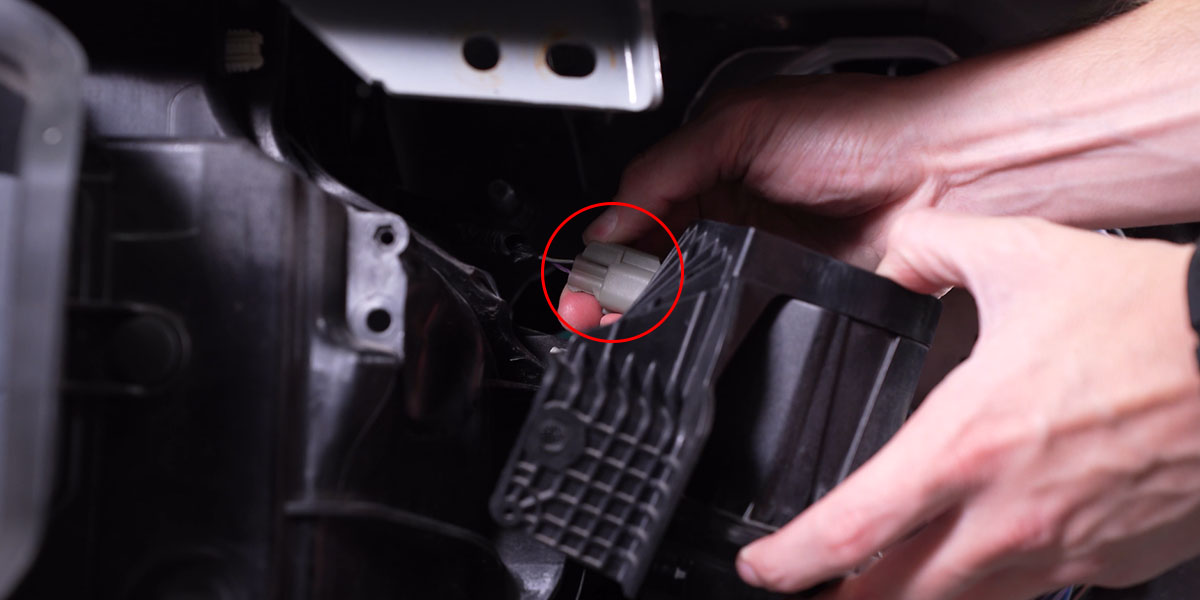
Pull the assembly away from the vehicle to reveal the wiring harness. Disconnect the harness by depressing the tab and separating it. Remove the speaker assembly.
With the speaker assembly removed, use a T20 Torx to remove the three (3) bolts holding the speaker to the bracket.
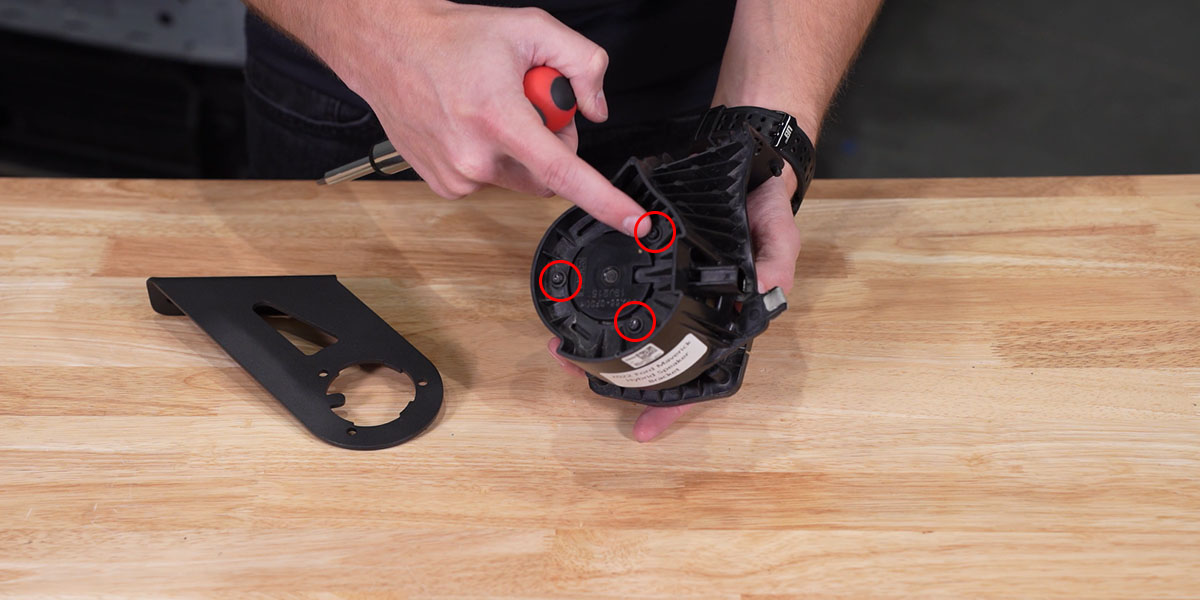
Using the same T20 Torx bolts just removed, install the relocation bracket to the speaker with the lip facing away from the speaker.
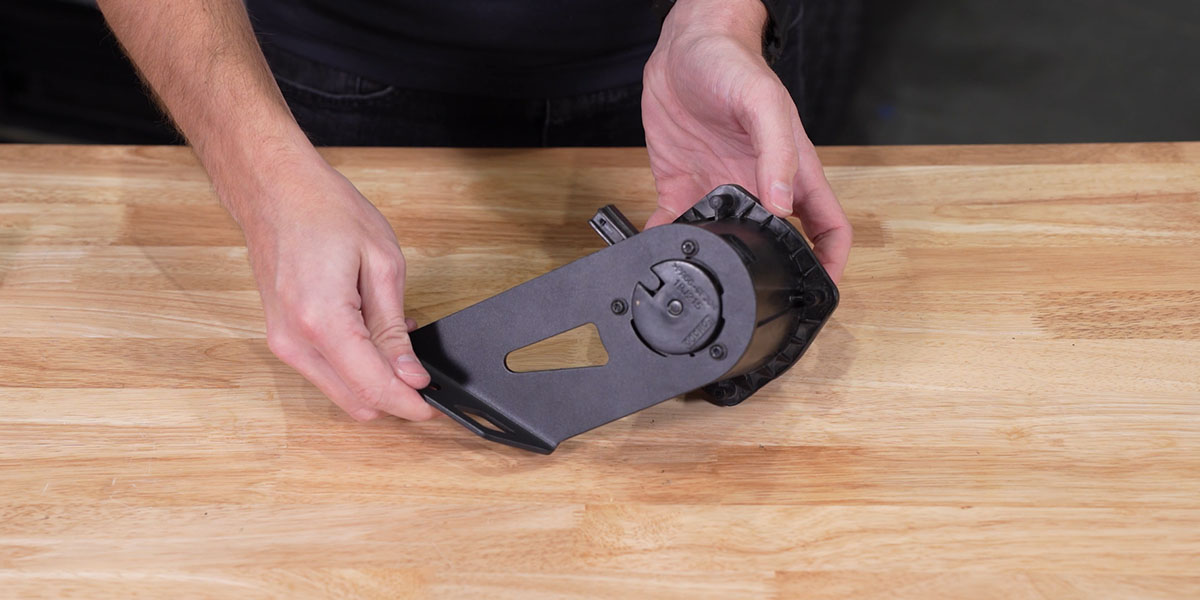
Re-connect the speaker harness to the speaker and secure it to the new location with the included 13mm bolts, washers, lock washers, and nuts.
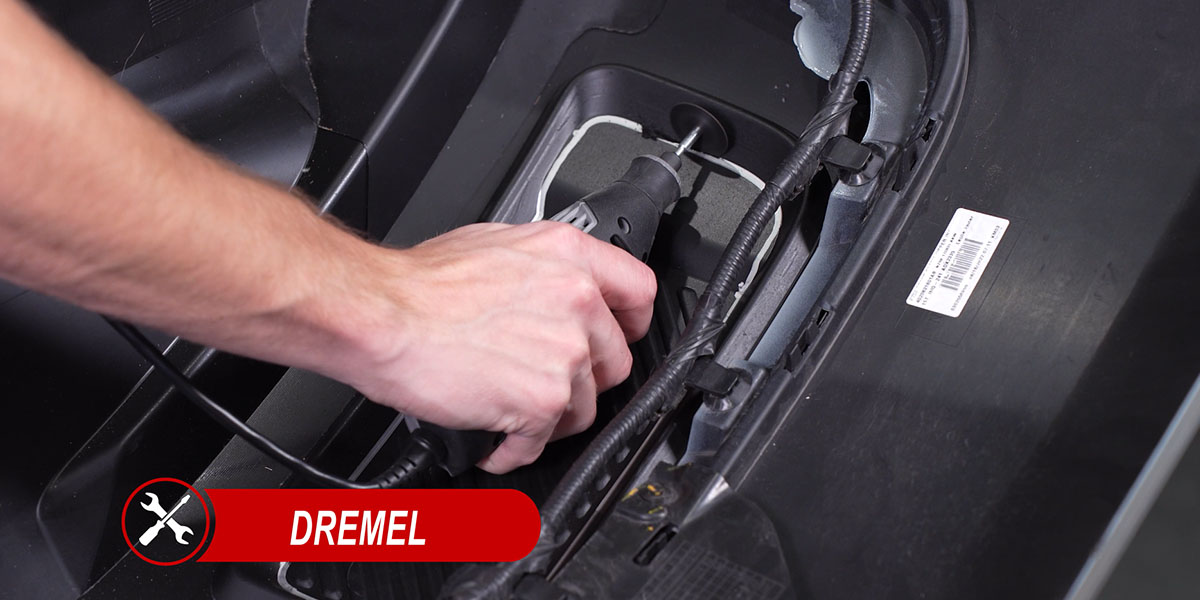
Step 8 - Bumper Modification
Lay the bumper face down on a soft surface. Set the corresponding support ring down on the back of the bumper and trace the outline along the inside edge.
With a Dremel, cut along the outside edge of your trace.
NOTE: This cut does not need to be precise.
Deburr the edges with a razor blade.
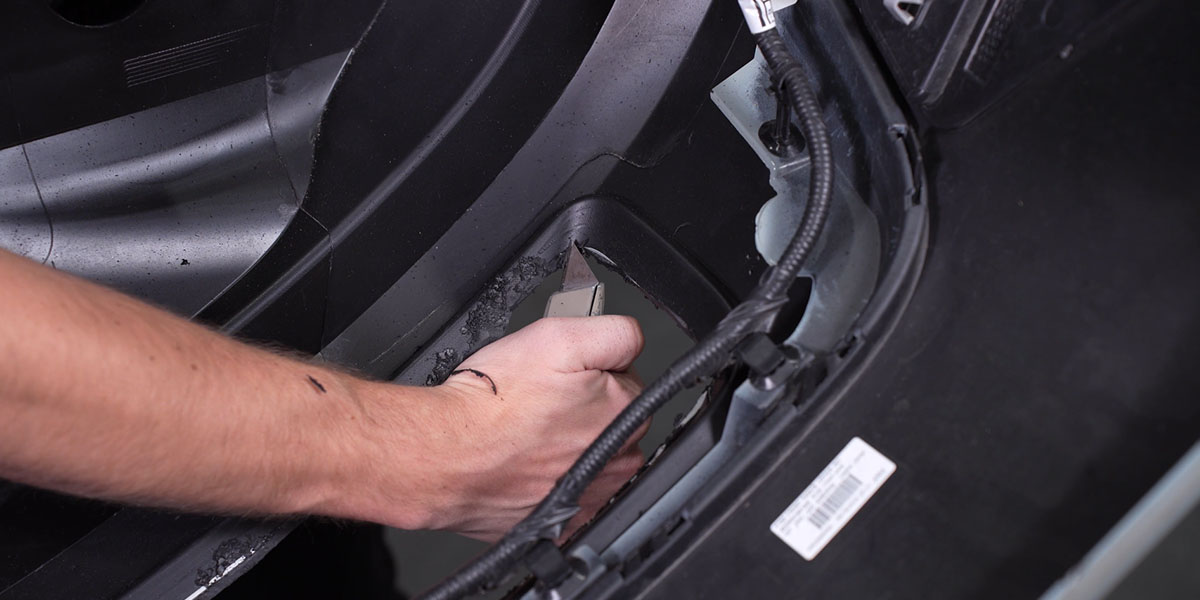
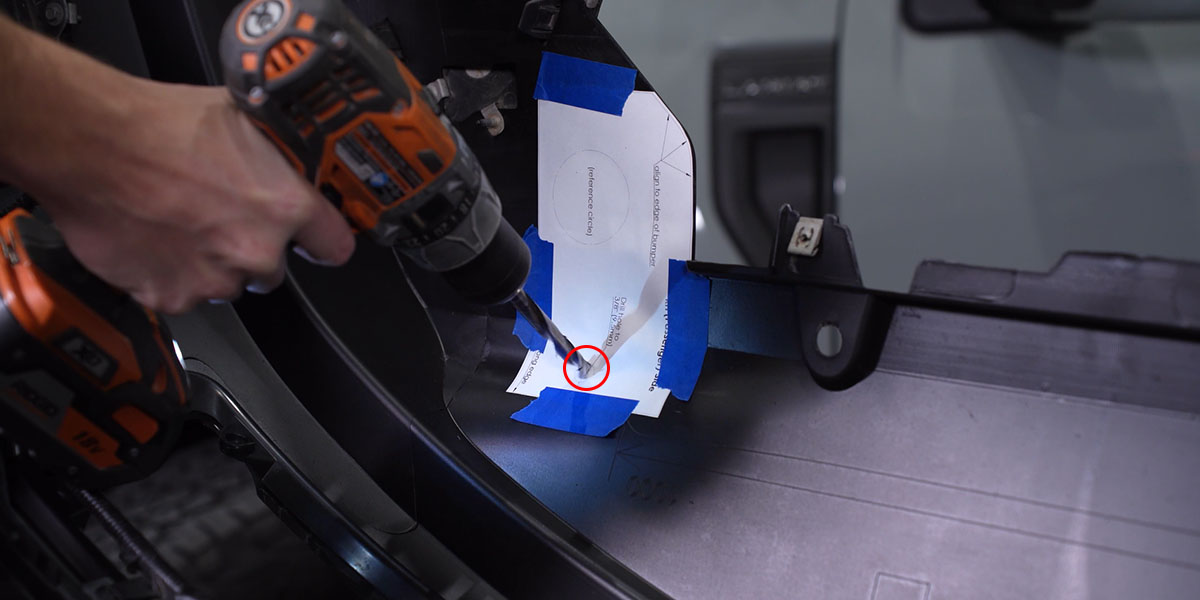
Using the included cutting template, align the cutout template to the correct side, and tape it down.
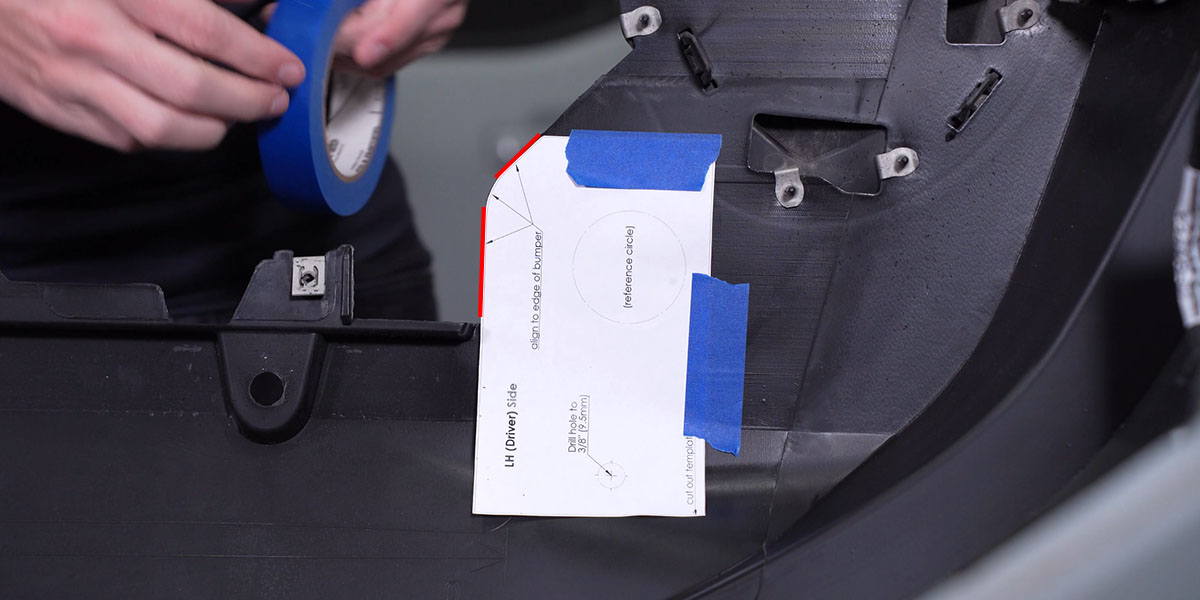
Use a 3/8" drill bit to drill a hole where the template indicates (circled in red below).
NOTE: This hole can be larger, as it will only be used for aiming adjustments in a later step.
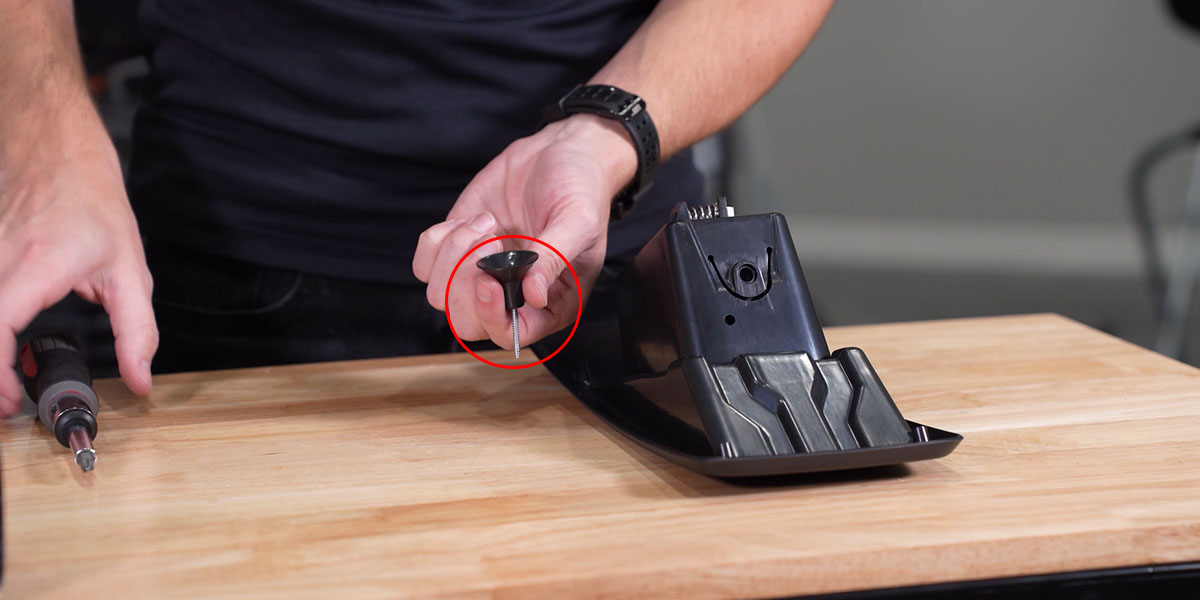
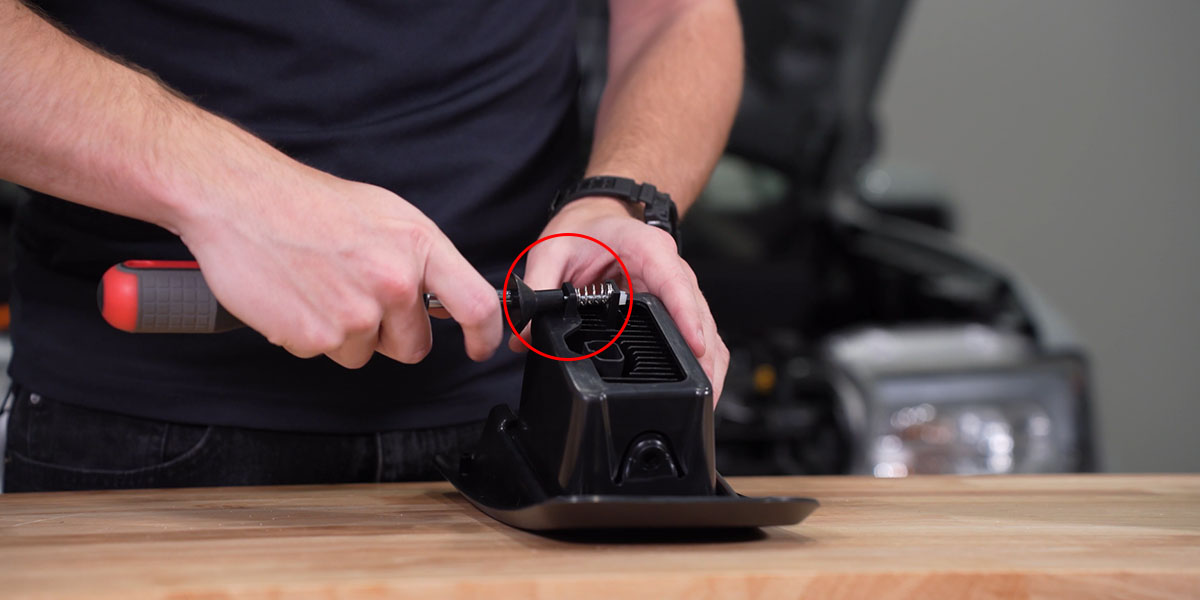
Step 9 - Assemble Fog Light Bezel
Insert the snap-in nut, then place the corresponding fog lamp into the fog housing (both lamps and fog housings are labeled).
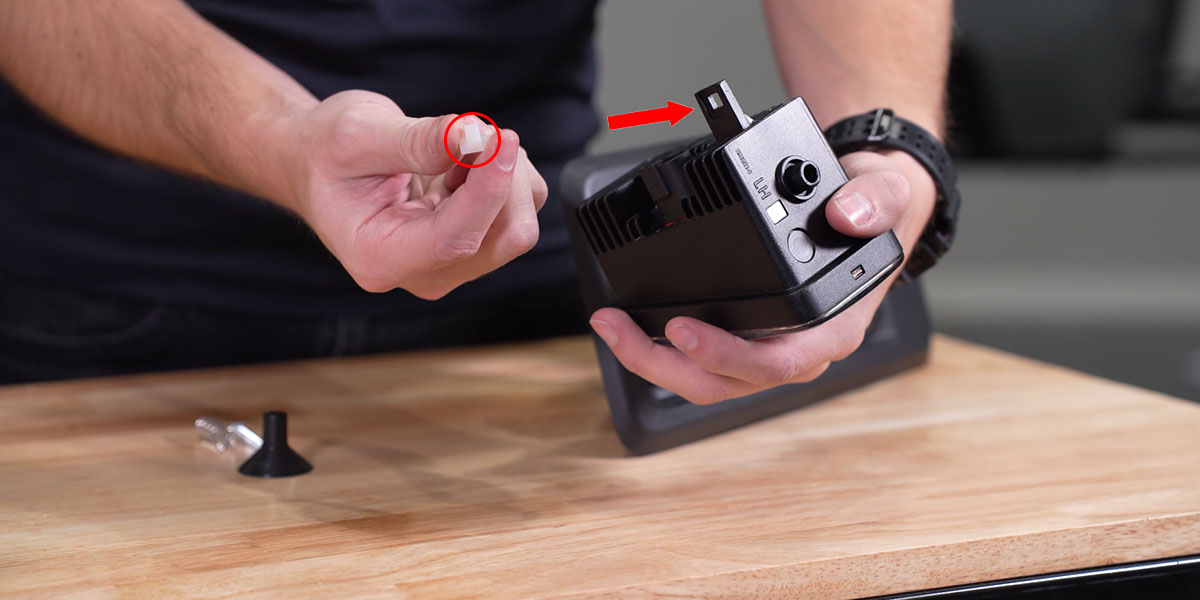
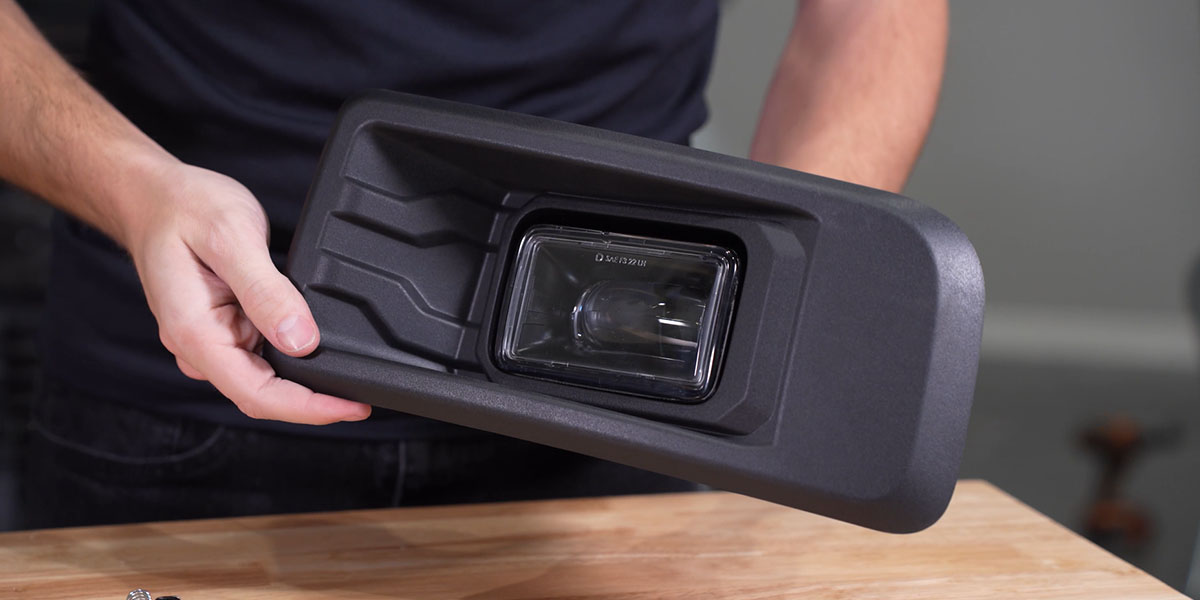
Insert the adjustment spring between the fog lamp and the housing.
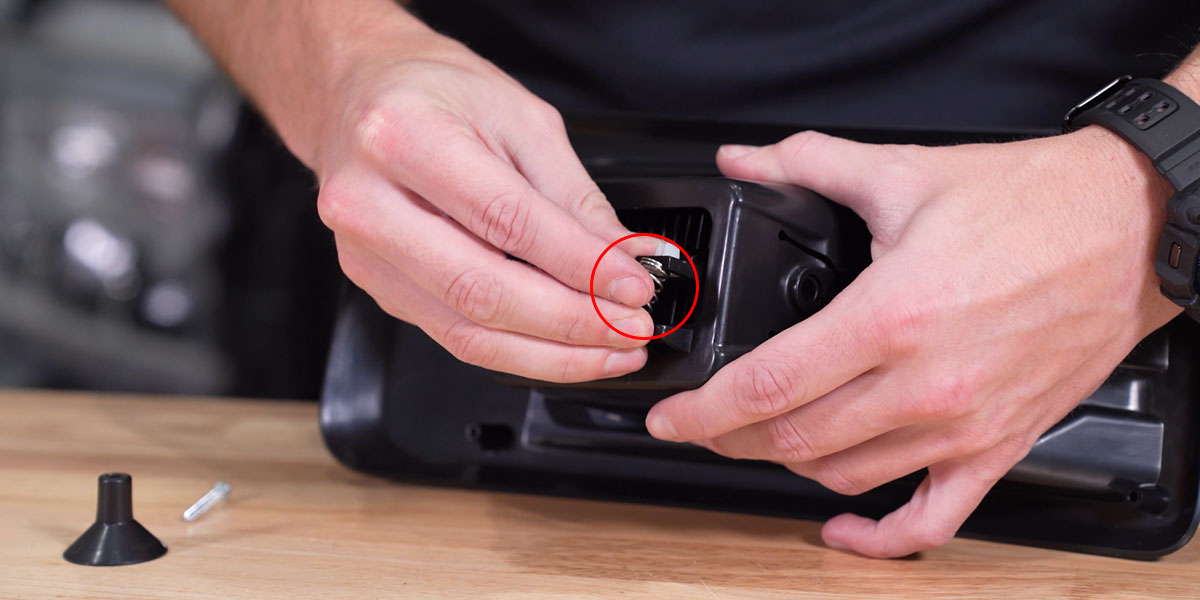
Insert the adjustment screw through the centering cone, and thread it into the snap-in nut using a Philips head screwdriver.
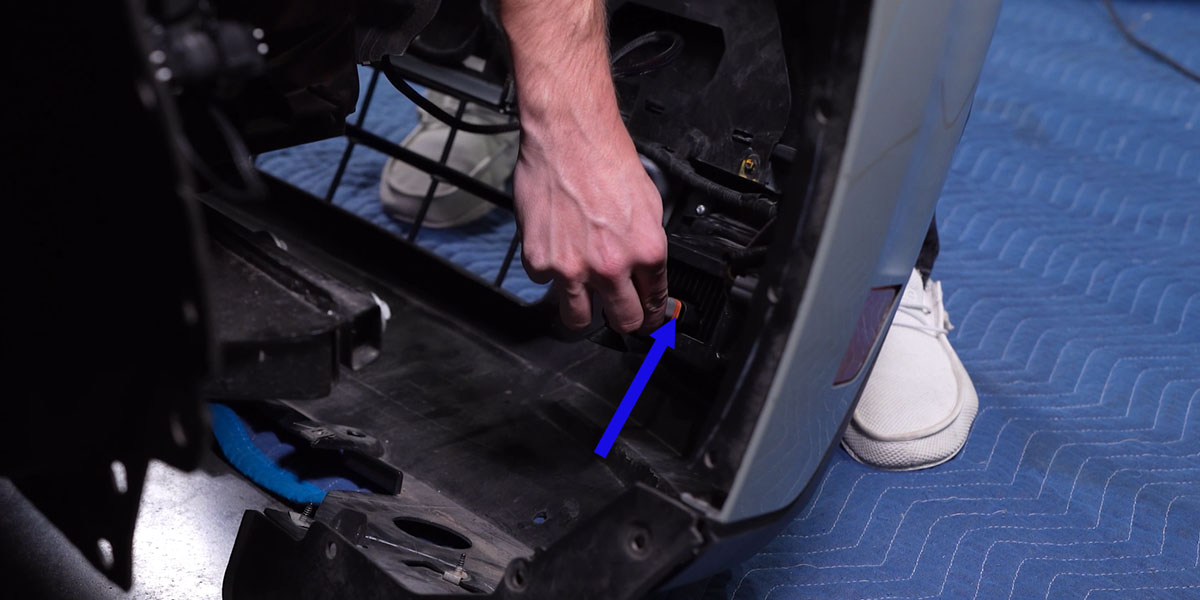
Step 10 - Fog Light Mounting
Place the support ring down onto the back of the bumper, and hold the fog light bezel against the front of the new opening.
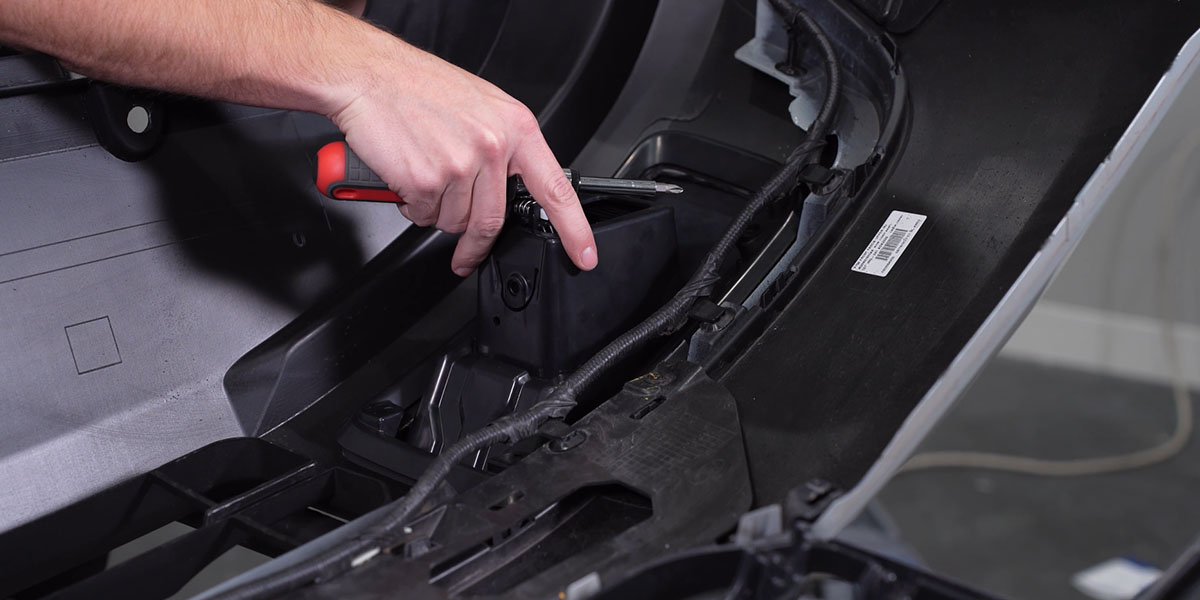
Ensure the four mounting holes align with both the support ring and fog bezel. Screw the included hardware into the fog bezel to sandwich the two pieces to the bumper.
NOTE: Be cautious not to over-tighten.

Wiring Instructions
Step 1 - Route Harness Relay
Route the fog light harness relay down behind the driver's side headlight and crash bar and mount it to the support bar in front of the wheel.
Follow the same path to route both DT leads and blue backlight tap wire down to the relay.

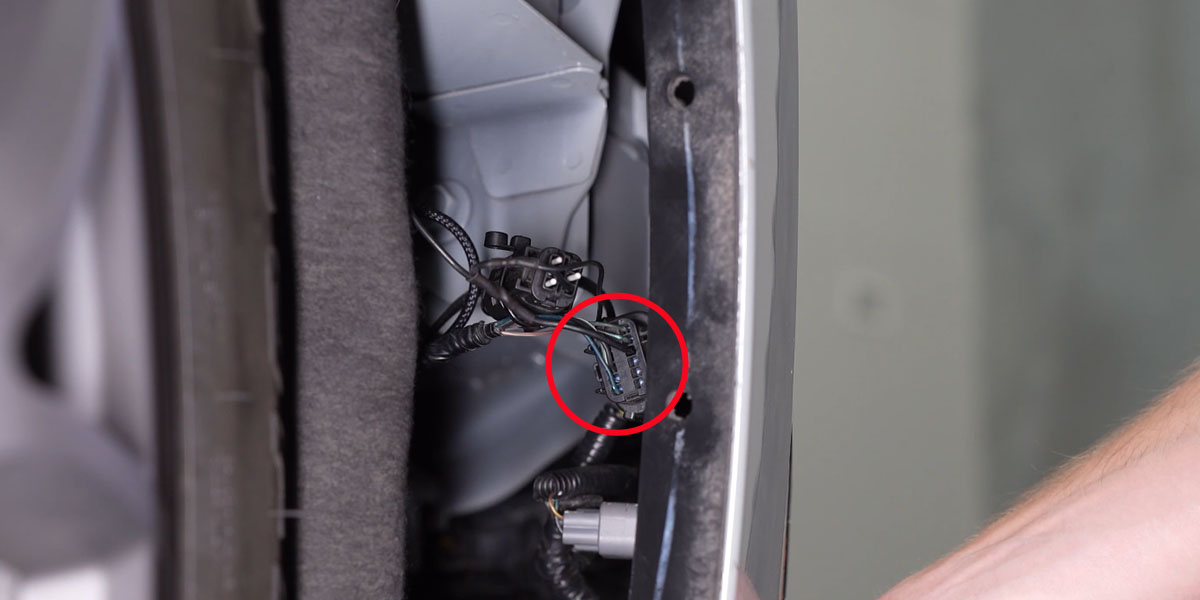
Step 2 - Route Passenger Side DT Lead
Route both the long DT lead and backlight tap wire along the top of the lower active shutters.
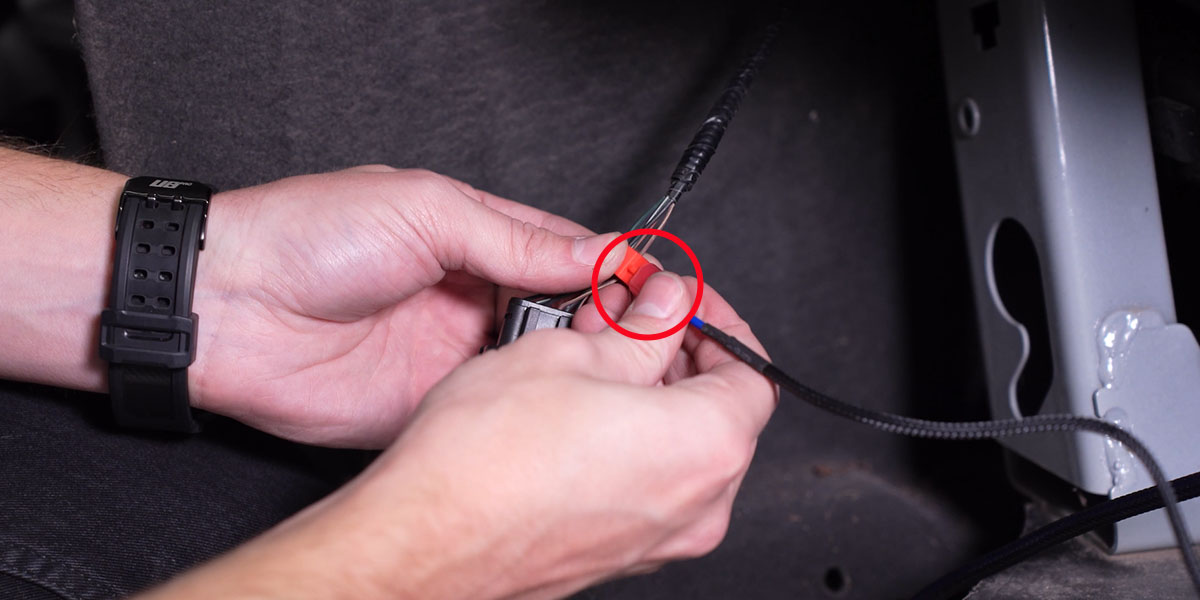
Locate the 12-pin Molex connector we removed earlier, and tap the number 10 pin (brown wire with a yellow stripe).
Tap and secure the included t-tap using needle-nose pliers. Connect the backlight activation wire (blue wire lead).
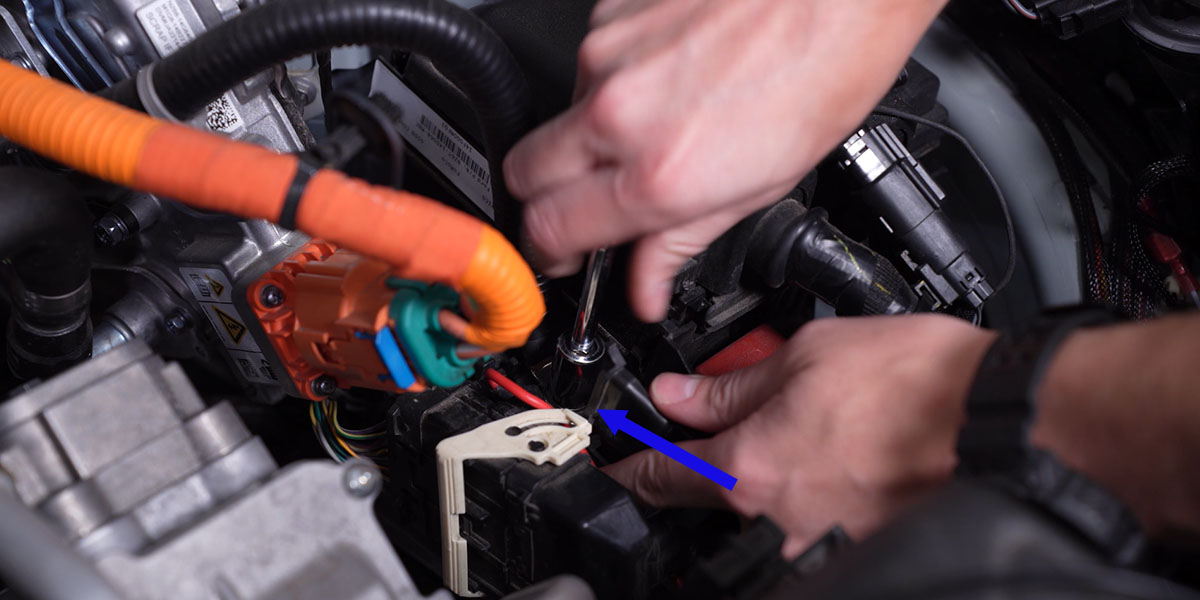
Step 3 - Route and Secure Switch Harness
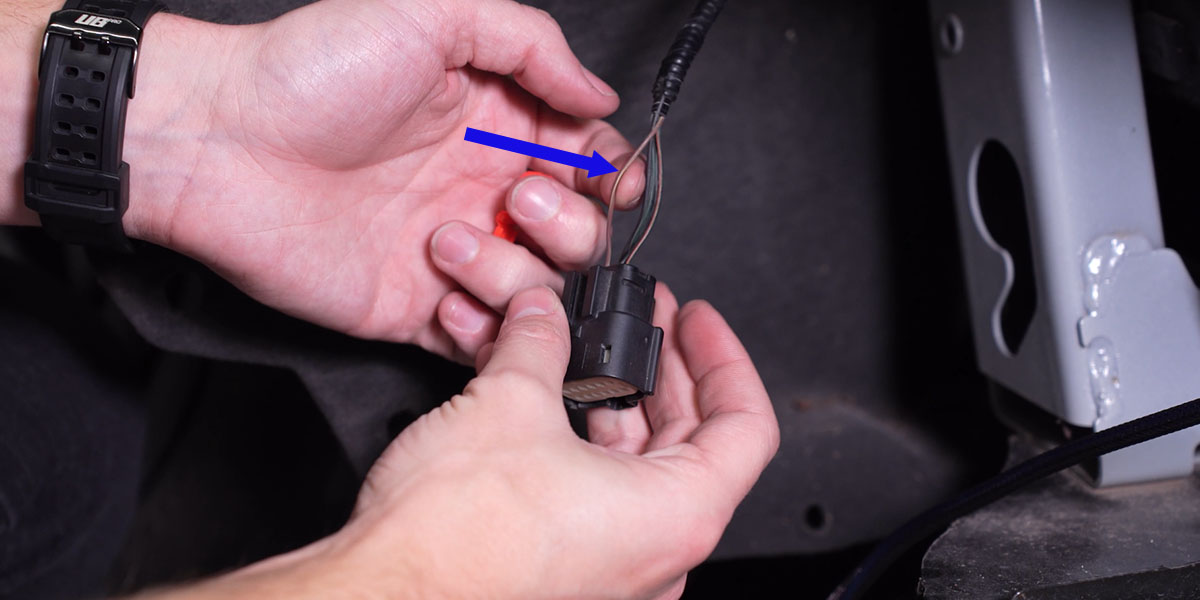
Unplug the passenger side headlight connector and locate pin 3 (blue wire with a green stripe).
Tap into this wire with the included T-tap and secure using needle-nose pliers.
Connect the white wire lead (main beam activation wire) from the Switch Harness to this tap.
Route the rest of this harness across the back of the engine bay.
Then, route the toggle switch down and through the firewall grommet into the cab.
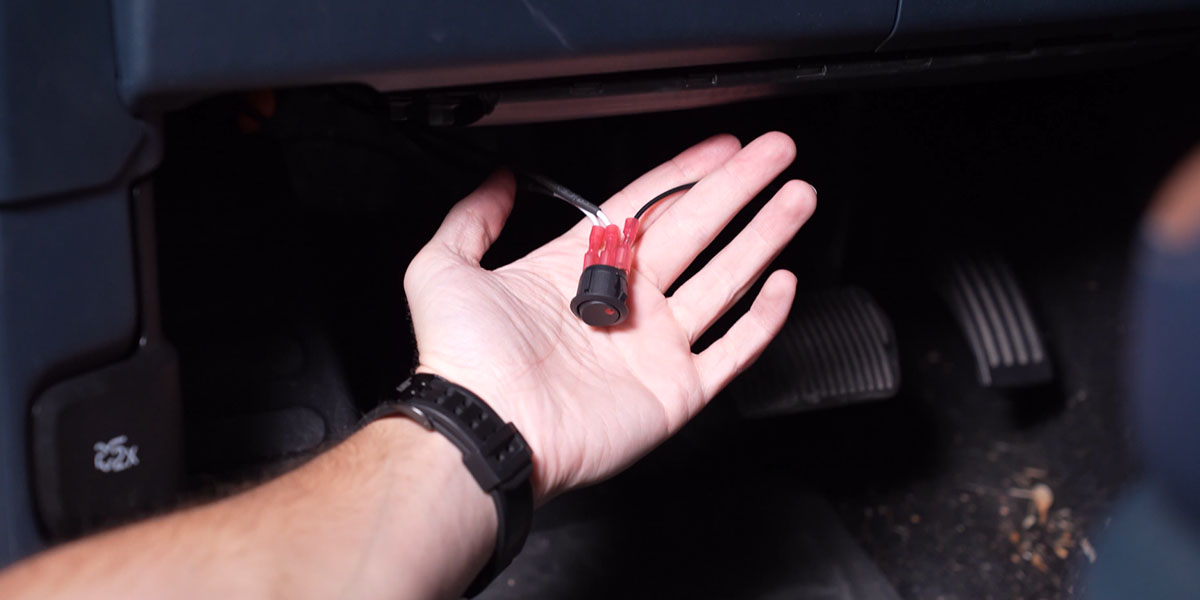
Step 4 - Mounting Toggle Switch
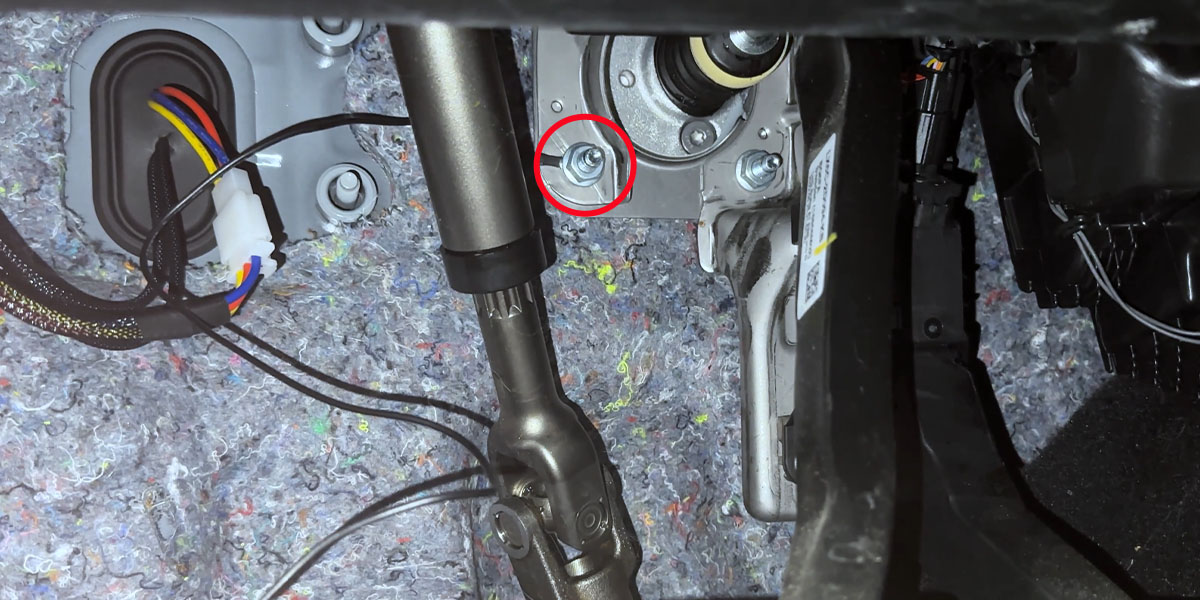
In the cab - up and underneath the steering column - secure the toggle switch wherever you prefer.
Ground the black wire wherever you see fit. For this application, we chose the bottom left 13mm bolt attached to the brake pedal bracket.
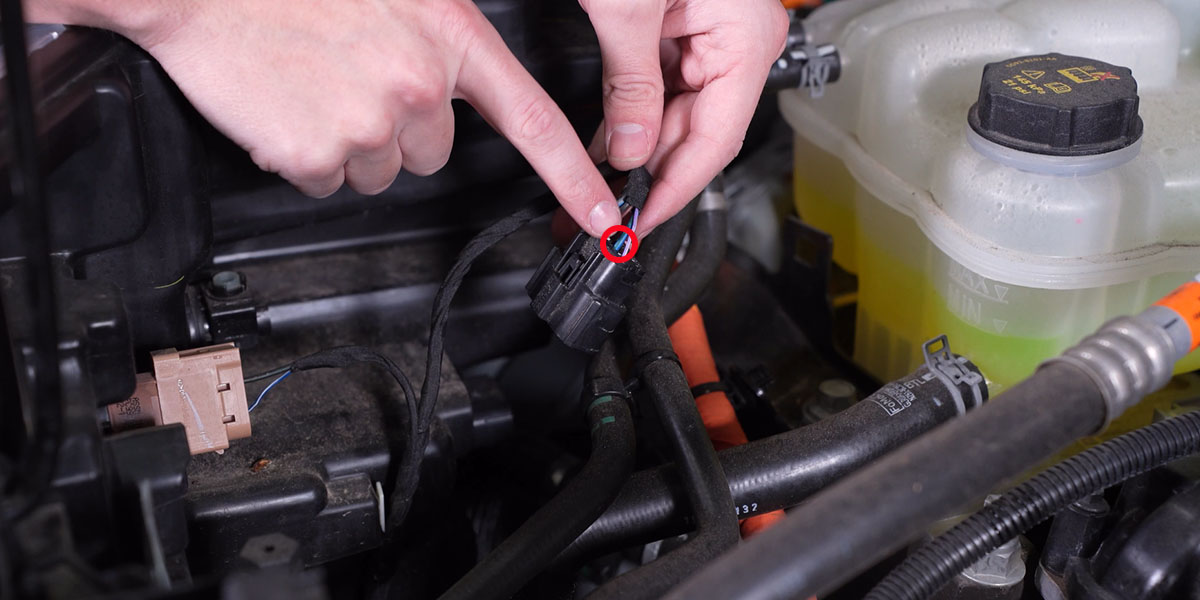
Step 5 - Connect Switch Harness to Main Harness
Using the female spade connector with the white wire, connect to the male spade connector with the white wire from the main fog harness.
Step 6 - Deactivation Lead
Locate the deactivation lead (orange wire), bundle it up, and tuck it away as it will not be used in this installation.
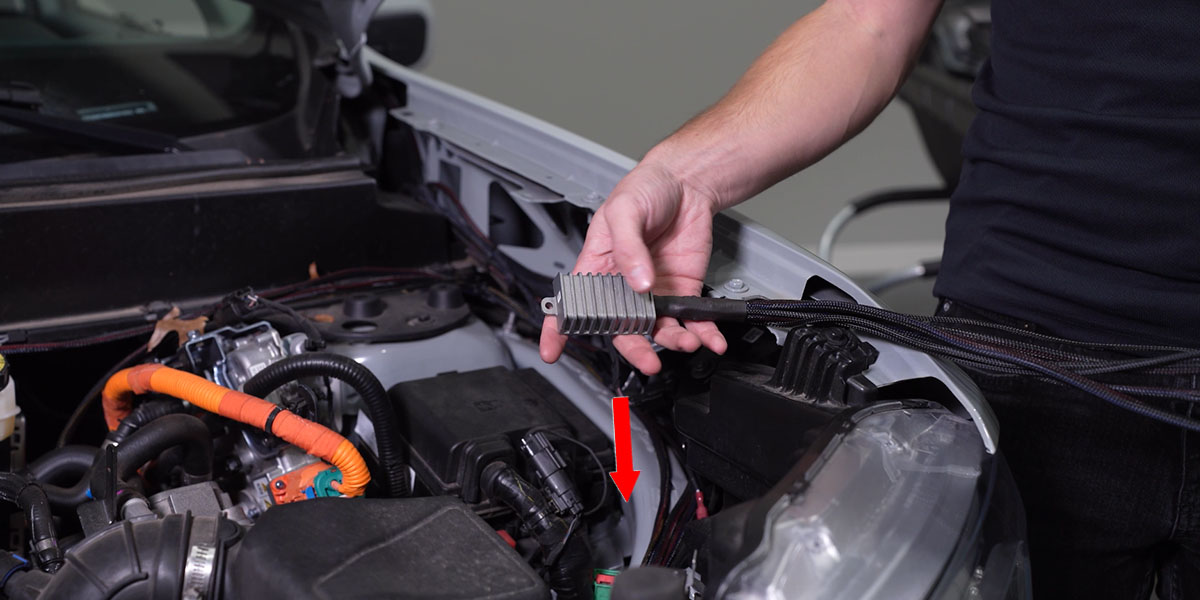
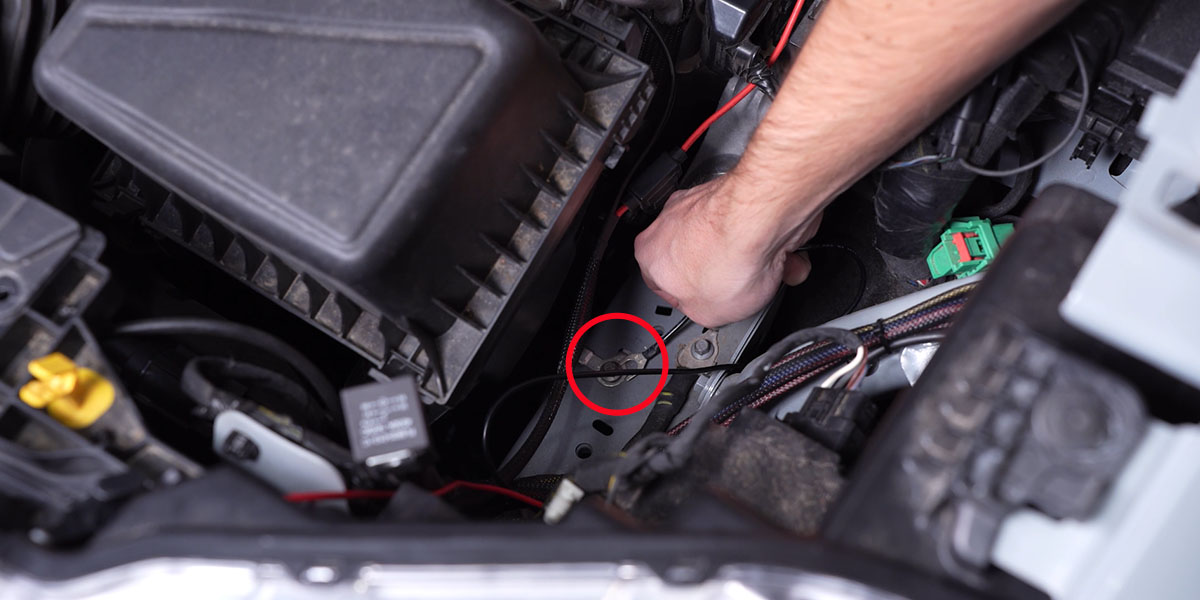
Step 7 - Connect Battery Leads
Find the positive lead and connect it to the positive terminal of the battery.
Take the negative lead and secure it to the chassis ground behind the driver's side headlight (as shown).
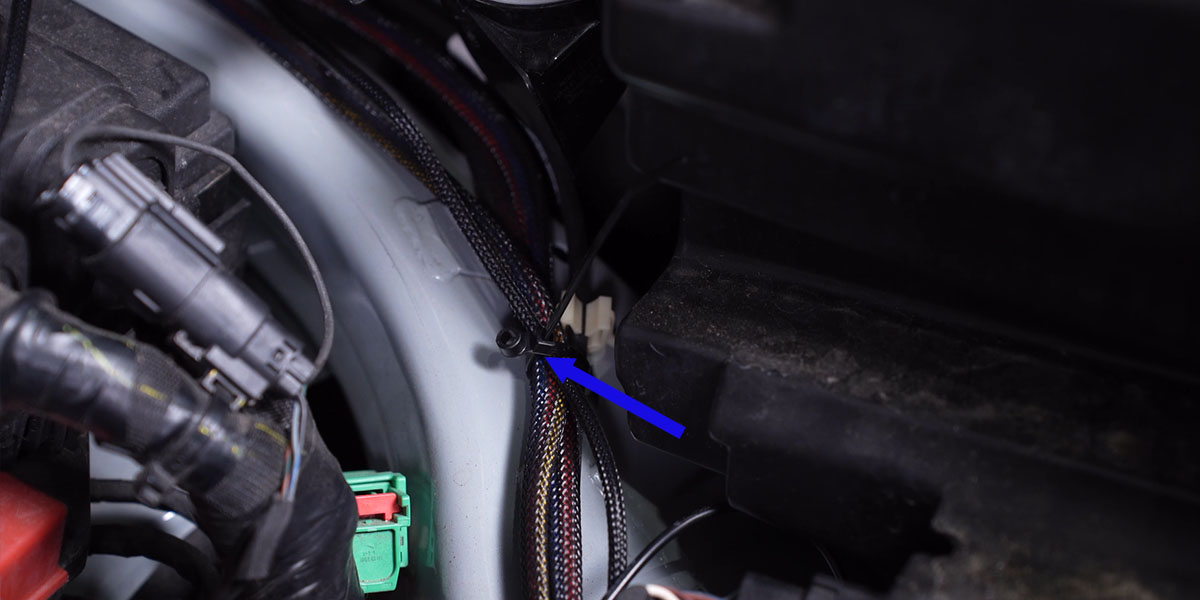
Step 8 - Secure Wiring
Using the included zip ties, secure any loose wiring, making sure to stay clear of any hot or moving parts.
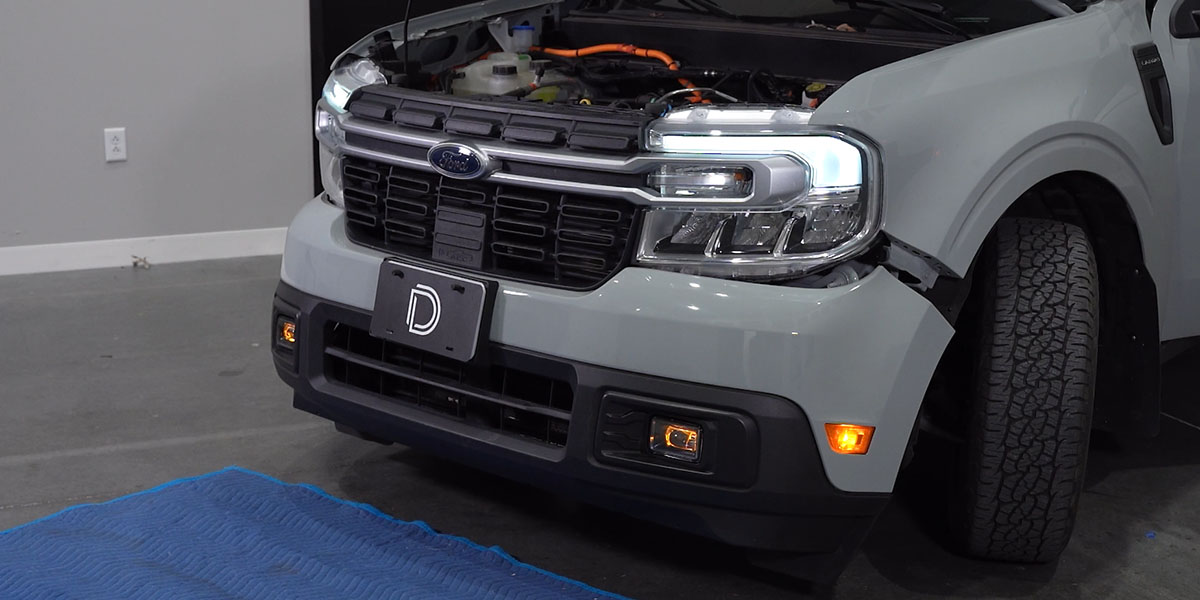
Step 9 - Test Lights
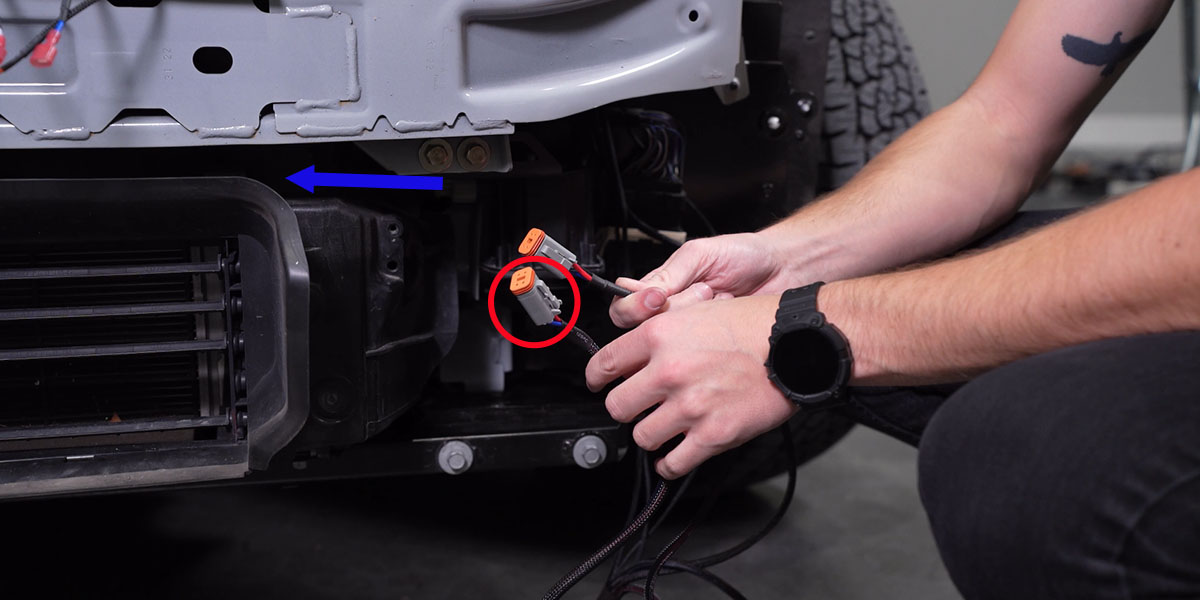
Bring the bumper to the front of the truck and set it on a soft surface. Plug in the DT connectors to the fog lights while holding the bumper upright.
Hang it back onto the vehicle using the top two push tabs.
On the passenger side, plug in the 12-pin connector we removed earlier, and test for functionality.
Note: The backlights should come on with the parking lights, and the main beam will only turn on with the low beam and the toggle switch in the "on" position. Then main beam should turn off when the low beams turn off.
Step 10 - Reinstall Bumper
Complete the reinstallation process by reversing the steps we used to take it apart.
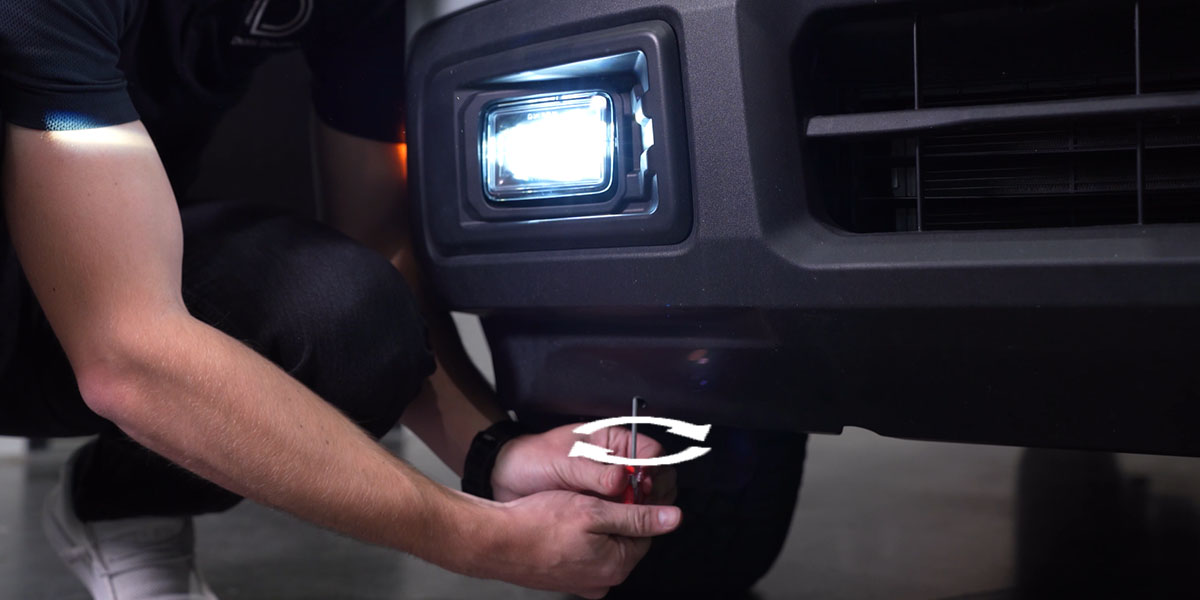
Step 11 - Final Aiming
With the extended Philips head screwdriver, use the 3/8" hole from "Step 8" of the Installation process, and aim your fog lights either up or down.
NOTE: Rotate counterclockwise to raise the angle, and clockwise to lower the angle.
Aiming Instructions
To learn how to aim your installed fog lights, check out the video below, or keep reading for step-by-step instructions.
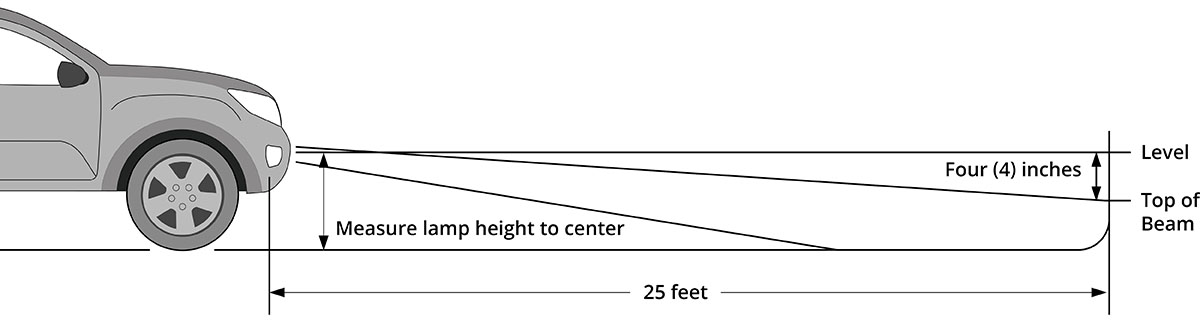
Step 1 - Position Vehicle.
Park your vehicle 25 feet away from a wall or garage door on a level surface.
Step 2 - Find Mounting Height.
On your vehicle, measure the distance between the ground and the center of your fog lamp. This is your mounting height.
Step 3 - Mark Mounting Height.
Mark the mounting height on the wall or garage door using tape.
Step 4 - Mark Cut-Off Line.
Add another piece of tape four inches below the mounting height. This is your fog cut-off line.
Step 5 - Aim Fog Lights.
Using the integrated adjustment screw, aim the fog lights on each side of the vehicle so that the top of the beam pattern is on the cutoff line mark.
The installation is now complete. Enjoy your Elite Series LED Add-on Fog Light Kit for the 2022-2024 Ford Maverick!
Questions About the Installation?
If you have any questions or issues installing the Elite Series LED Add-on Fog Light Kit for the 2022-2024 Ford Maverick, please contact us for further assistance.
Where Can I Buy an Elite Series LED Add-on Fog Light Kit for the 2022-2024 Ford Maverick?
If you’re ready to upgrade your 2022-2024 Ford Maverick with an Elite Series LED Add-on Fog Light Kit, you can purchase one by clicking here or using our dealer locator to find a dealer near you.
If you are looking to add additional Off-Road LED Lights to your Maverick, we have a variety of LED Pod Light kits here!
Want to know more about Diode Dynamics products? Visit DiodeDynamics.com and subscribe to our newsletter for new product releases and more!
This Installation Guide is for the following SKUs: DD7768, DD7769
Share This Post