


The HitchMount LED Pod Reverse Kit for the 2021-2023 Ford F-150 allows you to install one SSC1 or C1R LED Pod in your 2-inch trailer hitch receiver, adding a high-power reverse light, additional running light, and an optional 4th brake light with the C1R option.
The following installation guide will provide you with detailed instructions on how to install the C1R HitchMount LED Pod Reverse Kit on the 2021-2023 Ford F-150.
Note: This guide is only for the C1R Kit. If you are installing an SSC1Kit, refer to the installation guide here.
Table of Contents
Installation Video
Installation Tools
- 8mm Socket
Mounting Instructions
Step 1 - Remove Tail Lights.
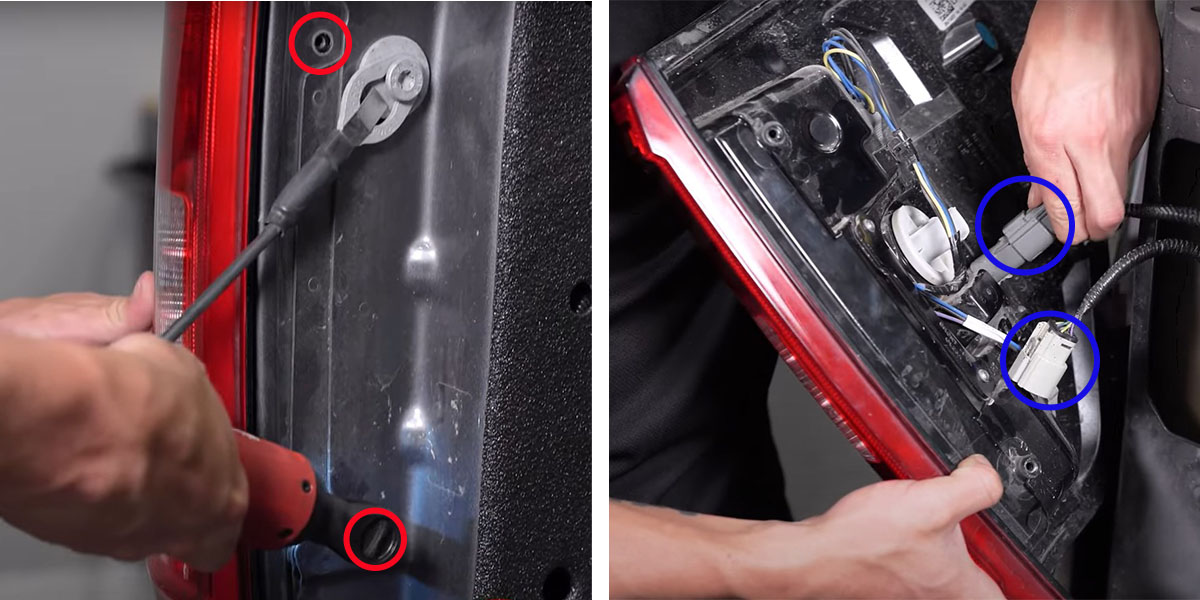
Begin by lowering your tailgate. Next, use an 8mm socket to remove the two bolts securing the driver-side tail light to the vehicle. Then, firmly tug on the driver-side tail light to release it from the ball clips.
When the tail light is loose from the vehicle and the factory wiring is exposed, unplug the two connectors that are circled in blue below. Once the tail light is fully disconnected from the vehicle, set it aside. Then repeat this step to remove the passenger-side tail light.
Step 2 - Select Appropriate Tail Light Signal Harness.
The tail light signal harness that you'll use during this installation will be based on the function of your factory F-150 tail lights.
Refer to the table below to help you select the appropriate harness.
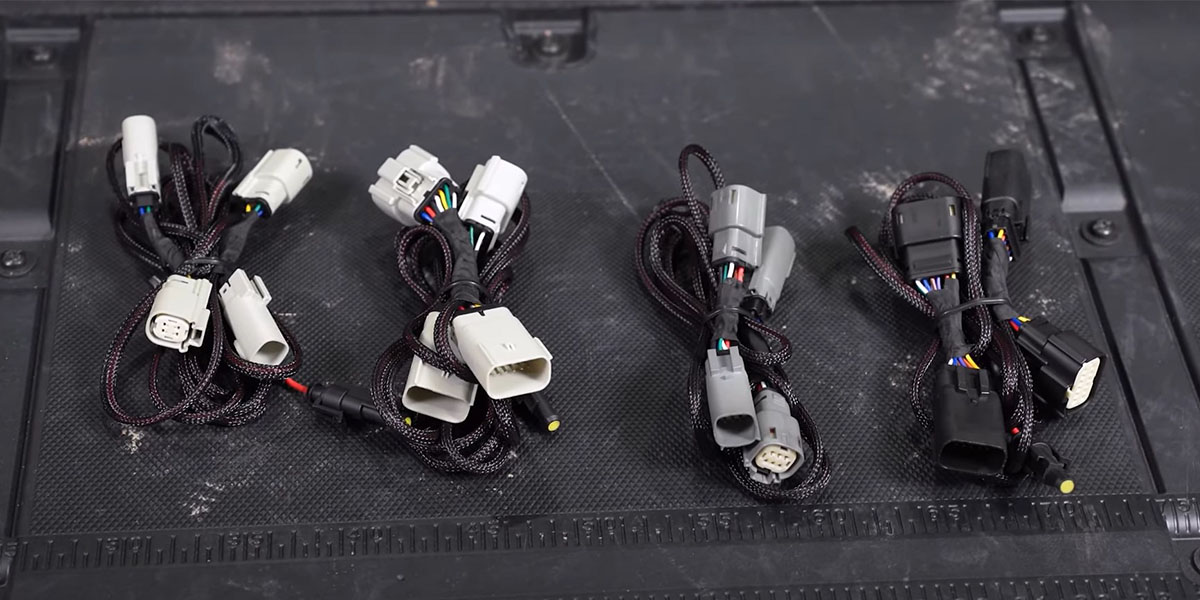

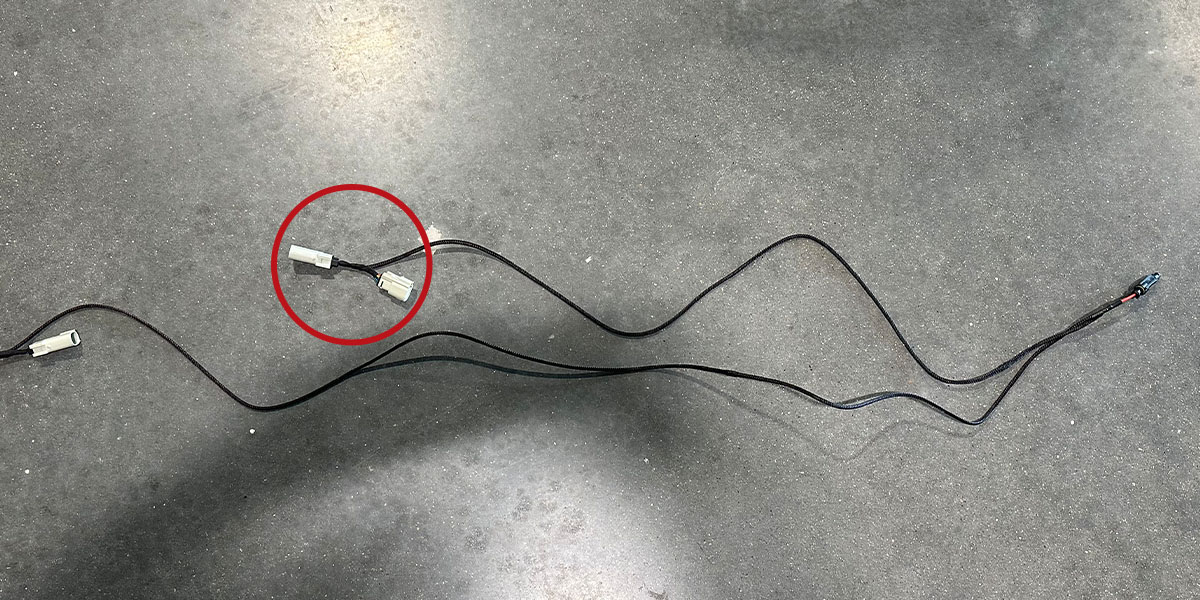
Once you've selected the appropriate tail light signal harness, identify the shorter side of the harness (circled in red) coming from the AMP connector. This shorter end of the harness will be connected to the driver-side tail light.
Step 3 - Connect Harness To Driver-Side Tail Light.
Plug one of the leads of the shorter end of the tail light signal harness in line with the matching vehicle factory harness. Then route the rest of the tail light signal harness through the tail light pocket and down under the vehicle alongside the factory harness.
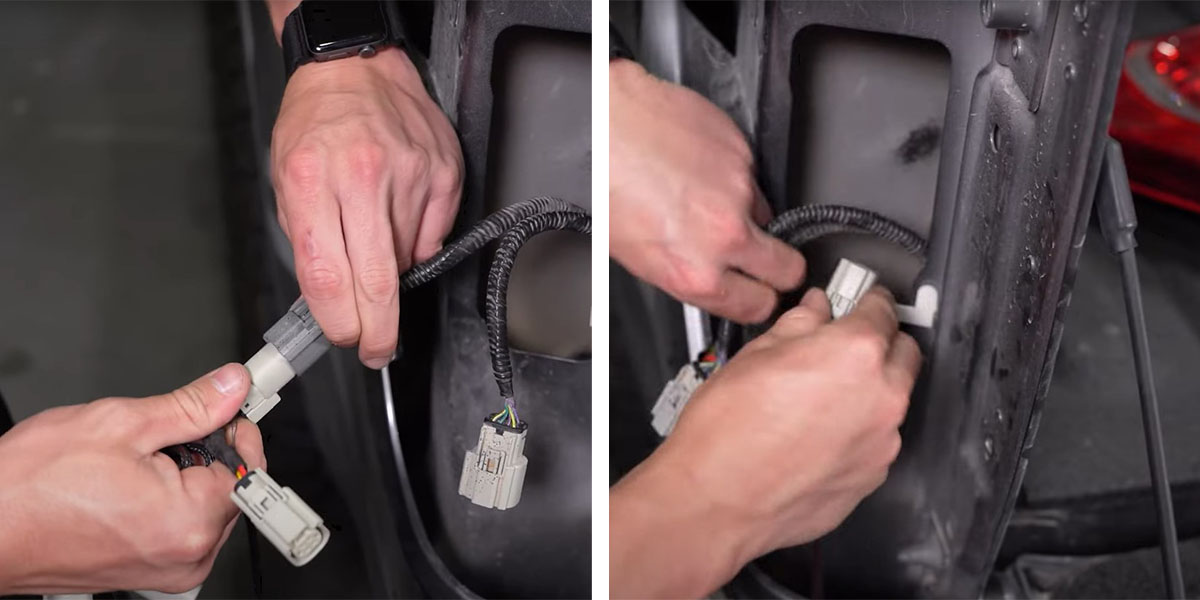
Step 4 - Reinstall the Driver-Side Tail Light.
Reconnect the factory harness to the uppermost connector of the driver-side tail light that was disconnected in Step 1 (indicated by the blue arrow below).
Then plug the remaining tail light signal harness lead into the remaining tail light connector (indicated in the red circle below).
Mount the driver-side tail light by pushing it back into place until the ball clips engage. Then use an 8mm socket to reinstall the bolts removed in Step 1.

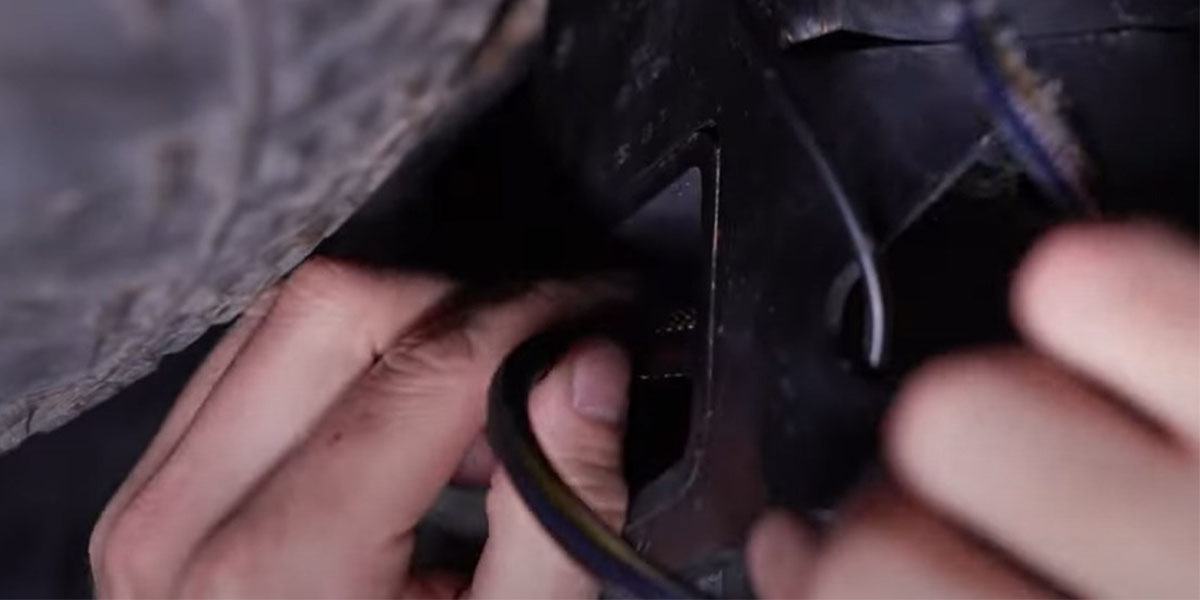
Step 5 - Route Tail Light Signal Harness to Passenger Side.
From beneath the vehicle, route the other end of the tail light signal harness from the driver-side tail light pocket to the passenger side of the vehicle. Guide the tail light signal harness over the two frame rails located on both sides of the spare tire as shown below.
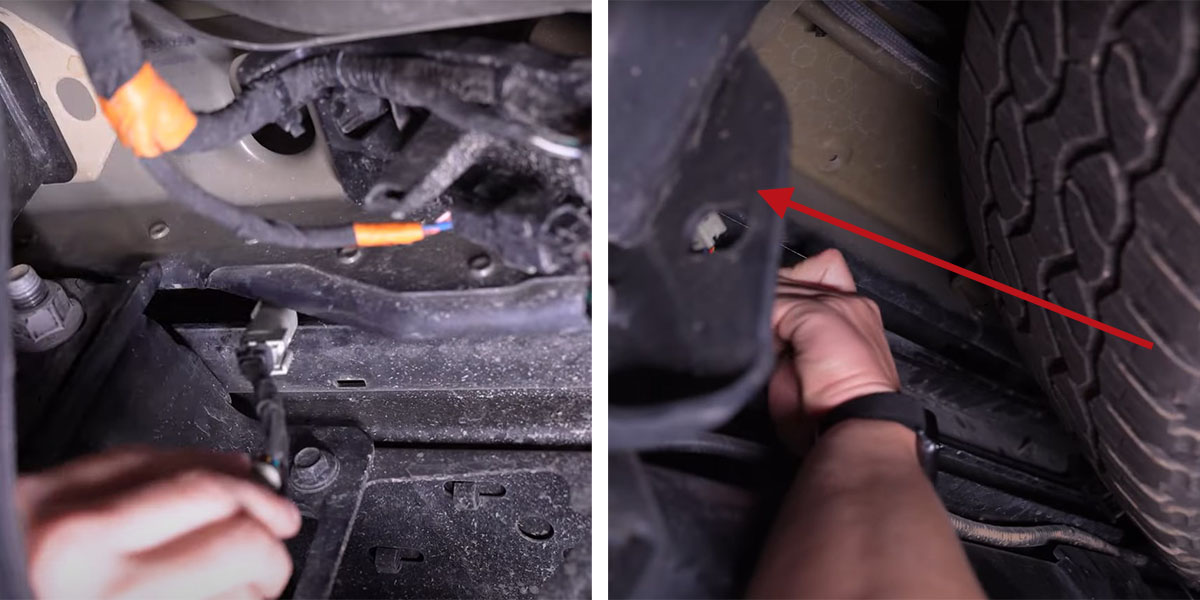
Step 6 - Route Harness To Passenger-Side Tail Light Pocket.
Route the tail light signal harness up and through the passenger-side tail light pocket.
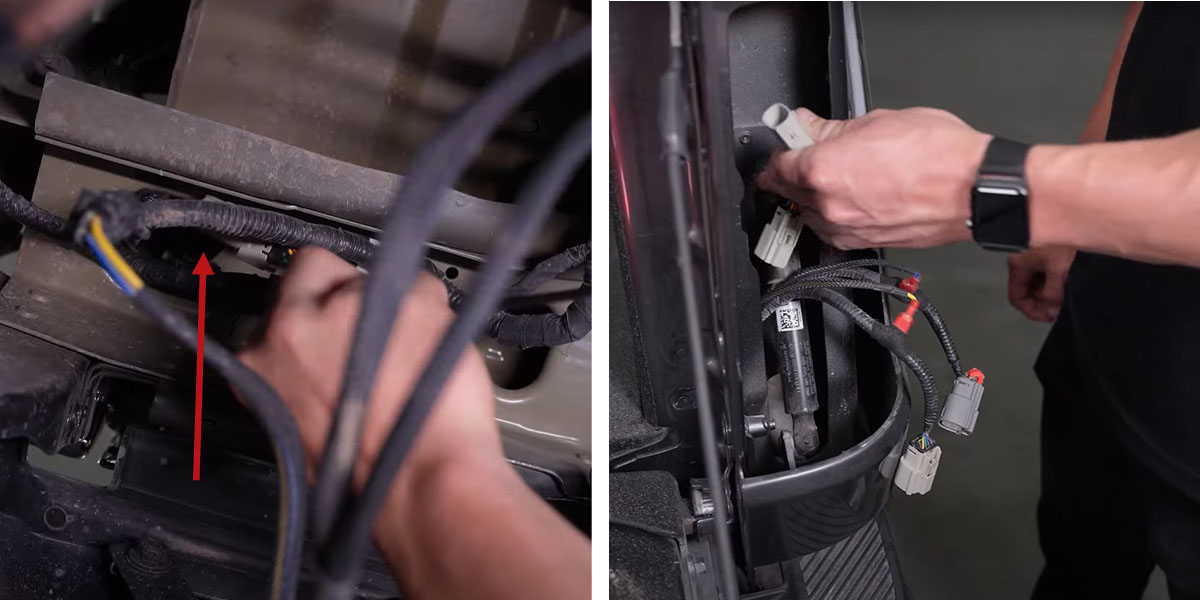
Step 7 - Connect Harness In Line With Passenger-Side Tail Light.
Plug one of the leads of the routed tail light signal harness in line with the matching vehicle factory harness.
Then reconnect the factory harness to the uppermost connector of the passenger-side tail light that was disconnected in Step 1 (indicated by the blue arrow below).
Next, plug the remaining lead of the tail light signal harness into the remaining tail light connector (indicated in the red circle below).
Mount the passenger-side tail light by pushing it back into place until the ball clips engage. Then use an 8mm socket to reinstall the bolts removed in Step 1.
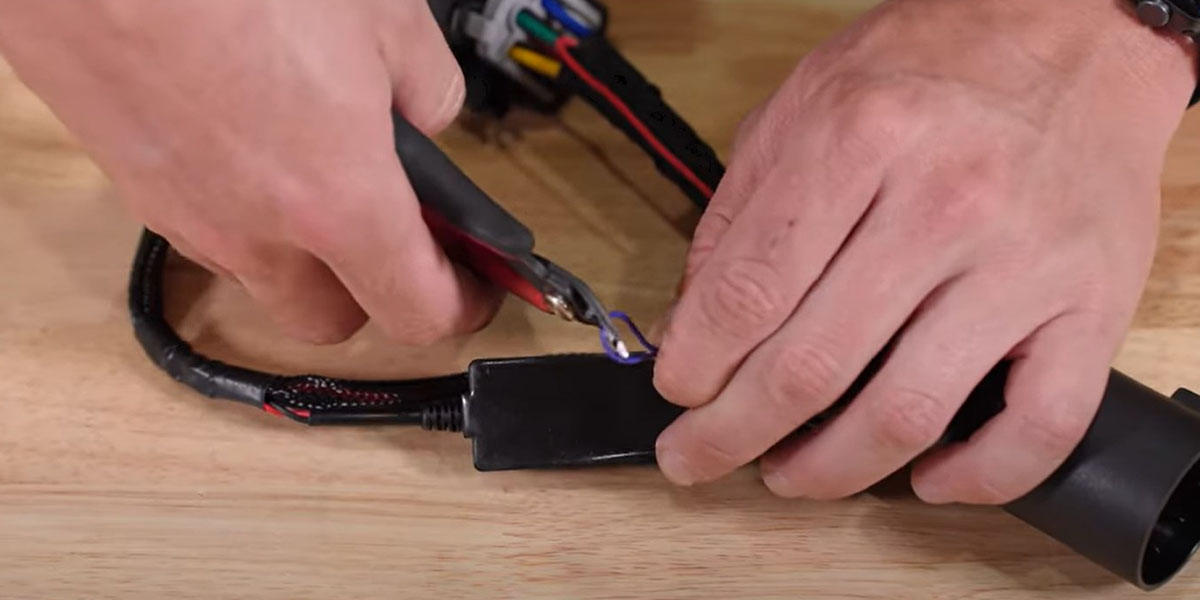
Step 8 - (Optional) Disable Safety Strobe.
If you want to disable the Safety Strobe feature of the C1R HitchMount LED Pod Reverse Kit, cut the purple wire looped on the C1R HitchMount harness.
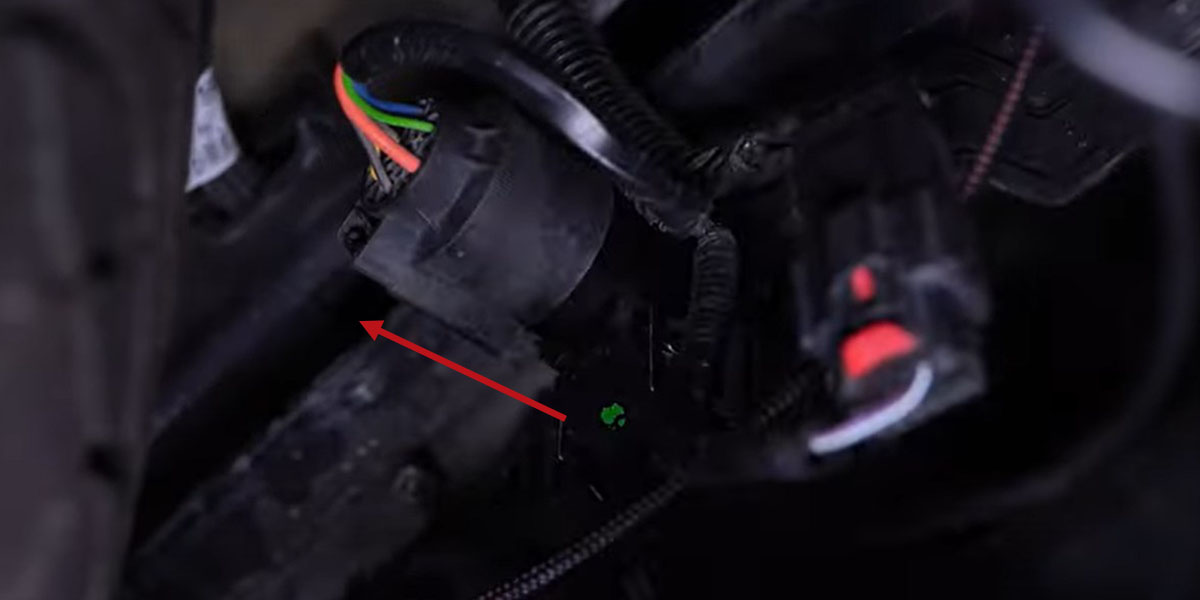
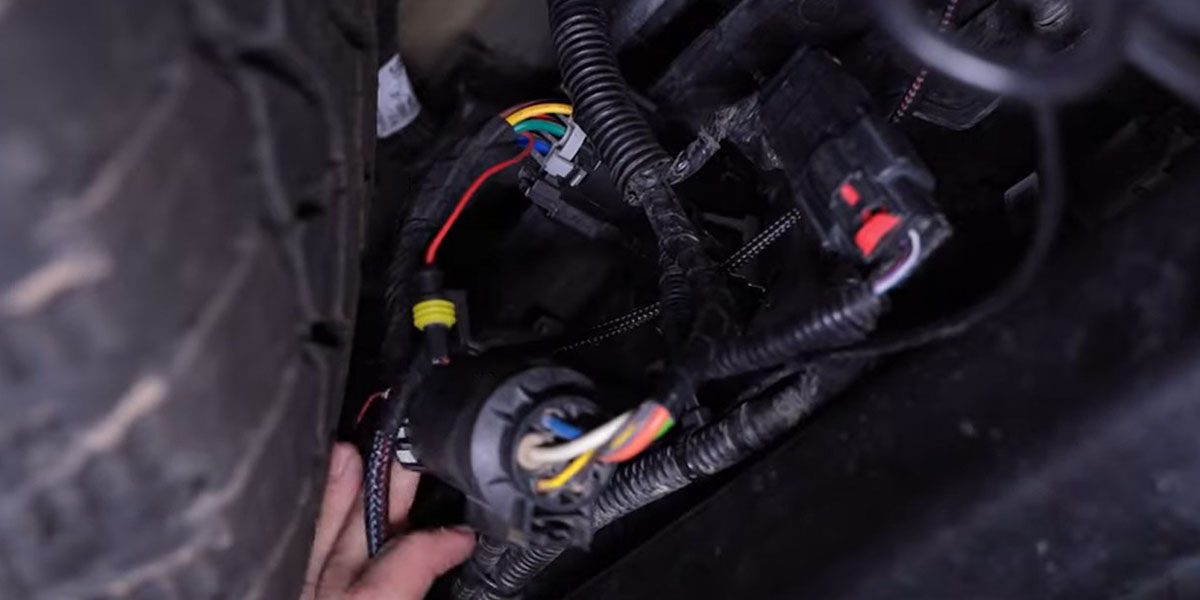
Step 9 - Disconnect Factory Trailer Harness.
Underneath the vehicle, disconnect the factory 7-pin trailer harness from the back of the bumper.
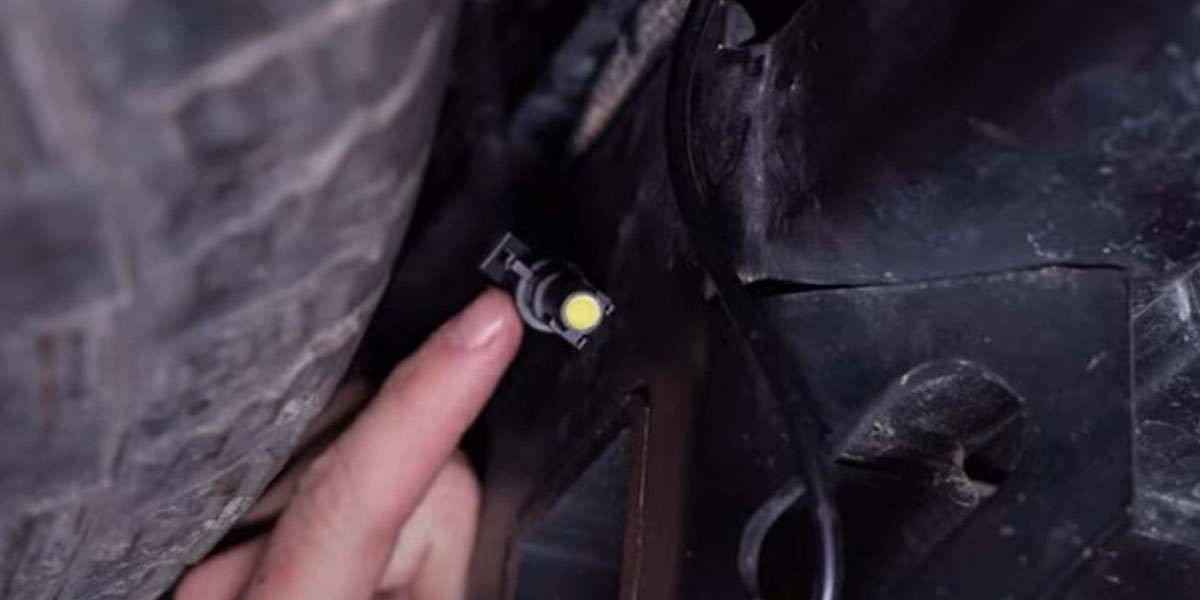
Step 10 - Remove Dust Cap.
Towards the middle of the tail light signal harness, locate the AMP connector and remove the dust cap.
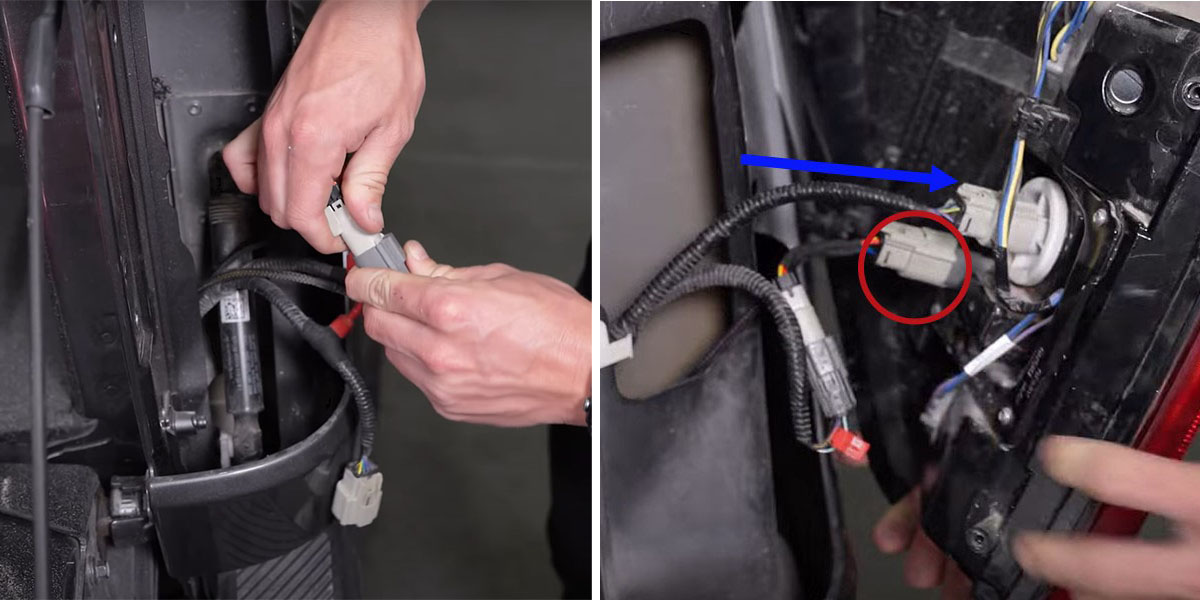
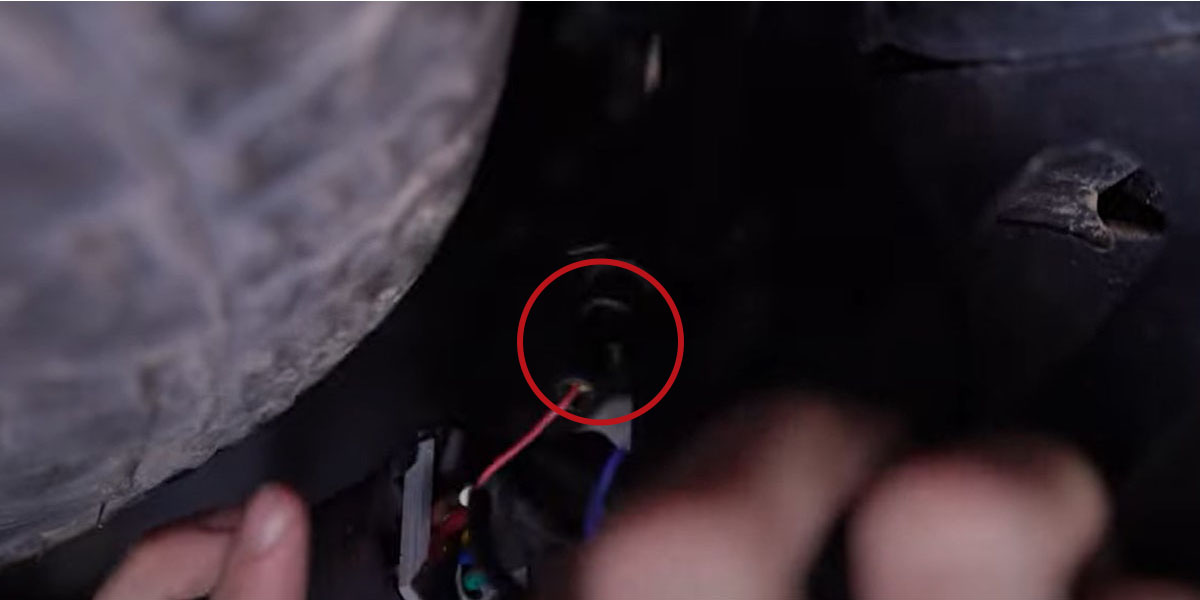
Step 11 - Connect AMP Connectors.
Plug the female AMP connector from the tail light signal harness into the male AMP connector on the C1R HItchMount harness (as indicated in the red circle below).
Step 12 - Connect C1R HitchMount Harness.
Connect the C1R HitchMount Harness inline between the factory 7-pin trailer harness and the bumper connector that was disconnected in Step 9.
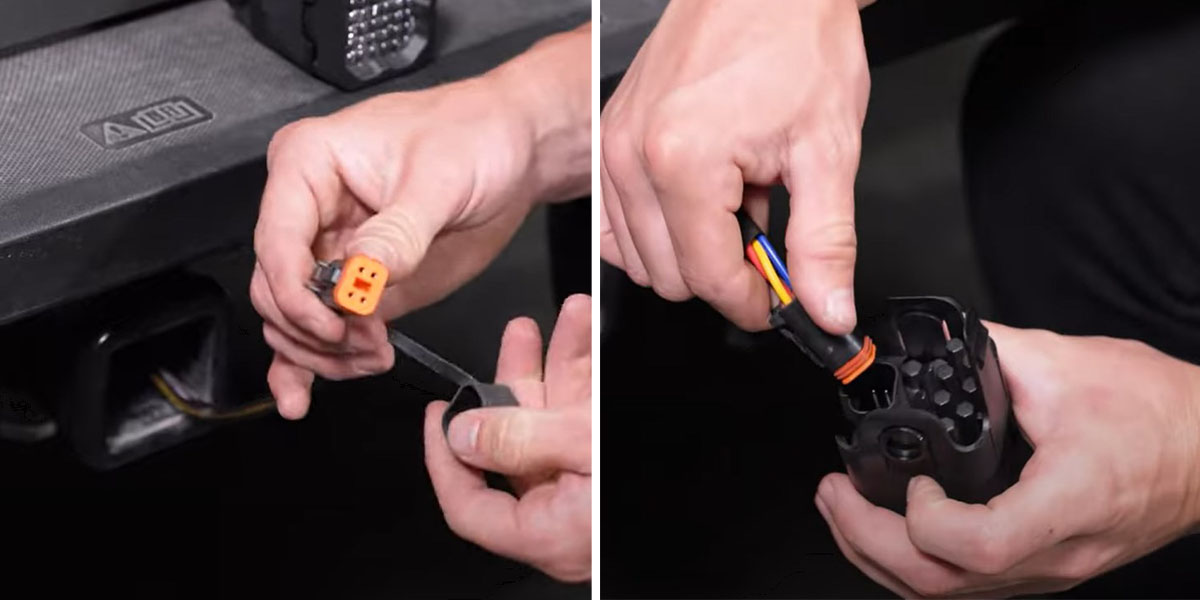
Step 13 - Route DT Connector.
Route the DT Connector of the C1R HitchMount harness through the back of the trailer hitch receiver.
Step 14 - Connect C1R HitchMount Pod.
Remove the dust cap from the DT connector and plug the DT connector into your LED Pod.
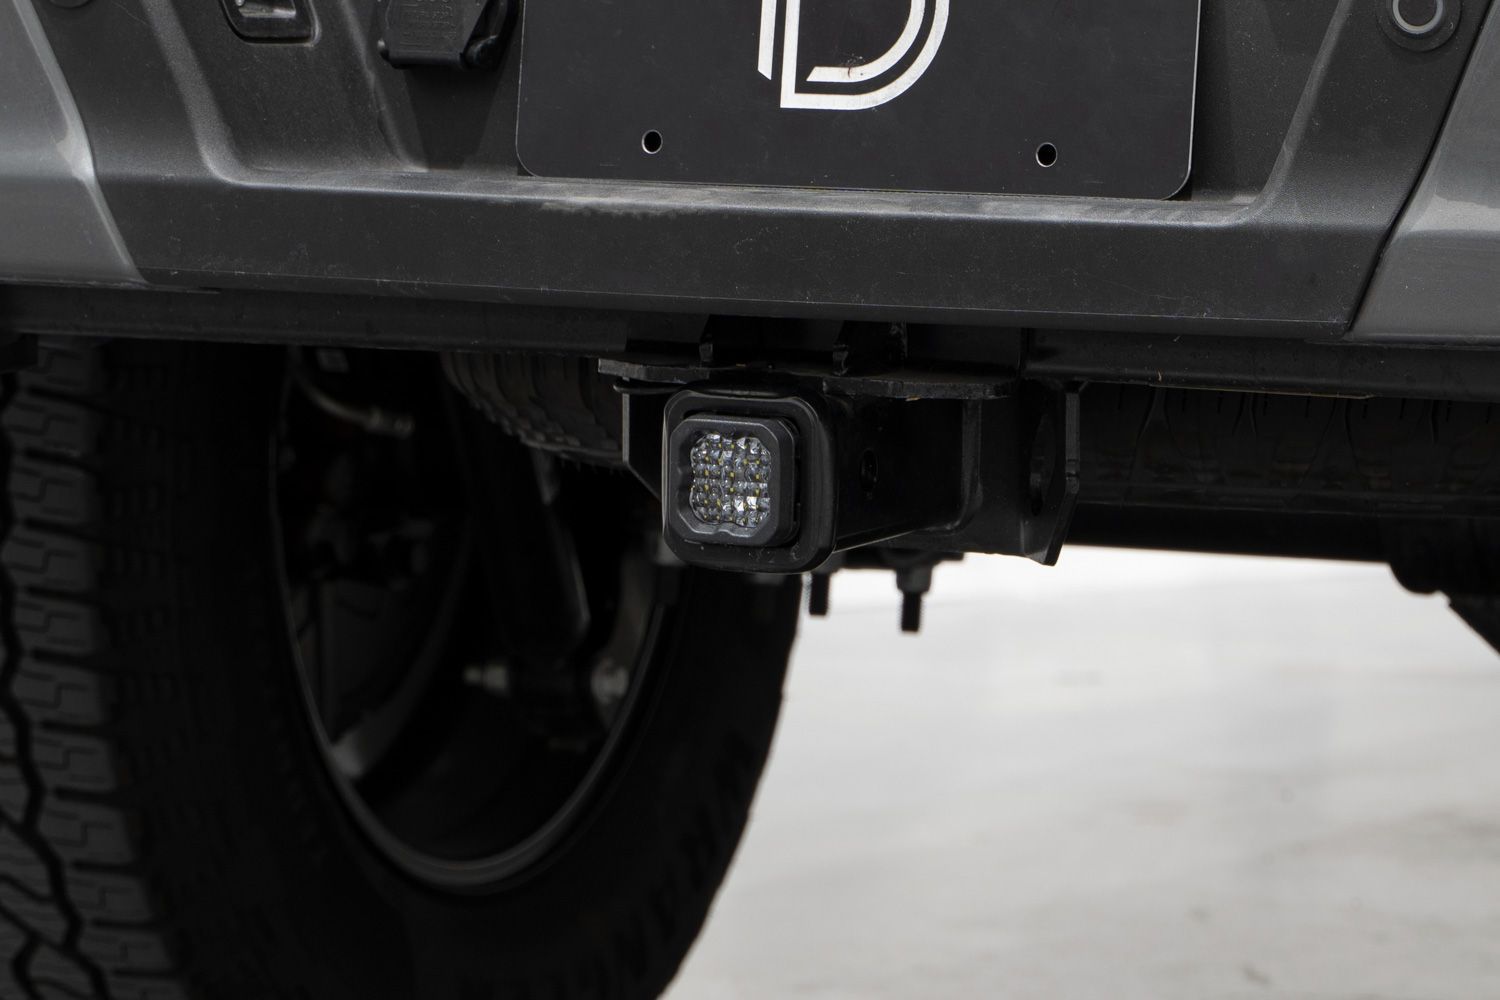
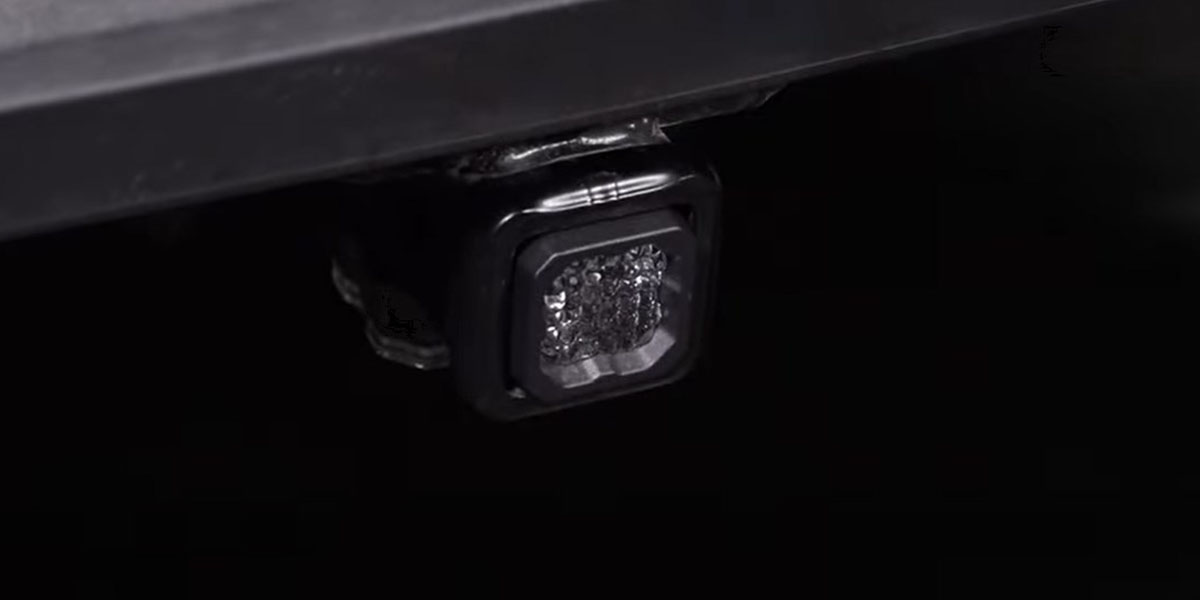
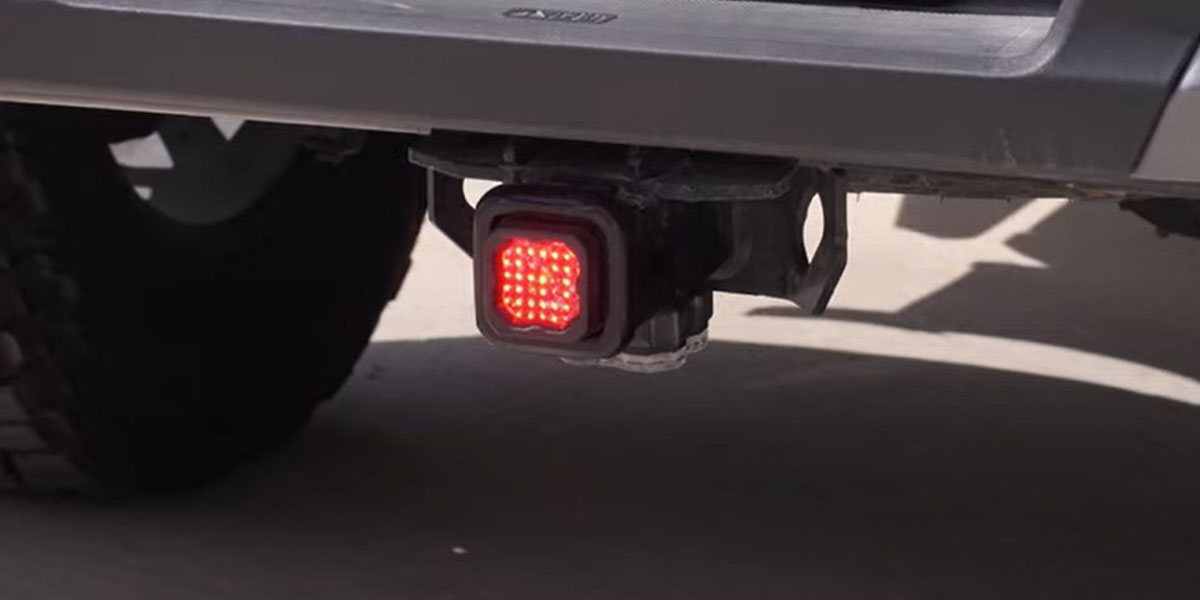
Step 15 - Push HitchMount LED Pod in Place.
Push the HitchMount LED Pod into the trailer hitch receiver until it snaps in place using the patent-pending HitchMount clip.
Step 16 - Test Function.
Test the functionality of the HitchMount LED Pod Reverse Kit and then secure the wiring harness with the included zip ties to complete the installation.
Step 17 - Removing HitchMount.
To remove the HitchMount, depress the clips on either side and apply forward pressure to slide the LED pod out of the receiver.
Then simply reinstall the dust cap and tuck the DT connector out of the way until it is again needed.
OPTIONAL: Using HitchMount with a Hitch Pin.
The HitchMount has been designed to stay securely in place during use. If you would like to add a locking hitch pin for added security (not included), you may easily accomplish this with slight modification. This modification does not void any manufacturer warranty.
Step 1 - Cut Out Retention Tabs.
To do so, push the retention tab outward and use a cutting tool to cut out the circular section on the tab. Repeat on the other side.
Step 2 - Connect HitchMount Pod to Harness.
Plug the DT Connector into the pod, and slide the HitchMount into the trailer hitch receiver.
Step 3 - Insert The Hitch Pin.
Slide the hitch pin into place with one hand, as you align the HitchMount with your other hand. It should be a tight fit, which will prevent rattling and movement once installed. Lock the pin if desired.
Questions About the Installation?
If you have any questions or issues installing the HitchMount LED Pod for the 2021-2023 Ford F-150, please contact us for further information.
Where Can I Buy The 2021-2023 Ford F-150 C1R HitchMount LED Pod Reverse Kit?
If you're ready to upgrade your 2021-2023 Ford F-150 with the C1R HitchMount LED Pod Reverse Kit, you can purchase one by clicking here or using our dealer locator to find a dealer near you.
Want to know more about Diode Dynamics products? Visit DiodeDynamics.com and subscribe to our newsletter for new product releases and more!
This Installation Guide is for the following SKUs: DD7649
Share This Post