


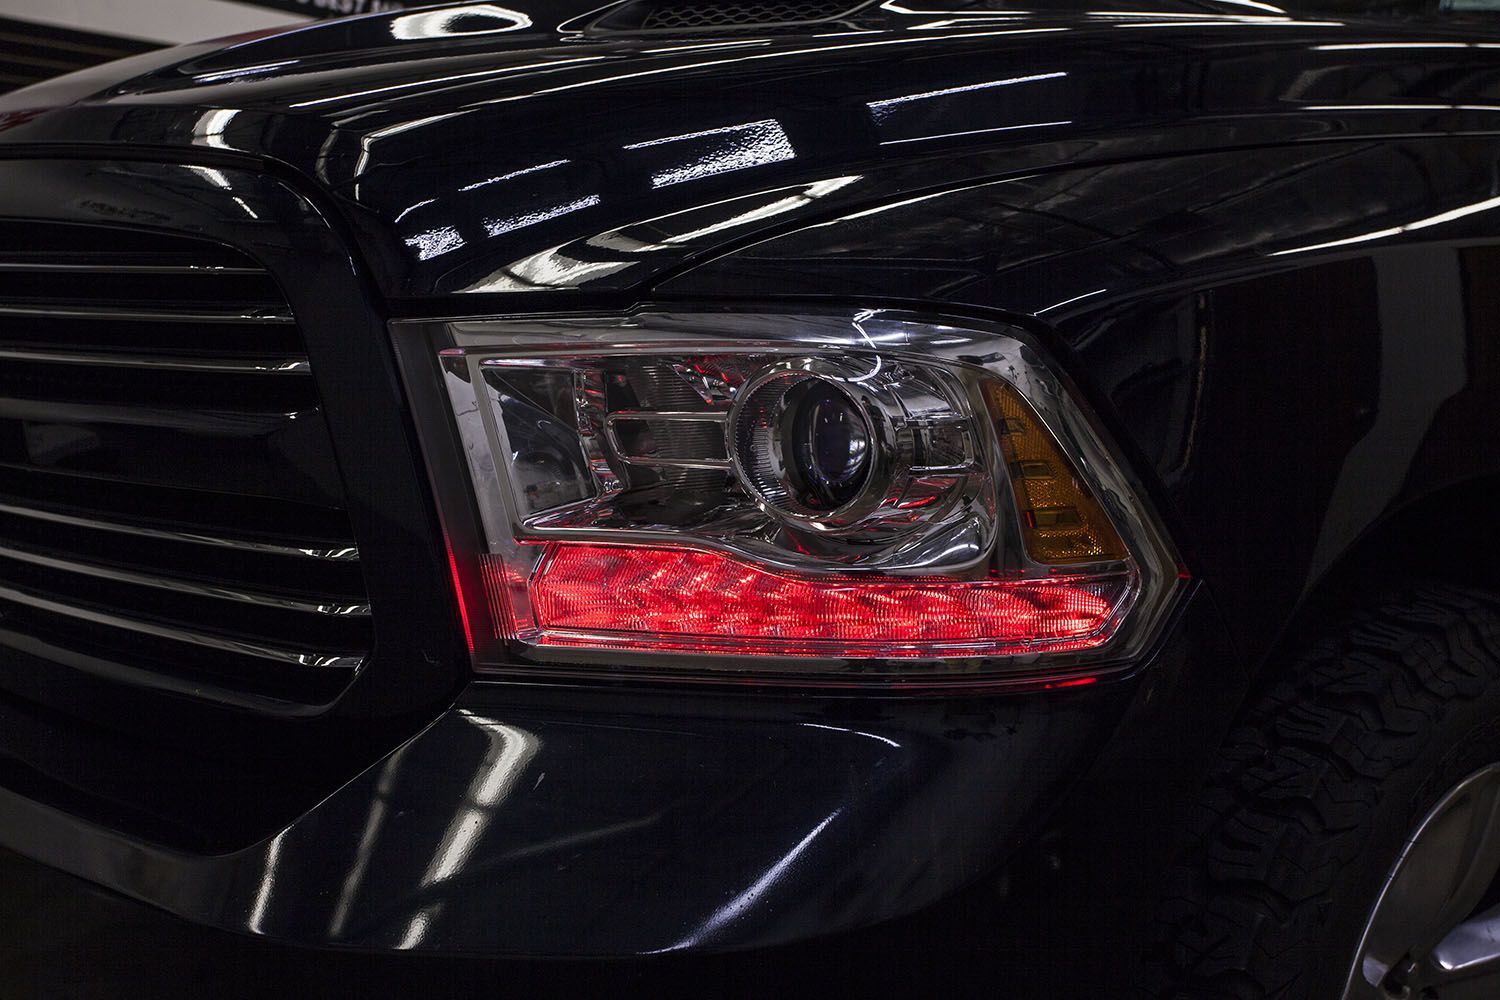
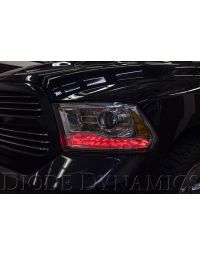
Thank you for your purchase of this unique product for your Dodge Ram with projector headlamps! With the Multicolor LED DRL Board for the 2013-2018 Dodge Ram, you will be able to convert your factory amber LEDs inside the headlight into full multicolor functionality, along with an amber turn signal feature. They are a direct replacement for the factory LED panels inside the light.
Please note: Headlights must be opened before proceeding with the installation. Professional installation is strongly recommended. Please, contact us if you need assistance locating an installer, or use our dealer locator tool to find an installer near you.
Check out our installation video, or continue reading for step-by-step instructions below!
Table of Contents
Installation Tools
- Torx T10 Screwdriver
- Dremel Rotary Tool
- Wire Cutter
Installation Video
Mounting Instructions
Step 1 - Remove Reflector.
Access the factory LED panels by removing the screws holding the turn signal assembly in place. Remove the chrome reflector unit by depressing
the clip on the back of the driver.

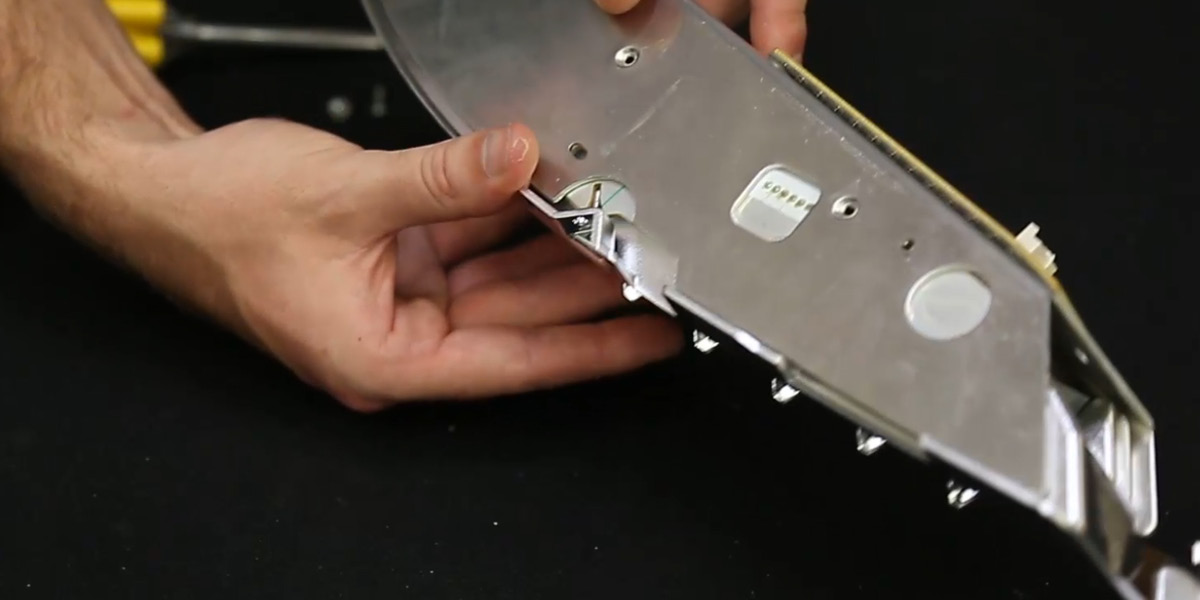
Step 2 - Separate Bracket.
Then, remove the Torx screws holding the metal bracket to the chrome reflector. Once complete, separate the chrome reflector from the metal bracket. Bring the metal bracket to a clean area away from the chrome reflector.

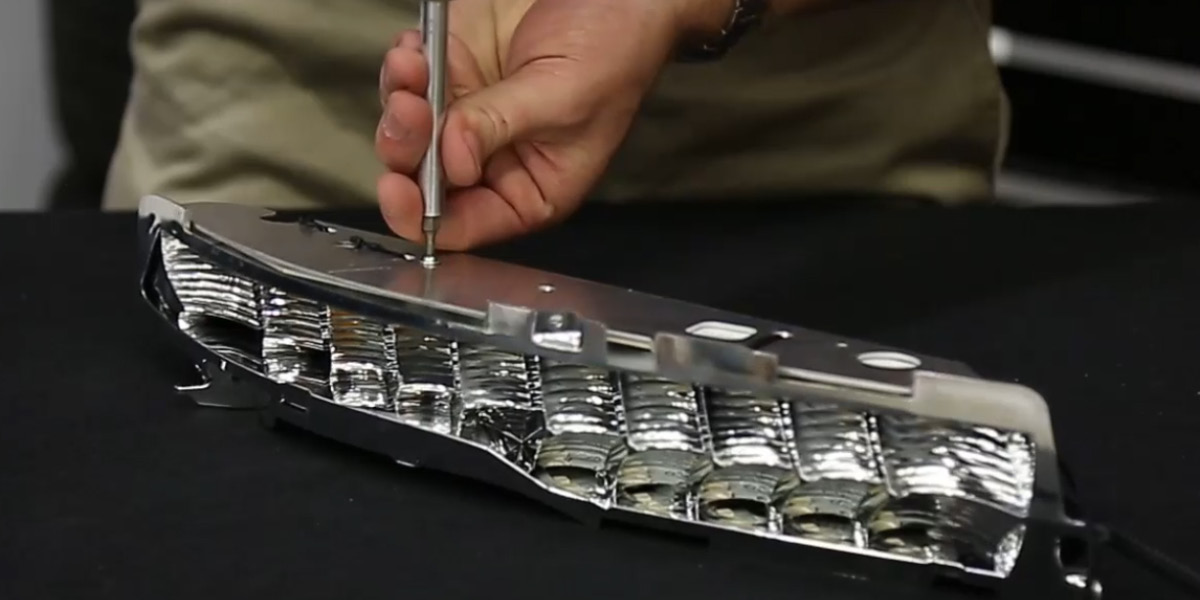
Step 3 - Remove Factory LED Board.
Remove the factory LED board from the metal bracket. Remove the metal rivets holding the LED panel to the turn signal housing with a rotary (Dremel) tool. Panels should fall off.
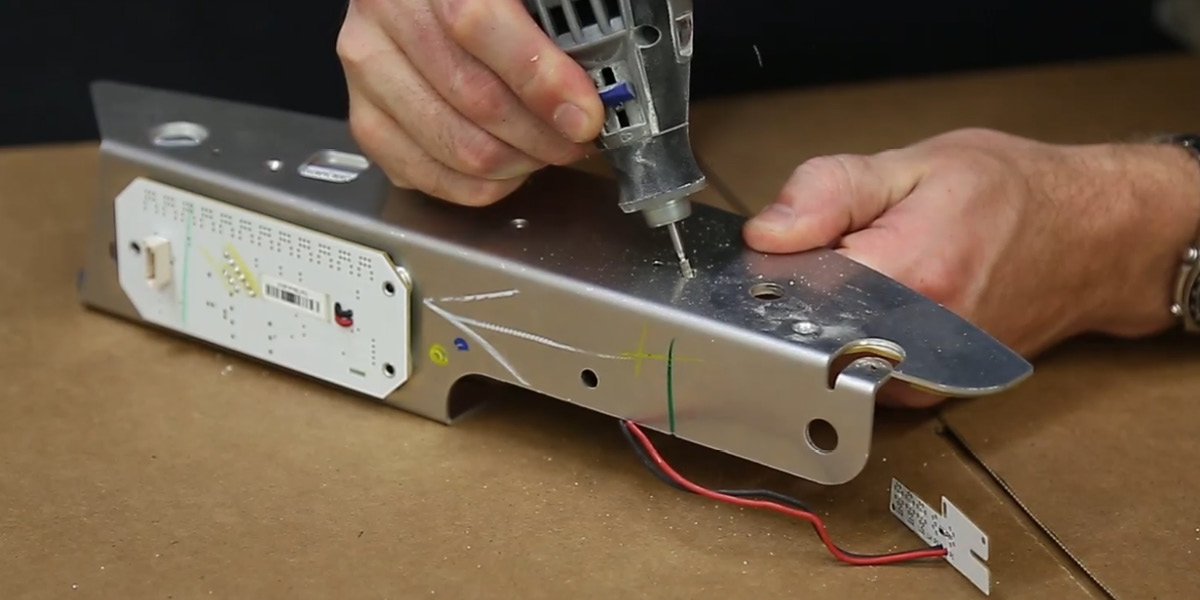
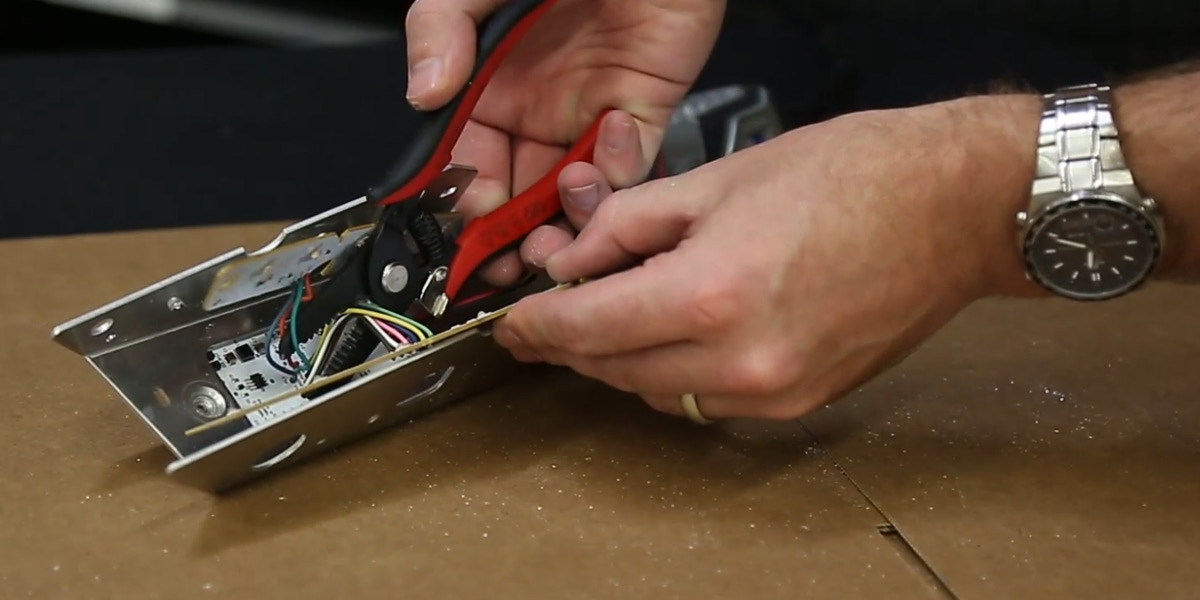
Step 4 - Cut Wires.
Using a wire cutter, cut the wires from the factory driver board and remove the panels. If the boards do not easily fall off, make sure to remove any metal burrs that may still be holding them on. You may leave the factory driver and side marker in place.
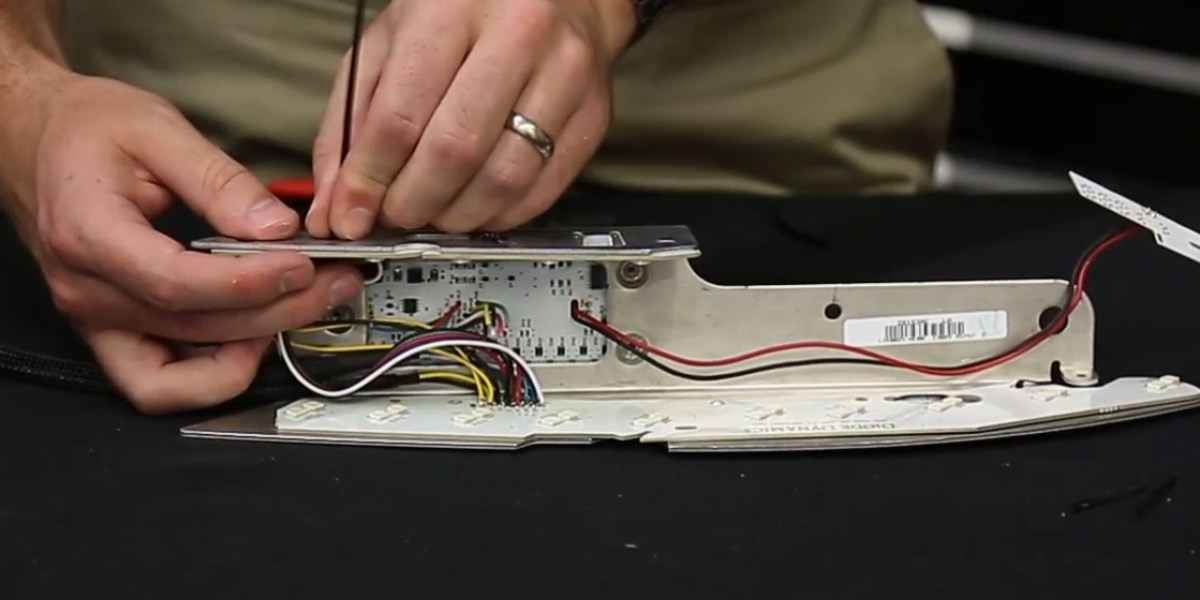
Step 5 - Install New LED Board.
Place the new Diode Dynamics LED boards into position on the metal bracket. All holes should align perfectly. Adjust if holes do not line up. Use sturdy twist-ties (included) to fasten boards in place, by passing them through the holes where the metal rivets were. We do not recommend adhesives, as they may fail over time.
Step 6 - Reinstall Reflector.
Reinstall the chrome reflector to the housing. Using the alignment notches, be sure to align properly and push gently back into position. Do not use excessive force. If the reflector is misaligned, there is a chance of damaging the LEDs. Once complete, replace the Torx screws.
Step 7 - Reassemble Housing and Route Wire.
Reinstall the turn signal housing into the main headlamp housing. Run the RGBW ribbon cable out of the headlamp, along with the 2-wire connector, sealing any holes that you may create. If desired, plug the side marker into the factory driver board. Using the alignment pins, set the unit into place. Once complete, replace the torx screws and headlamp lens.
Wiring Instructions
Step 8 - Connect Driver.
Connect the LED board to the driver. Then using the JST-to-M8 adapter wire included with the Diode Dynamics RGBW controller (sold separately), connect the driver to the controller. See the diagram below.
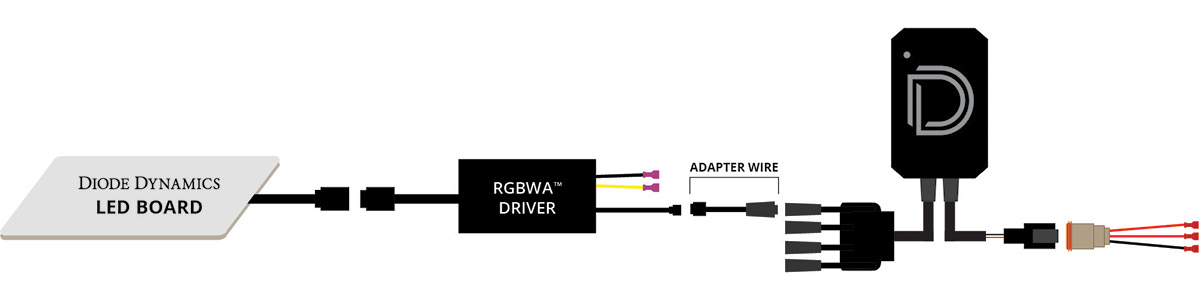
IMPORTANT: DO NOT plug the LED panel directly into the controller without the driver. The LEDs must be plugged into the driver first to control the power.
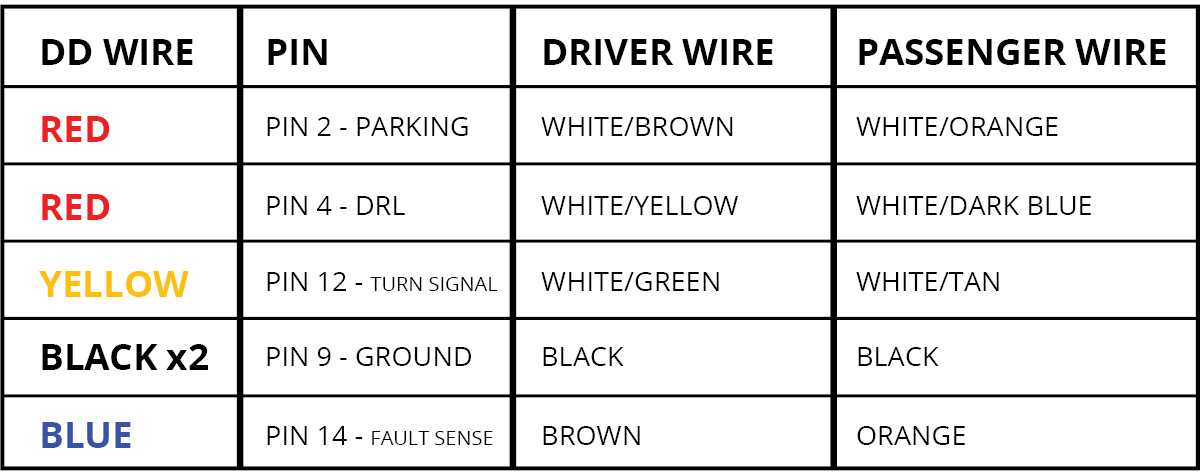
Step 9 - Connect Power.
Connect your RGBW controller to 12V power and ground. This will dictate when the panels turn on. The most popular wiring choice is listed in the table below.
Step 10 - Mount Driver.
Mount drivers and controller. Drivers should be mounted outside of the headlight for serviceability, in a location away from the engine block to avoid excessive heat buildup. Tuck all of the wires clear of any hot or moving parts.
Step 11 - Complete Installation.
Test thoroughly, reseal the headlight, and reinstall onto the vehicle.
Questions About the Installation?
If you have any questions or issues installing RGBWA™ DRL LED Boards in your 2015-2018 Dodge Ram, please contact us for further information.
Where Can I Buy RGBWA™ DRL LED Boards for the 2013-2018 Dodge Ram?
If you’re ready to upgrade your 2013-2018 Dodge Ram with an RGBWA™ DRL LED Board, you can purchase one by clicking here or using our dealer locator to find a dealer near you.
Want to know more about Diode Dynamics products? Visit DiodeDynamics.com and subscribe to our newsletter for new product releases and more!
This Installation Guide is for the following SKU: DD2014
Share This Post