


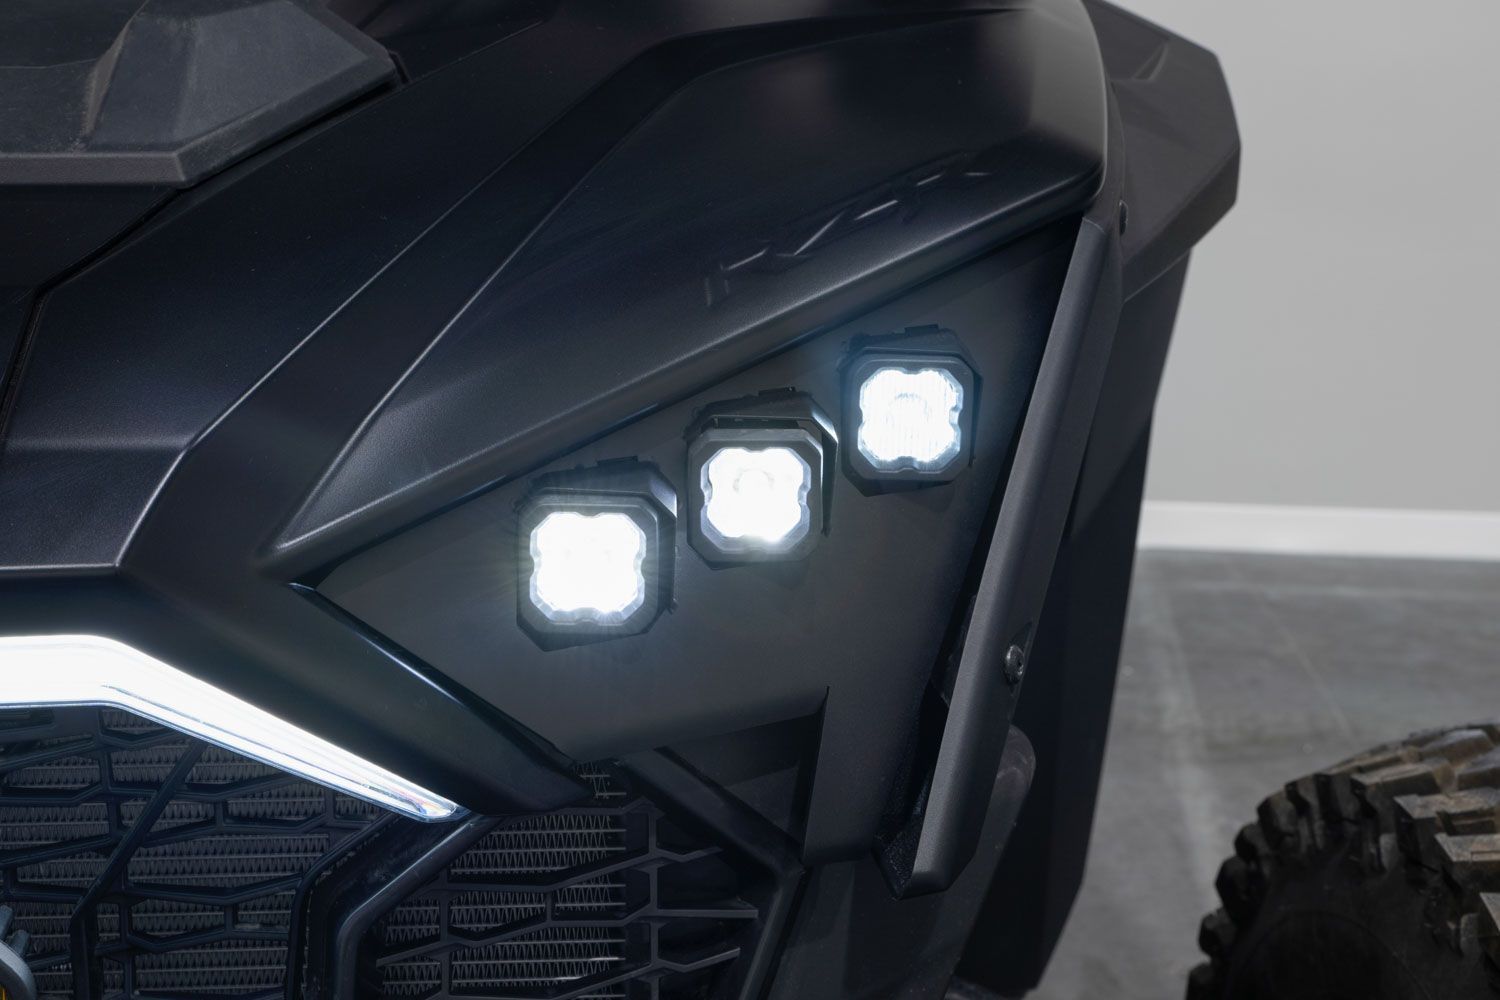
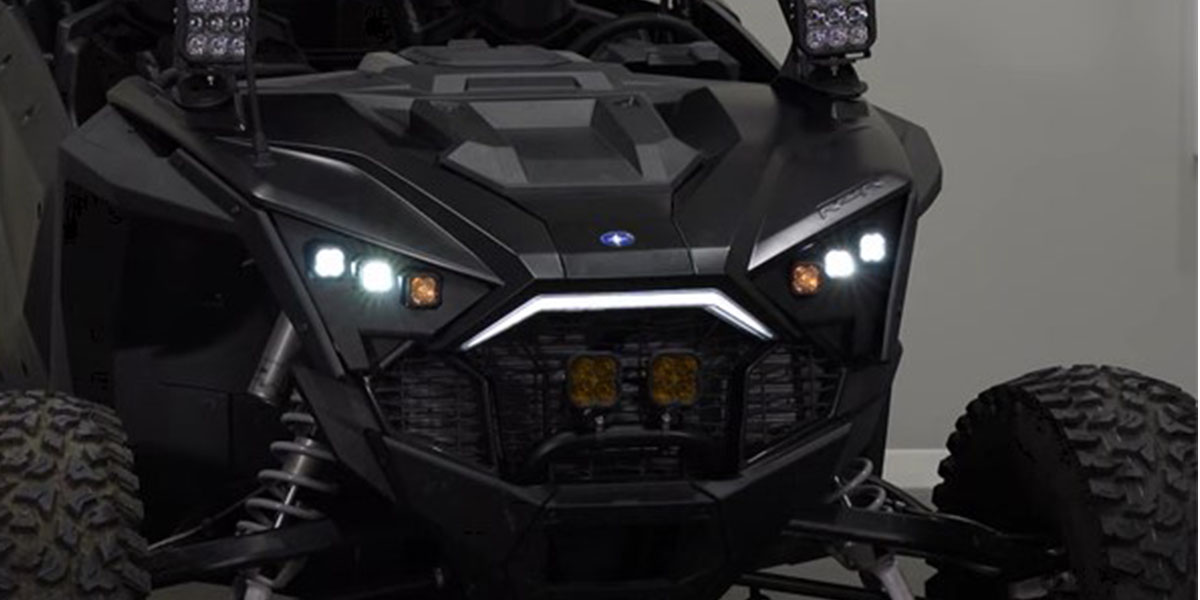
The SSC1 LED Headlight Kit for 2020-2023 Polaris RZR Pro allows you to mount six SSC1 LED Pods in place of the factory RZR headlight, adding a more aggressive appearance and a significant increase in light output. This bolt-on, plug-and-play headlight kit offers three off-road beam patterns—wide, spot, and SAE fog—for optimal nighttime driving visibility. Plus the additional amber backlights provide DRL accent lighting when the main beams of the headlight aren't in use.
The SSC1 LED Headlight Kit is 100% engineered and assembled in the US and is constructed using highly durable powder-coated stainless steel and polycarbonate lenses. This kit is purpose-built to tackle any adventure you embark on with your RZR.
The following installation guide will provide you with detailed instructions on how to install the SSC1 LED Headlight Kit on the 2020-2023 Polaris RZR Pro. Check out our installation video, or continue reading for step-by-step instructions below!
Table of Contents
Installation Video
Installation Tools
- 1/4" Ratchet Wrench
- 1/4" T25 Torx Bit
- 1/4" Driver
- T40 Torx Driver or Socket
- 8mm Socket
- Socket Driver
- 3/8" Box Wrench
- 4mm Allen Key
- Plastic Trim Removal Tool
Mounting Instructions
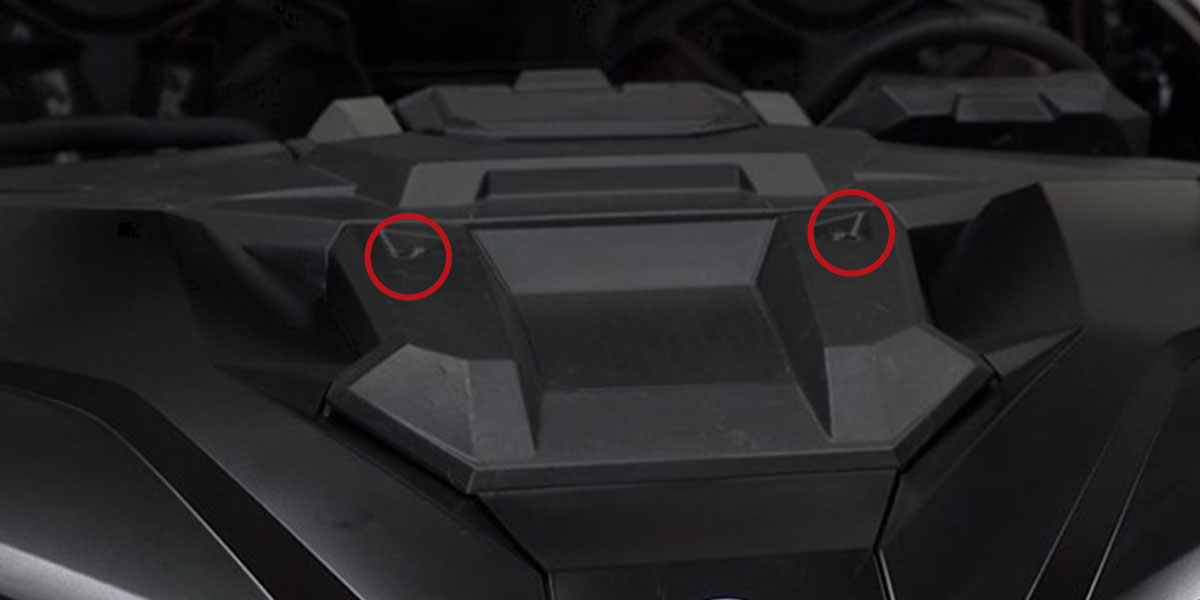
Step 1 - Remove Upper Hood Panel.
Use a T40 Torx driver to remove the two bolts on the upper hood panel. Then remove the panel by lifting it up and towards the windshield. Once removed, set the panel aside.
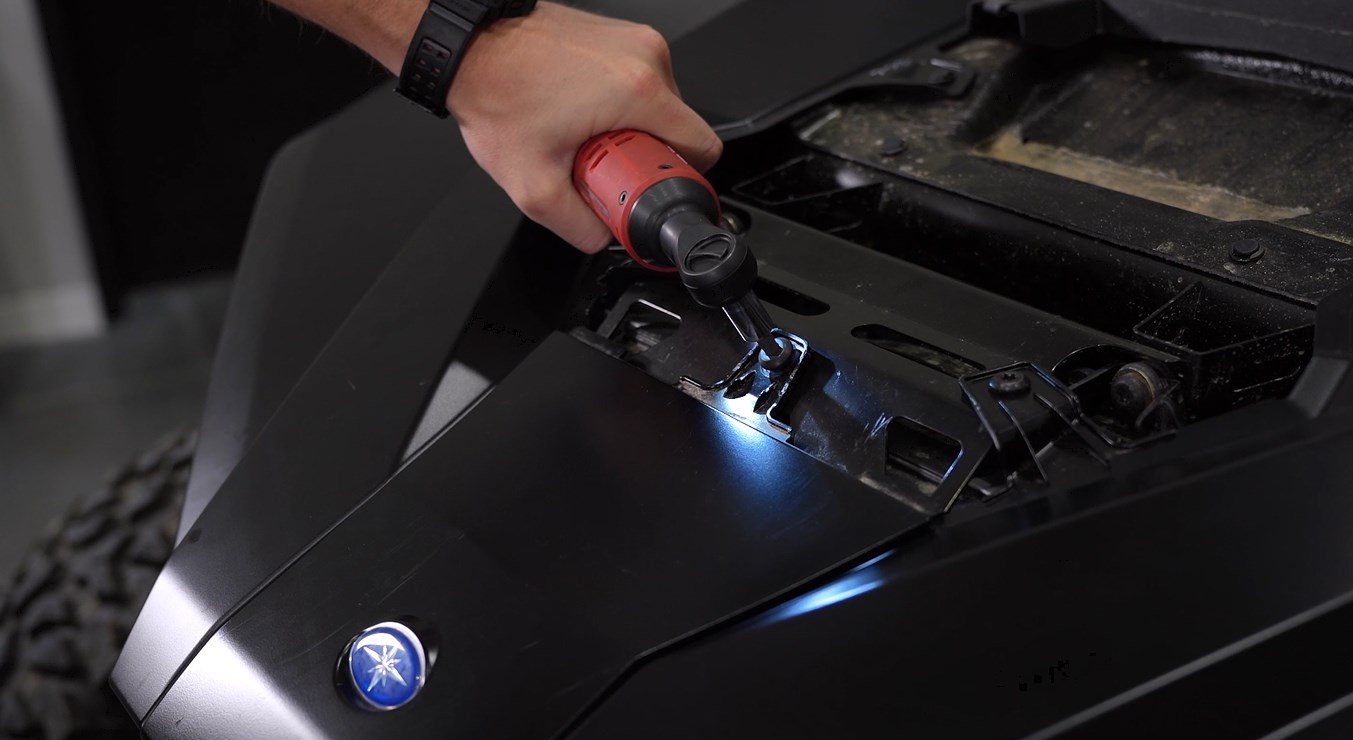
Step 2 - Remove Lower Hood Panel.
Remove the T40 Torx bolt holding the lower panel in place. Remove the panel by pulling it away from the vehicle at the top of the panel and then sliding the panel down toward the bumper. Then set the panel aside.
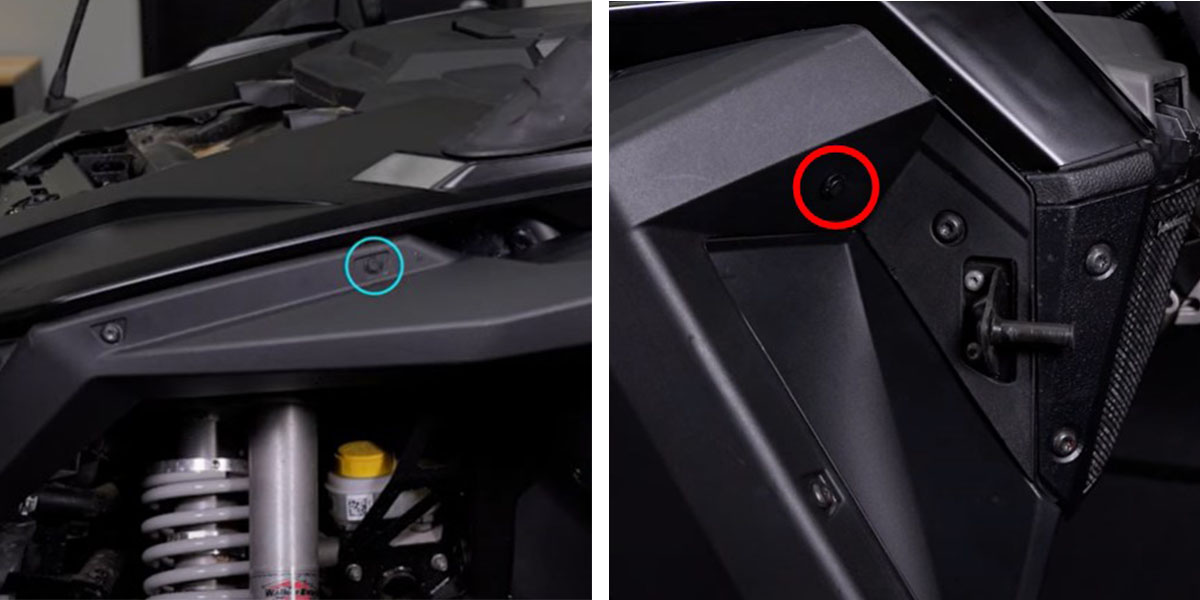
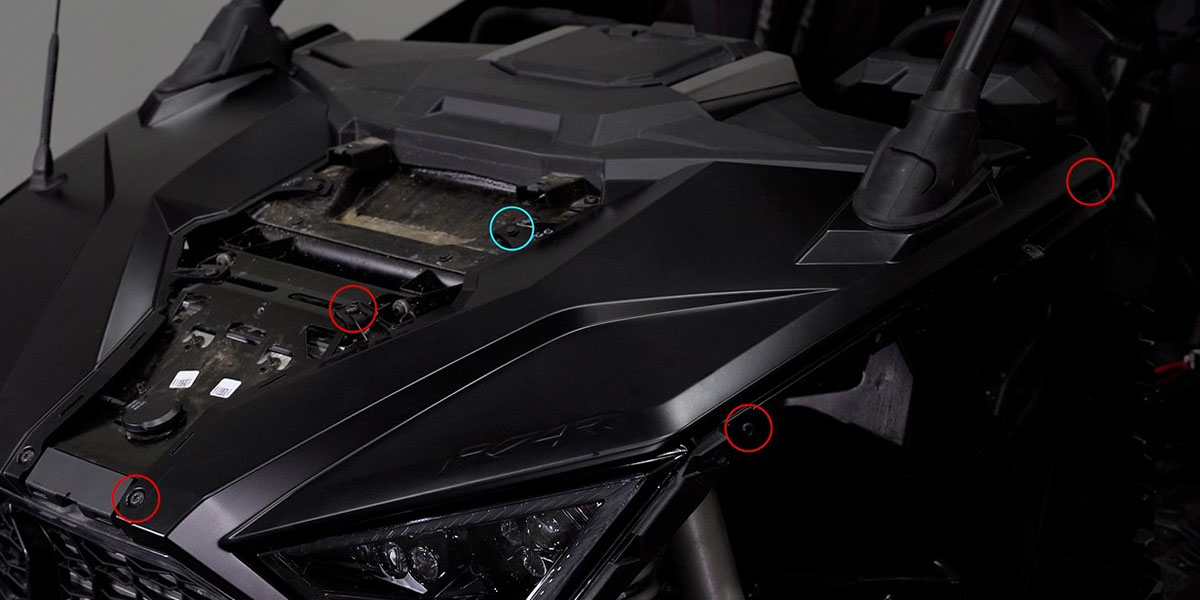
Step 3 - Remove Fender Clips.
On the driver's side, use a plastic trim removal tool to take off the outer fender's plastic clip (circled in blue). Then remove the plastic clip (circled in red) situated on the inner fender.
Step 4 - Remove Driver-Side Fender Bolts.
Use a T40 Torx bit to remove the seven bolts (circled in red) on the outside of the driver-side fender.
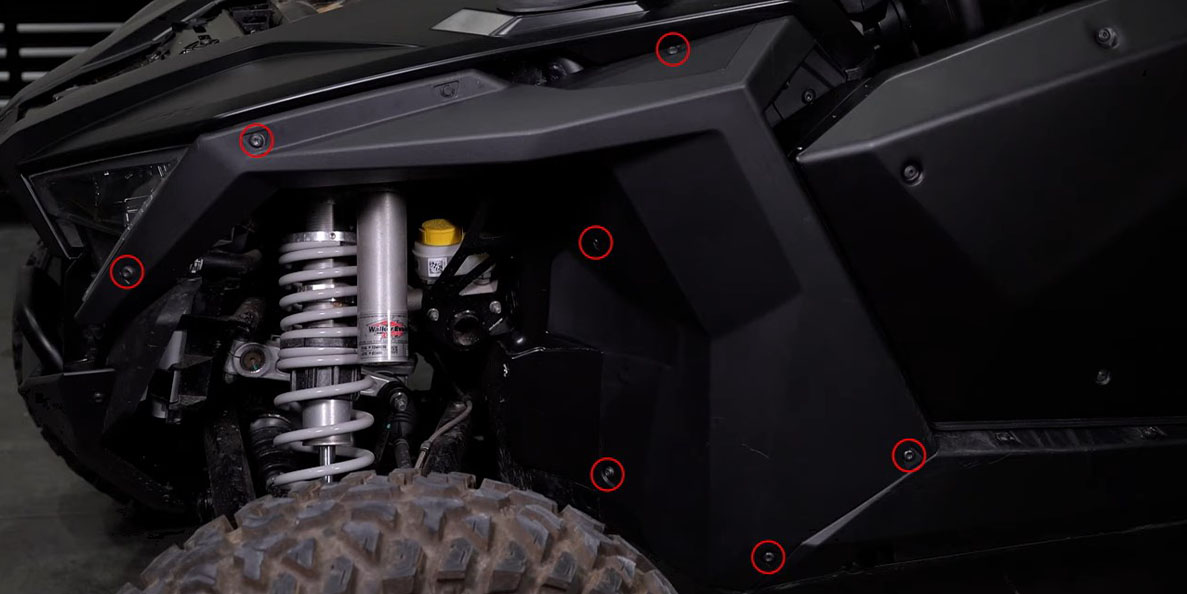
Then remove the three T40 bolts (circled in red) located on the inside of the fender.
Step 5 - Loosen Speaker Panel Bolts.
Use a T40 Torx bit to loosen the two driver-side speaker panel bolts (circled in red).

Step 6 - Remove Driver-Side Fender.
Remove the driver-side fender by pulling it away from the body of the vehicle and working it around the door latch. Once removed, set the fender aside.

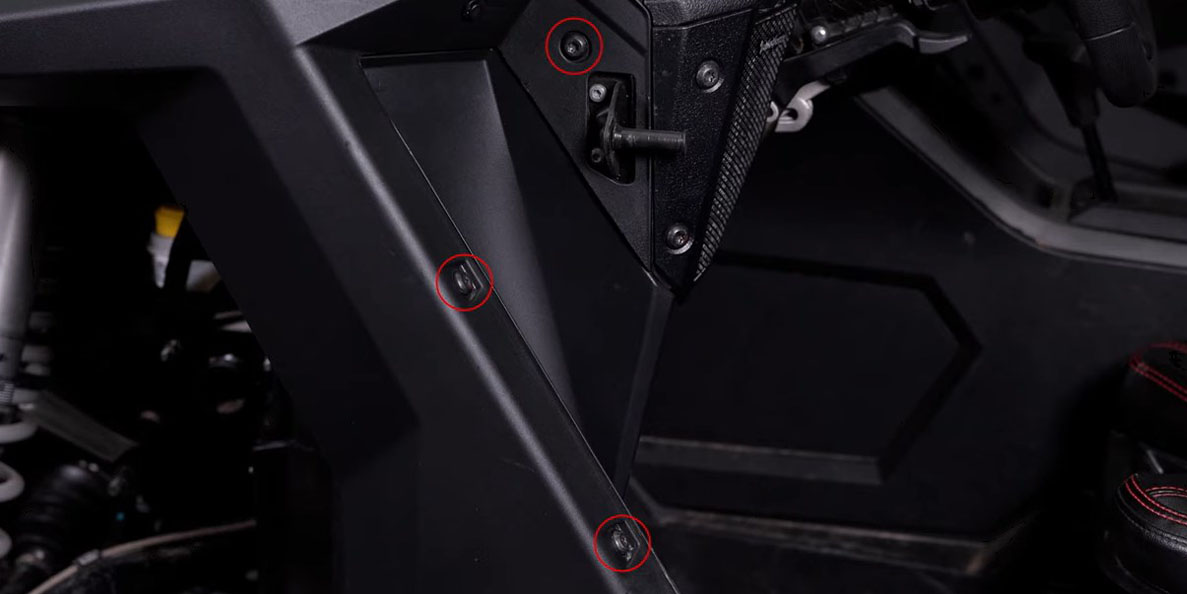
Step 7 - Remove Driver-Side Hood Panel.
Use a T40 Torx bit to remove the four bolts (circled in red) securing the hood panel to the vehicle. Then use a plastic trim removal tool to remove the remaining clip (circled in blue).
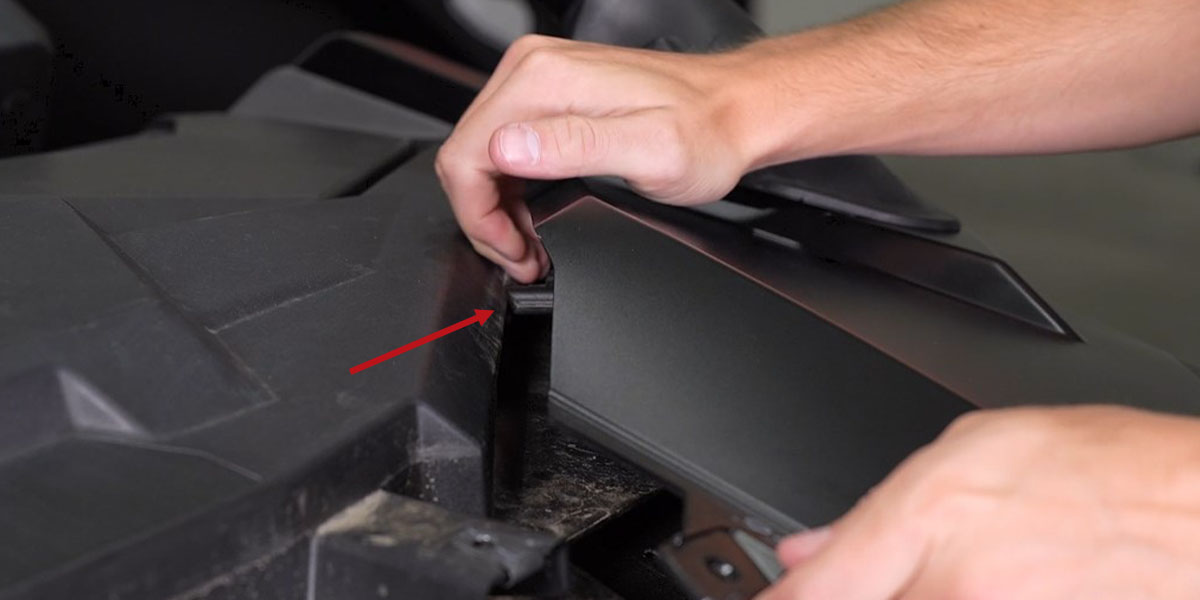
Step 8 - Remove Driver-Side Hood Panel.
Remove the driver-side hood panel by pulling it up and away from the vehicle to release the tab (indicated by the red arrow) near the A-pillar. Then pull the panel away from the vehicle and set it aside.
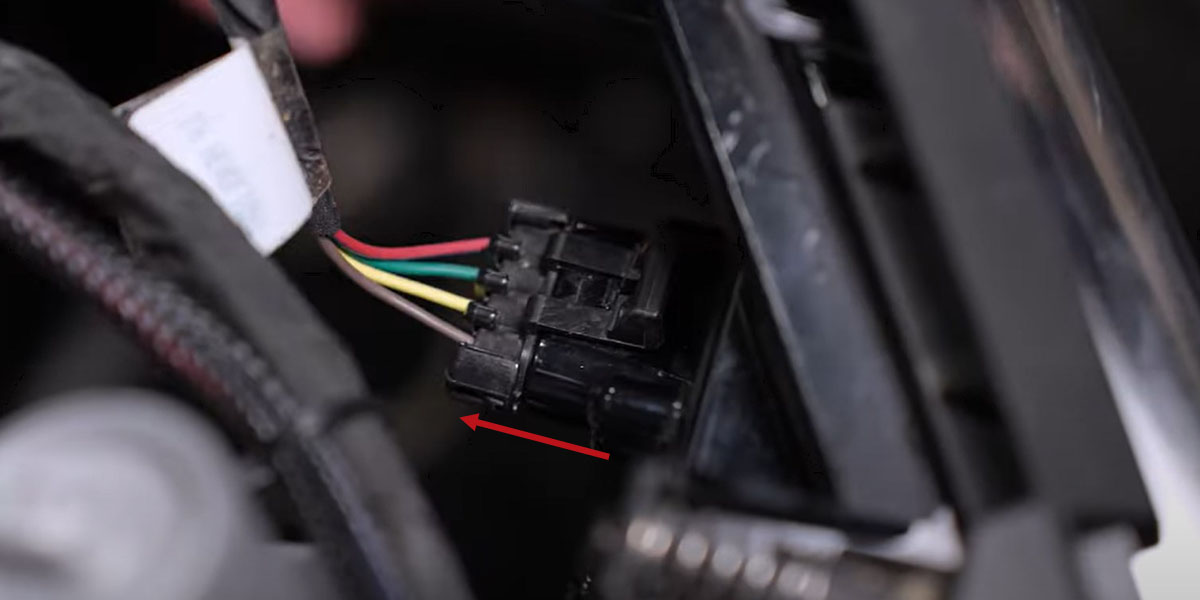
Step 9 - Disconnect Factory Headlight.
Disconnect the factory wiring harness from the OE headlight by lifting up the retention tab and pulling the connector away.
Step 10 - Remove Headlight Screws.
Use a T25 Torx bit to remove the top two screws holding on the factory headlight.
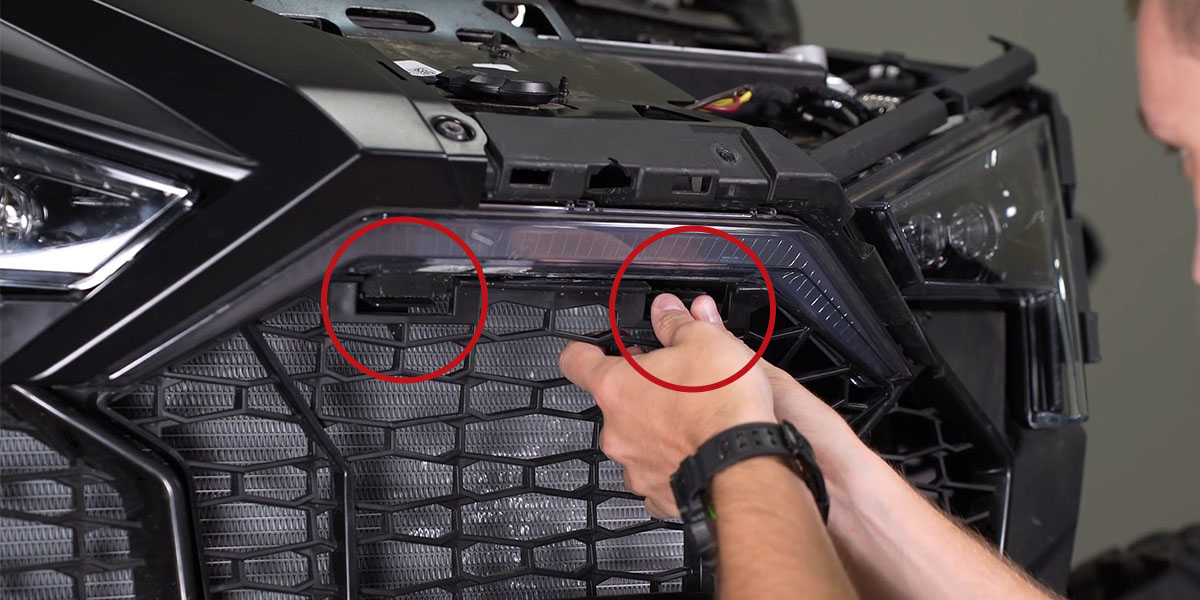
Step 11 - Remove Grille.
Locate the two plastic tabs (circled in red) at the top of the grille. Then squeeze them and pull away to remove the grille and gain access to the last screw on the back of the headlight.
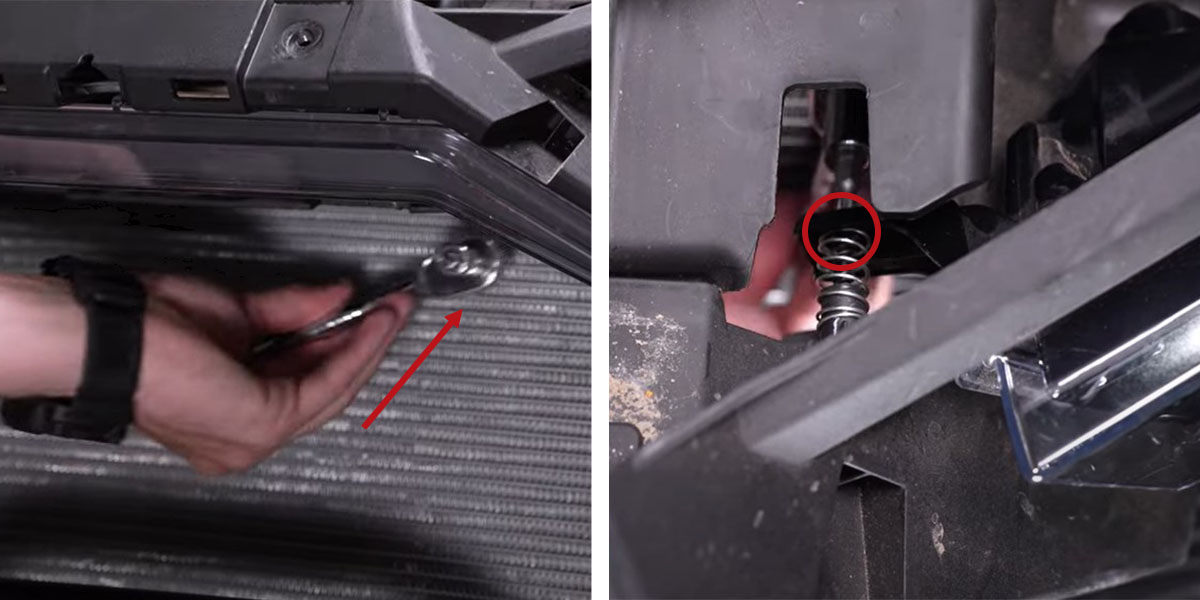
Step 12 - Remove Factory Headlight.
Insert your hand through the grille gap and use a T25 Torx bit attached to a socket to remove the last screw (circled in red) behind the headlight.
Then carefully remove the factory headlight from the vehicle and set it aside.
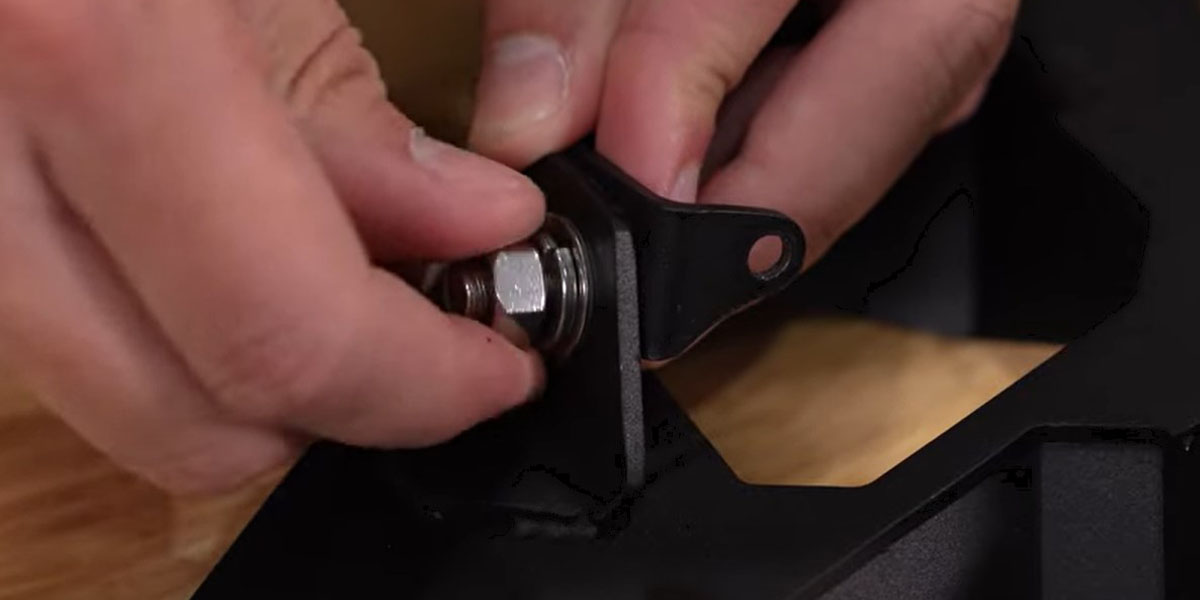
Step 13 - Assemble Headlight Bracket.
Bolt each universal SSC1 bracket to the headlight bracket using the provided bolts, washers, lock washers, and nuts.
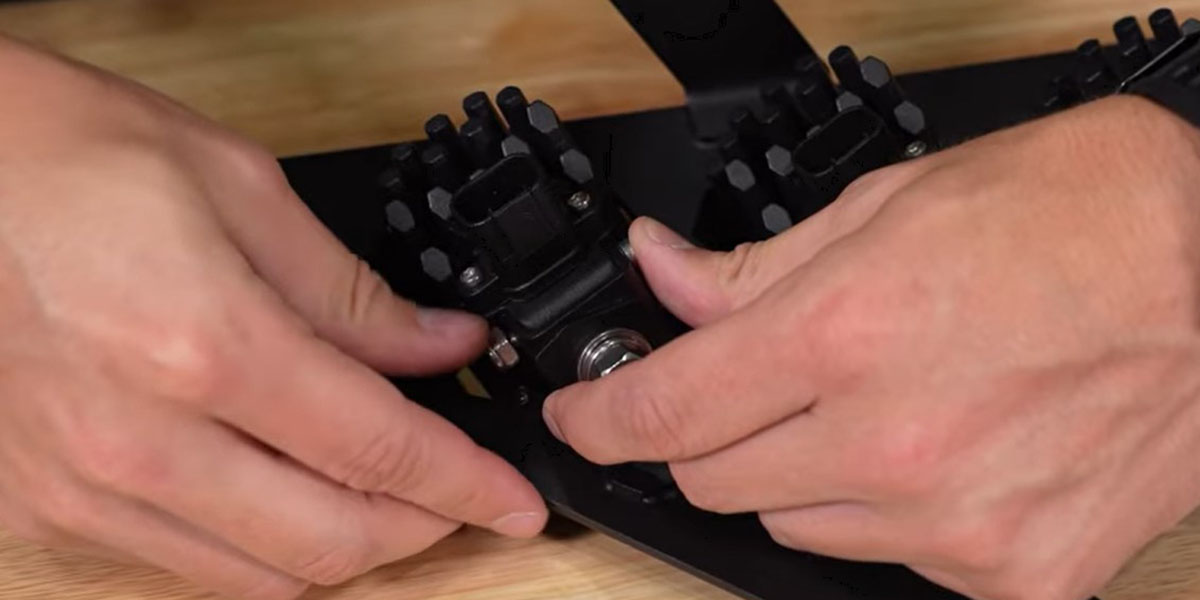
Step 14 - Mount SSC1 LED Pods.
Bolt the SSC1 LED Pods to the universal brackets using a 3/8mm wrench and 5/32" Allen key. Be sure to only hand tighten them during this step to leave room for adjustment later in the installation process.
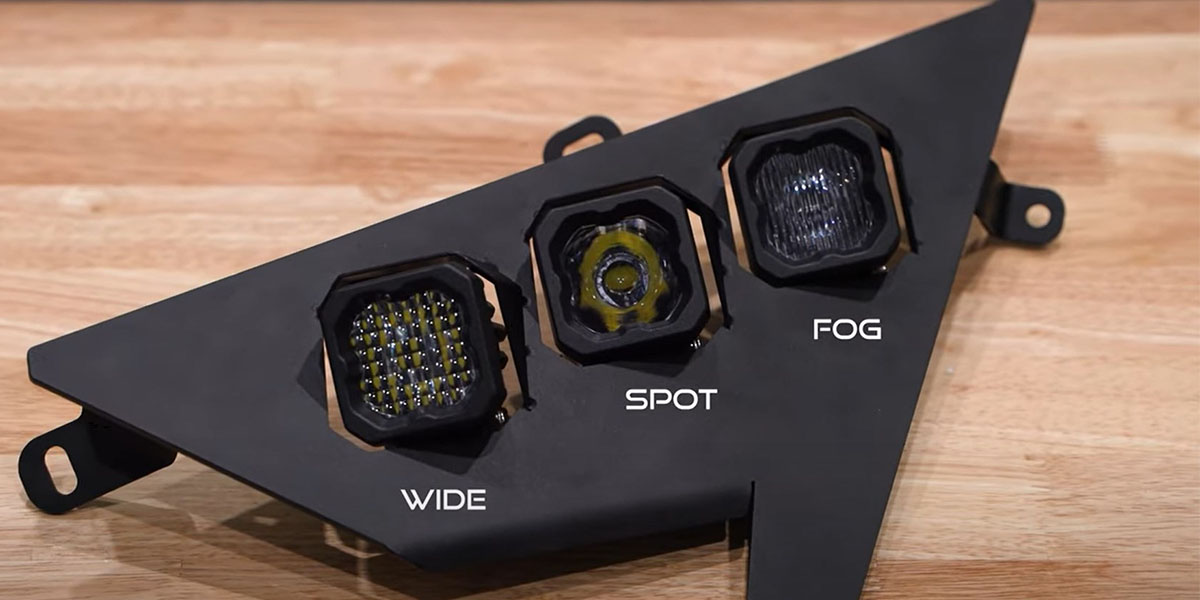
Note: The wide pod will be in the innermost position on the headlight bracket. The spot will be in the middle and the fog pod will be in the outermost position of the headlight bracket as shown below.
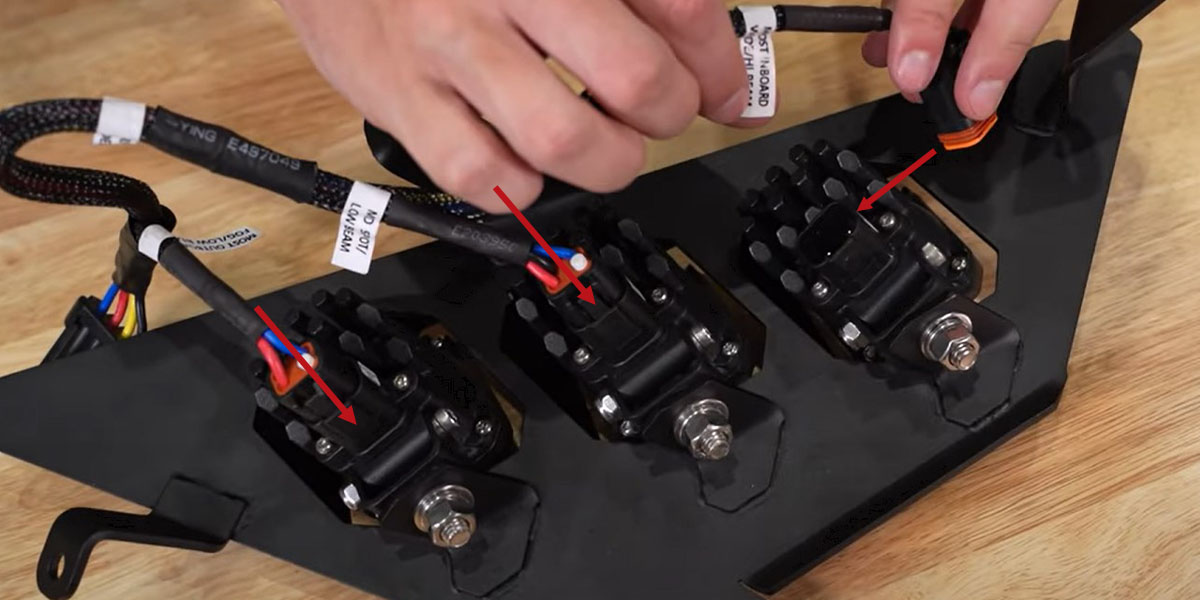
Step 15 - Connect DT Harness To LED Pods.
Plug the labeled connectors of the DT harness into the appropriate SSC1 LED Pods on the headlight bracket.
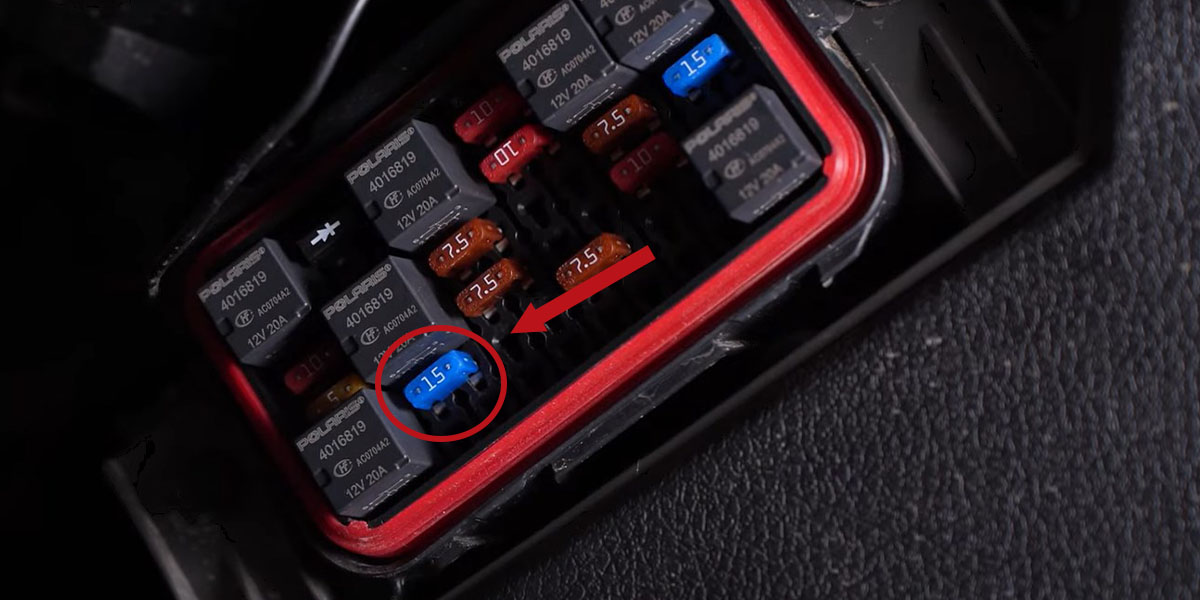
Step 16 - Replace Fuse.
Locate the fuse box under the dashboard on the driver's side of the vehicle. Then replace the 7.5 AMP fuse labeled "lights" with the supplied 15 AMP fuse as indicated by the red circle and arrow below.
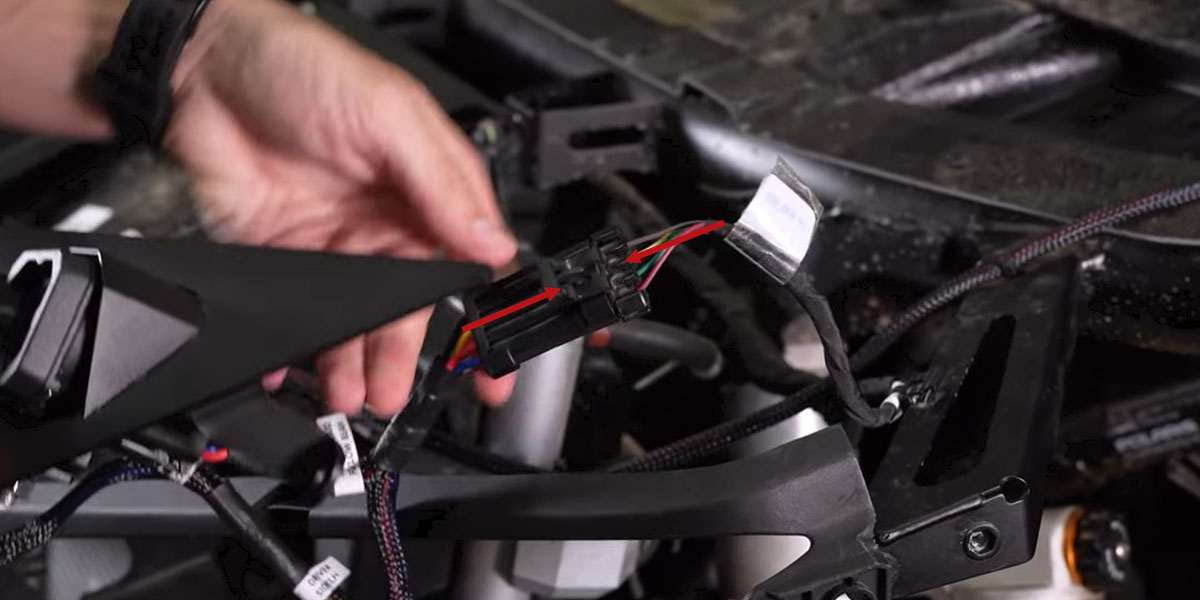
Step 17 - Connect Factory Harness.
Connect the factory headlight harness that was disconnected in Step 9 to the DT harness of the SSC1 LED Pods.
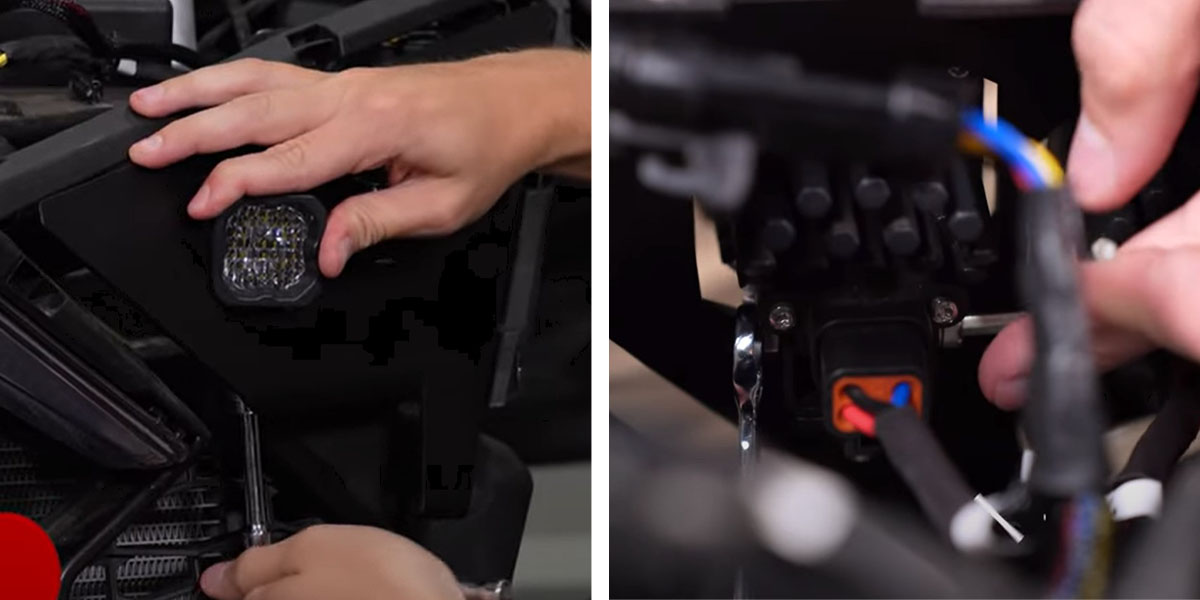
Step 18 - Mount Headlight Assembly.
Mount the SSC1 headlight assembly into the headlight position using the previously removed factory T25 bolts and the included washers and spacers.
Step 19 - Aim and Tighten Pod lights.
Test the function of the SSC1 headlight kit and then aim the LED pods.
Make horizontal aiming adjustments by rotating the pods left and right. Then tighten them in place from the bottom using a 13mm socket and extension.
Make vertical aiming adjustments by tilting the LED pods up or down. Tighten them in place with a 3/8mm wrench and 5/32" Allen key.
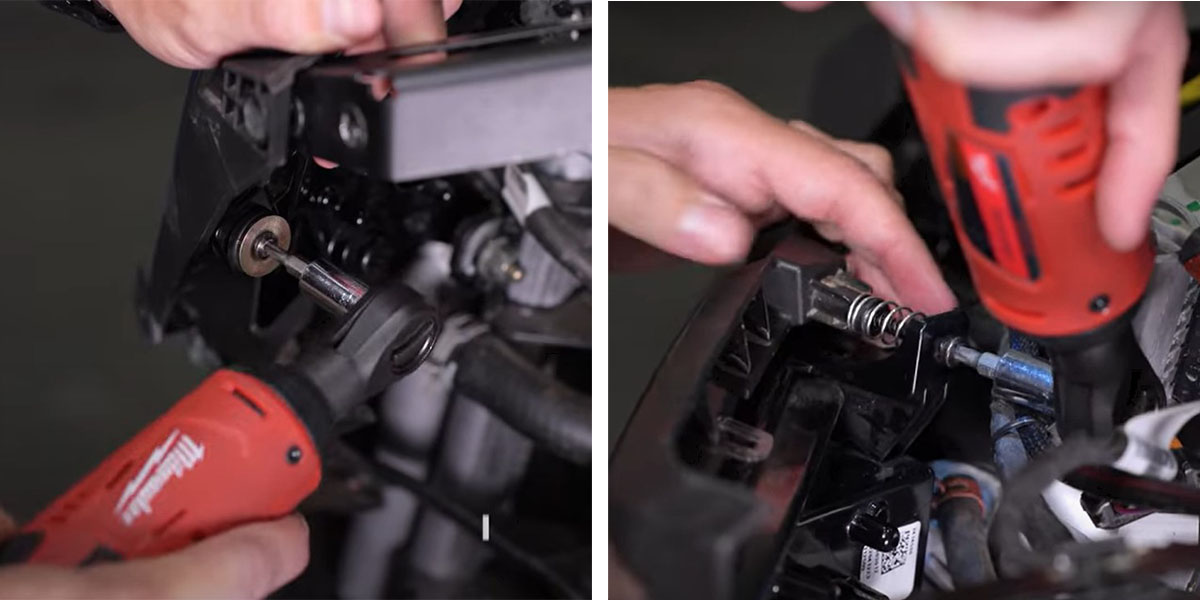
Step 20 - Install Passenger Side SSC1 Headlight.
Repeat these steps to install the SSC1 headlight on the passenger side of the vehicle.
Note: The antenna will need to be removed using an 8mm socket.
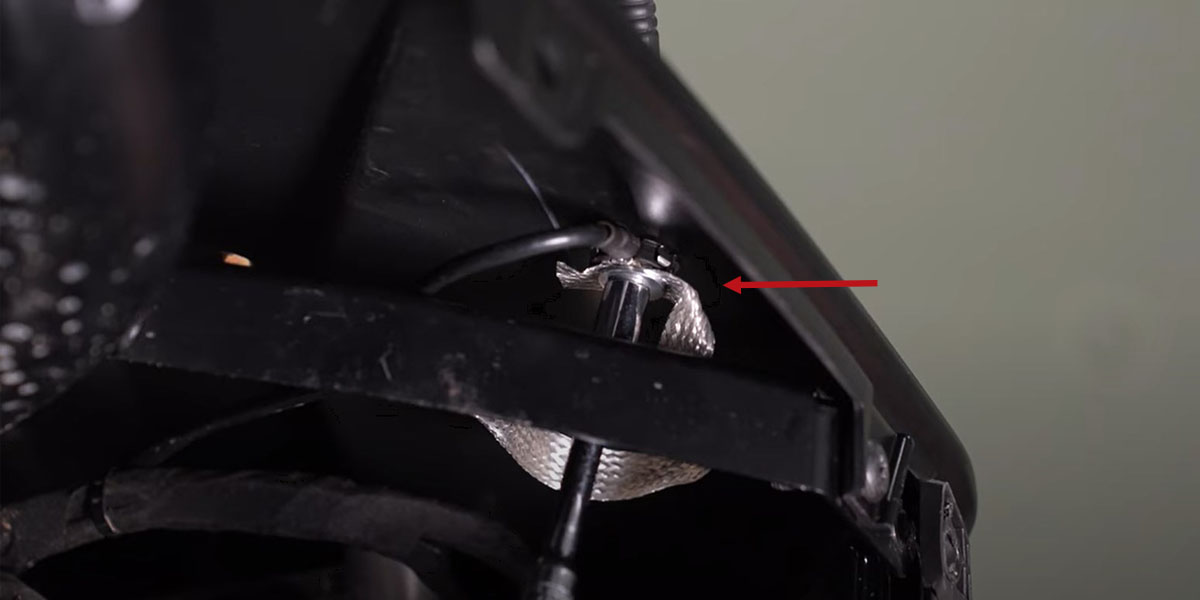
There is also an additional push clip on the passenger-side hood panel that will be removed with a trim removal tool.

Step 21 - Reassemble The RZR.
Reassemble the RZR by reversing the steps used to take it apart. Make sure to zip-tie any loose wiring to keep it away from hot or moving parts.
Questions About the Installation?
If you have any questions or issues installing the SSC1LED Headlight Kit for the 2020-2023 Polaris RZR Pro, please contact us for further assistance.
Where Can I Buy The SSC1 LED Headlight Kit For The 2020-2023 Polaris RZR Pro?
If you’re ready to upgrade your 2020-2023 Polaris RZR Pro with the SSC1 LED Headlight Kit, you can purchase one by clicking here or by using our dealer locator to find a dealer near you.
Want to know more about Diode Dynamics products? Visit DiodeDynamics.com and subscribe to our newsletter for new product releases and more!
This Installation Guide is for the following SKUs: DD7672P, DD7645, DD7644.

Share This Post